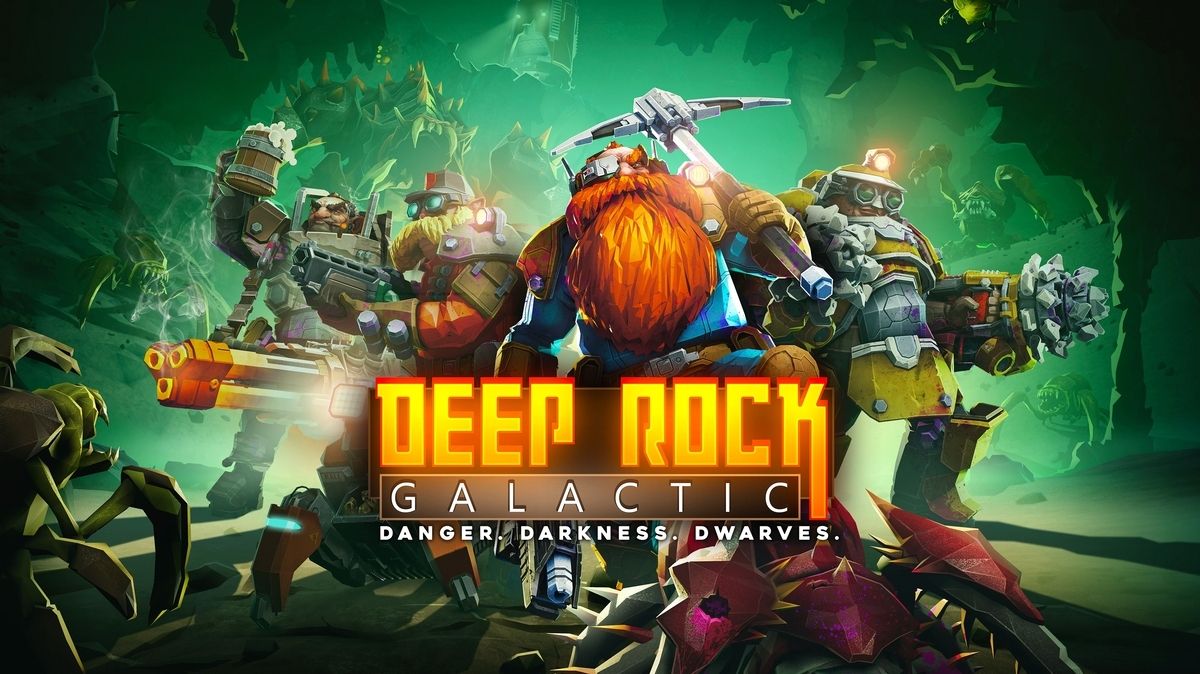
Deep Rock Galactic is a 1 to 4-player cooperative first-person shooter where you take the role of one of four combat miners. As an employee of Deep Rock Galactic, it’s your job to descend to the surface of Hoxxes 4 and bring its mineral treasure into company hands. Not an easy task as the planet’s vast mineral wealth is guarded by some of the most lethal creatures known to dwarvenkind. For this reason, We’ve created this beginner guide to get you started in Deep Rock Galactic.
This guide is intended for those either just starting or those interested in buying the game but want to know what it has to offer. This guide is up to date as of Season 5.
Classes
Before starting their first proper mission, players will have to select their class. As such, it’s only natural that the first part of our beginner guide will be a brief introduction to the four classes in Deep Rock Galactic. Although this might seem a low number for some, this narrow focus means that all the classes bring something useful to the team.
As you might assume, no class is “the most powerful one”. Instead, all of them have strengths, weaknesses, and gear that often lets them perform some unique action in the game.
Gunner
This is the first class players will meet in the game thanks to the tutorial. The Gunner is the sustained DPS class. What We mean by this is that the Gunner has some of the highest uptimes on his weapons, which allows him to project steady streams of lead into the swarm.
Thanks to this sustained damage output experienced Gunners can survive combat in scenarios where most other classes would be better off simply running away to a better position. The Gunner’s mobility tool is the zipline launcher. It’s probably the weakest mobility tool in the game, but it has great combat utility in the hands of skilled Gunners.
The class also carries the single most powerful anti-mistake tool in the game – The portable shield generator. This energy bubble recharges player shields and provides a few seconds of safety for the team to recuperate. In short, the Gunner is the guy with the big guns that can take on just about anything. You’re sometimes the literal shield wall that keeps the team safe.
Pros:
- High Uptime – While everyone else is reloading for the second time..you keep firing.
- Large Ammo Pool – The shooting stops when either you or the bugs are dead.
- High Survivability – A Gunner well played is tied with the Scout for the honor of last dwarf standing when things go from bad to worse.
- Generalist – Many loadouts can reasonably engage just about any type of bug in the caves of Hoxxes.
Cons:
- Below Average Mobility – Movement speed is the same for all classes but your ziplines are the slowest way of terrain traversal.
- Recoil – Your move speed is halved when firing your primary weapons. Mobility is the key to survival in Deep Rock Galactic.
Pro tip: Your primary weapons won’t slow you down if you fire while in mid-air. Chain jumps to maintain movement speed. This way you can still fire your gun but also dodge the swarms attacks.
Engineer

The Engineer is the Swiss army knife of the team. His myriad gadgets and strange weapons can create loadouts that cater to the needs of the team. The Engineer is also sometimes referred to as the burst DPS class. He has a reasonable ammo pool, and many loadouts can dump massive amounts of damage if the situation calls for it.
The Engineer can build turrets. These little fellas will boost your damage output further, help reduce pressure on the team and they’re great during point holds. The Engineer’s mobility tool is the powerful platform gun. It is the only tool in the game that can create terrain.
You’ll use it to create platforms for the team to move around, repair damaged terrain, close off bug paths and so much more. Engineers are an adaptable class that can bring some serious firepower to the team.
Pros:
- The right tool for the job – Single target damage, loadouts to hold points during defense missions, crowd-clear..the Engi can perform so many roles reasonably well.
- Burst Potential – Unleash a lot of damage, fast. Don’t get trigger-happy though, your ammo pool is not unlimited.
- Plastcrete – Create terrain with the platform gun. Terraforming(modifying the map to make the game easier) potential equals that of the Driller.
Cons:
- High-skill class – Least amount of “get out of jail free” tools to save himself if mistakes are made. Engis stay alive through good game knowledge, proper positioning, and overwhelming firepower.
- Platforming – Creating platforms to move around terrain will probably be a slow and fiddly process for new players. It will get easier with experience.
Pro tip: Turrets will provide a solid defense against very small targets that attack in packs (swarmers) in the early game. Remember to place them down and don’t get caught off guard while placing/maintaining them.
Driller
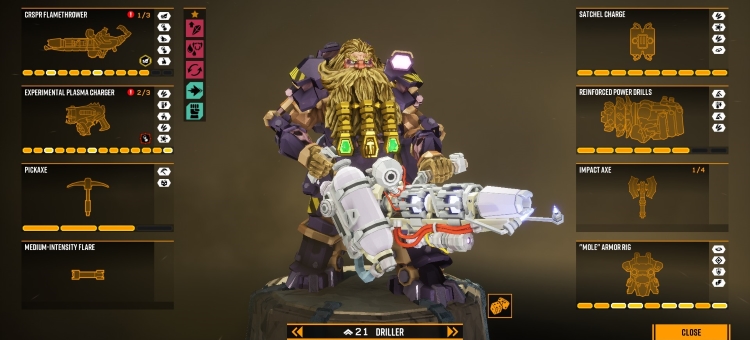
The Driller’s primary weapons deal low to medium amounts of damage but they can easily project that damage over a large area. This makes Driller the crowd clear class. As the Driller your job is to quickly clear the large amounts of weak simple bugs that make up the swarm part of the swarm.
The Driller has access to Satchel Charges (called C4 by the community). They’re powerful explosives with a large area of effect that can be used to kill bugs, blast through rock, or even stun enemies as a way of escaping from danger. His signature mobility tool is the power drill.
All dwarves can dig terrain using their pickaxes, but the power drills can remove it much faster than even the entire team combined. This makes them a powerful terraforming tool. With them, the driller can make tunnels to hard-to-reach places, remove obstacles, expand the arena, clear sightlines, and much more. Drillers are the class that excels at clearing crowds of weak bugs while crowd-controlling all the rest.
Pros:
- Geneva to-do list – An Exotic arsenal of various elemental weapons that can burn, freeze, melt, irradiate, microwave, corrode, disintegrate, and poison large amounts of weak bugs.
- Warcrimes class – Driller’s arsenal can afflict the enemy with a wide variety of status effects. Such as freeze which makes bugs take more damage from bullets, or poisons which slow them down.
- Power Drills – Remove vast amounts of terrain to make fights easier. Good mobility.
Cons:
- Below average single target damage – Some loadouts have tricks that help the class deal with high HP targets but you’ll feel the heat during your first dreadnought fight.
Pro tip: Don’t blow up your teammates.
Scout
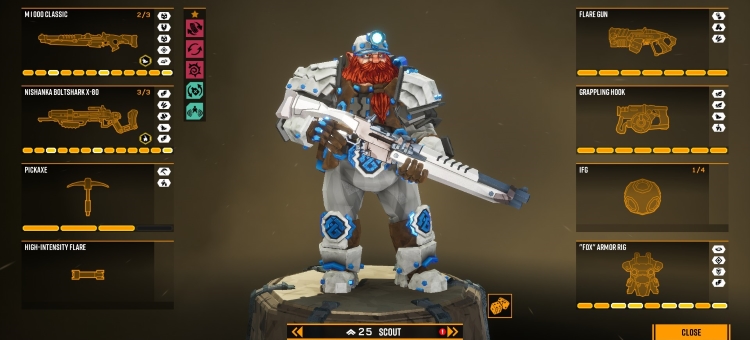
The Scout is the fastest class in the game due to his signature mobility tool, the Grappling Hook. Unlike the other traversal tools, this one only benefits the Scout (at least directly). His mobility serves the team by allowing him to get to hard to reach resources and objectives.
An experienced Scout can greatly increase mission progression speed by finding and doing objectives. Primaries usually have good accuracy and single-target damage. This potent mix of speed and precision makes Scouts the most adept class when it comes to hunting down high-value targets (uncommon and dangerous bugs with more unique behaviors or modes of attack).
The Scout has access to the flare gun. The flare gun fires far more powerful flares than the small portable ones the dwarves carry and presents the only way to efficiently light up the entire cave. Because of all this, the Scout is a bit more support-oriented than the rest of the classes.
This is a class for those who like to go fast. It’s the simplest to grasp but probably has the highest skill ceiling in the game.
Pros:
- I am speed – Grappling hook enables many movement techniques. Some weapons can add additional mobility.
- Precision Terror – Many loadouts feature high single-target damage output and good accuracy.
- High Survivability – A well-played Scout is often the last dwarf to go down. For this reason, Scouts act as de facto medics of the team by using their mobility to rez people who got downed.
- CC Grenades – The most powerful grenades in the game. We made a grenade tier list for entertainment purposes, and 3 out of the Scout’s 4 grenades landed in the S tier.
Cons:
- Lacking direct AoE – varies based on loadout, but the class is balanced in such a way that it has the lowest swarm clear potential.
- Moderate ammo pool – Again, varies based on loadout. You’ll get what you need to get the job done, just don’t spend it recklessly. Those 5 grunts might be best left to the Driller.
Pro tip: The Scout stays alive by staying ahead of the swarm. Stay aware of your surroundings and always have an escape plan.
The Space Rig
In this part of the beginner guide for Deep Rock Galactic, We move to your new home, Space Rig 17. Floating high above the Bug-infested Hoxxes 4, the space rig holds the myriad facilities dwarves need to do their job. Here, We’ll explain what you can do in the game before going out on missions.
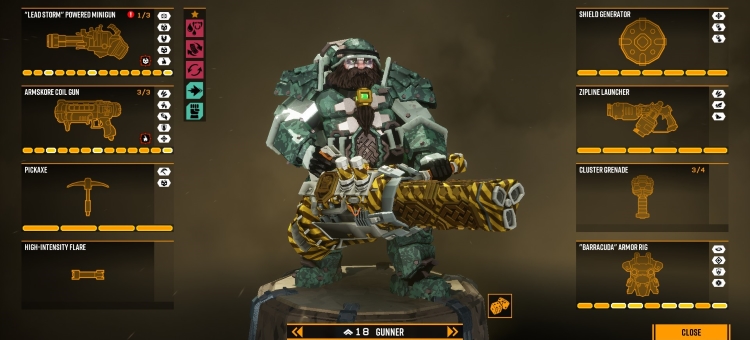
Upgrading Weapons and Gear
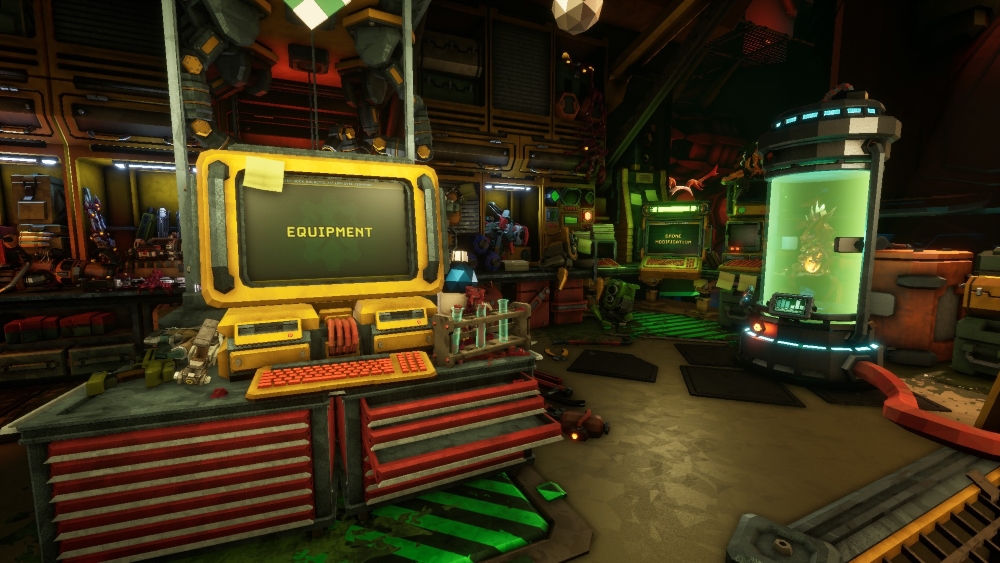
Equipment (left) and Drone modification (right) terminals.
Most of this is done by using the equipment terminal. This terminal can be found to the left or in front of the dwarven rooms (depending on where you spawn). The terminal lets you equip and upgrade weapons and gear. Perks can also be equipped there as well. It can also let you save multiple loadouts if you ever need to switch them fast.
At first, you won’t be able to do much, but as you gain resources and complete weapon unlock assignments your options will expand greatly. Keep in mind while upgrading weapons that one row (called a tier by the community) can only hold one mod, so there’s an element of choice.
The upgrade system in DRG is done well. It serves to slowly introduce players to their gear and to give players choices in how they build their weapons.
While we did call the game CO-OP at the beginning of our Deep Rock Galactic beginner guide, it can actually be played solo. You won’t be left alone, however. You will be joined in the game by a friendly drone called Bosco. Bosco can be given simple instructions by using the ping system. He will mine ores, provide additional firepower and light, and even dig through dirt. Like most pieces of gear Bosco can be upgraded, and this is done through the Drone modification terminal. This terminal is found to the right, past the Equipment terminal.
Pro tip: Sometimes when discussing weapon builds you’ll see players use numbers such as 11231, for instance. These numbers are how the community quickly describes their builds to one another. The position of the number in the sequence indicates the mod tier, while the number itself tells which mod in that tier is used. The first number in our example(11231) means that in the first tier, we have the first mod equipped. The second number would be the second tier, first mod equipped. The third number would be the third tier, the second mod equipped..and so on. Some players use the alphabet instead of numbers. In that case, 11231 would be AABCA.
DRG Perks
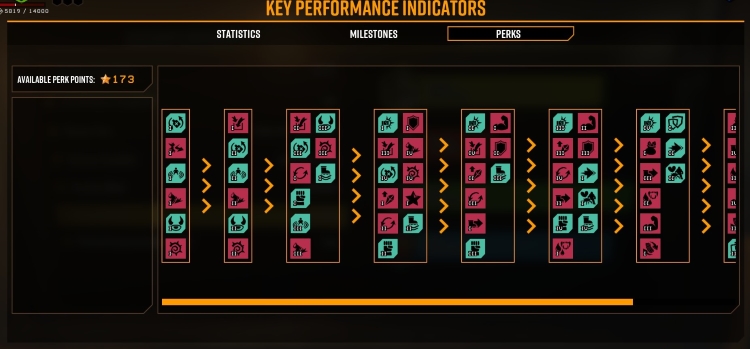
Perks are bonuses that can be equipped on dwarves to boost their performance. They come in two varieties: Passive and Active. Passive perks provide a bonus that is always active, such as getting more HP from healing crystals. Active perks must be manually activated to gain their benefits. Active perks are basically abilities. Passive and active perks are colored red and blue respectively.
One popular ability allows dwarves to tame enemy bugs and have them fight at their side. By doing challenges you’ll get perk points which you can then spend to unlock perks. These challenges are easy and plentiful, mostly revolving around completing various mission types. It’s only a matter of time before you accumulate a decent amount of perk points. The perk terminal can be found on the walls of the dwarven rooms. Remember that perks must be equipped at the Equipment Terminal.
Choose Assignments and Missions
Assignments are a series of missions that need to be completed to finish the assignment. The assignment board is right next to the Equipment terminal, and this is where you will select which assignments you wish to do. That being said, once you complete the tutorial, you’ll first have to complete a 10-mission assignment chain that acts as a sort of tutorial that slowly introduces the mission types to the players, as well as ever more complex cave systems. Doing it is mandatory and it will unlock new areas of the planet as you do the missions.
To complete assignments, simply complete its missions. There is no punishment for failing, other than having to do the mission again. After this is completed, you will gain new assignments that unlock different weapons or cosmetics, for instance.
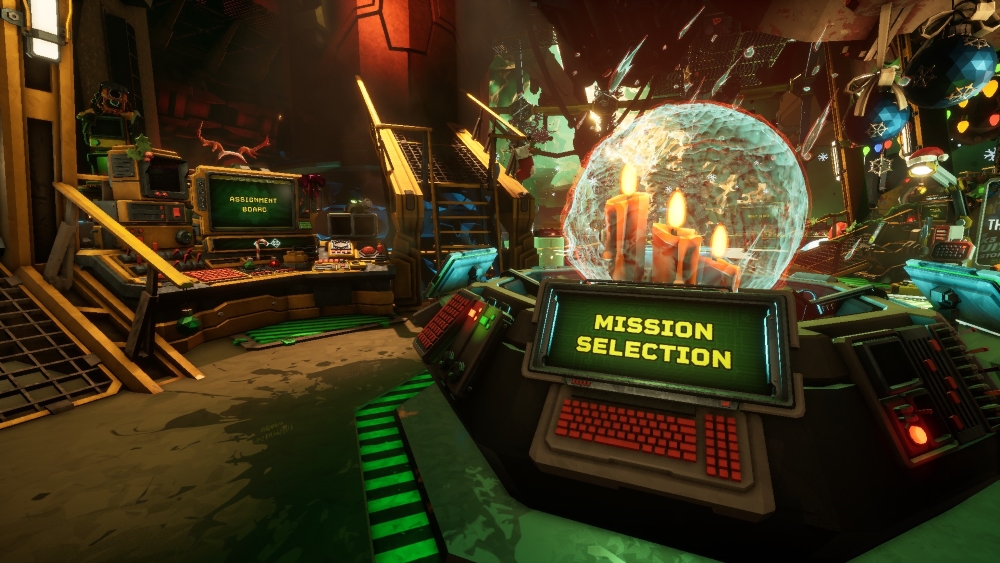
Assignment terminal (left) and Mission selection terminal (right).
Mission selection is done through a console located right next to the Assignment board. Additionally, it lets players set basic match parameters such as mission difficulty and who can join their missions. It will also provide basic info about biomes, such as what upgrade resources can be found there.
If you have any active assignments, the mission you have to complete will be displayed with a white diamond above it. The UI will also show which missions your teammates need to complete as well.
Pro tip: In the options menu, under the “Gameplay” tab, there’s a “Prevent character late join Duplication” option. If active, players joining after the mission has started won’t be able to select the same class as those already in the mission. It’s a personal preference type thing. Some like balanced teams, others couldn’t care less.
The Abyss Bar
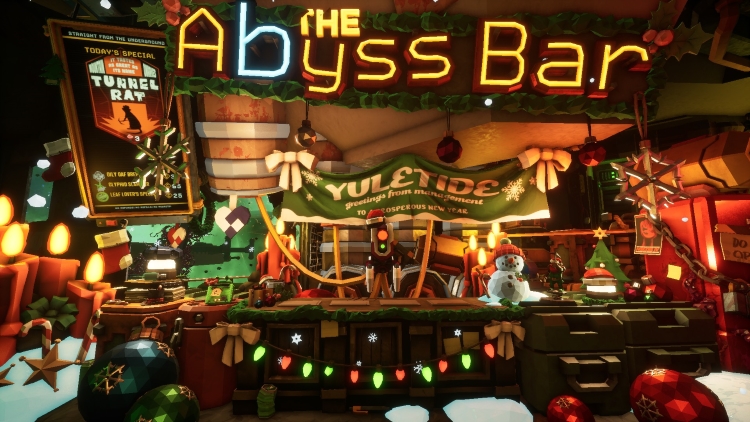
A facility without which dwarven existence would be impossible on the space rig. While down in the caves of Hoxxes, keep an eye out for beer-crafting ingredients. Bring these plants back to Lloyd, the robot bartender, and use them to upgrade your beer license.
Or, in other words, unlock new beers. There are two types of beer. The daily special beers grant buffs to help you out on missions, such as the “Red Rock Blaster” which increases HP. And the craft (able) beers which are there for entertainment purposes. One of these would be the “Wormhole Special” which teleports players all over the place.
Pro tip: The Leaf Lovers Special is a beer that’s so weak it actually causes dwarves to sober up. It exists only to please management and no one else. Don’t let management fool you.
Pro tip II: Remember to tip Lloyd. He’s a good lad.
Additional Information
Those are the basics you’ll need to know to get missions started. However, aside from those the rig also holds a shop where you can buy new cosmetics. At the start of the game, your options will be limited, but your choices will expand significantly as you play more.
Your new drip can be equipped at the wardrobe located right outside of the dwarven rooms or at the pickaxe customization console next to the equipment terminal. There is also a mineral trading station where you can buy and sell upgrade materials for credits. Use it when necessary as its exchange rate is abysmal, except for the daily deal which is usually worth grabbing.
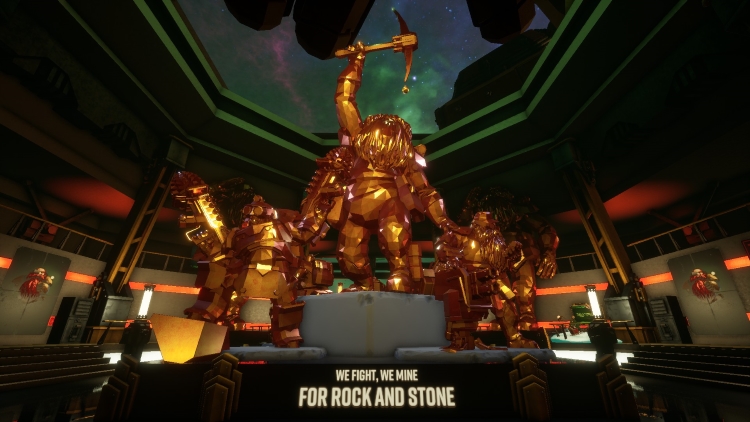
“This is the Memorial Hall, where We honor the fallen”
Another important place is the Memorial Hall, located past the equipment terminal to the left. This is the place where you will promote your dwarves when the time comes.
There are a few more terminals such as the forge, but we’ll mention them later in our Deep Rock Galactic beginner guide.
Mission Types
In this part of the beginner guide to Deep Rock Galactic, we’ll quickly go over what the dwarves do down on the planet’s surface (or below it, rather). One important game mechanic worth noting is that your ammo supply is limited (except for the regular flares). You can call in a resupply pod to get more ammo. However, grenades and bullets don’t come cheap on Hoxxes. Management expects something in return so to get more ammo you need to find Nitra. It’s a cherry-red crystalline ore usually found on walls. 80 Nitra will be consumed out of the team’s inventory for one resupply pod, so use it wisely.
Mining Expeditions
Gunner mining some Morkite.
It’s the first and simplest mission type anyone will do. The tutorial is one of these as well. This mission tasks the dwarves with finding Morkite, a blue ore usually found on walls. Caves are mostly linear, connected via tunnels separated by dirt. Sometimes a cave has one or two tunnels that loop back into it. Excluding terrain generation messing up, it’s usually a mostly linear affair.
Salvage Operation
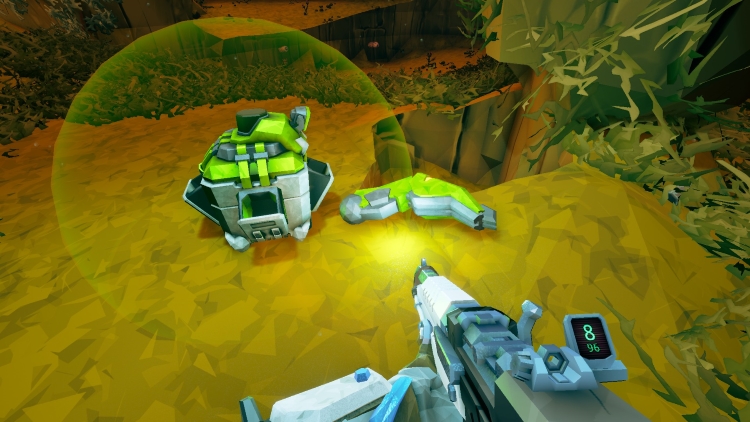
A broken mini-mule and one of its missing legs.
This mission type has the team finding and repairing several mini-mules. Once found, scan the mini mules to have them display their missing legs on the map. Find these legs, carry them to the mini-mule, and re-attach them. Once the mini-mules are fixed you’ll have to repair the disabled drop pod as well.
This is done by activating the uplink box next to the drop pod, and then surviving long enough for it to do its job. The team needs to stay in the area around the uplink and survive the ensuing onslaught. After this Mission control will send down fuel for the drop pod, and a similar process will repeat itself. Survive long enough for the drop pod to fire up its engines and leave on it.
Pro tip: Mini-mules summon a mini swarm once someone comes close enough to them. One of the legs also has a chance to spawn a mini swarm once it’s excavated. Be careful not to summon more than what the team can handle by accident.
Egg Hunts
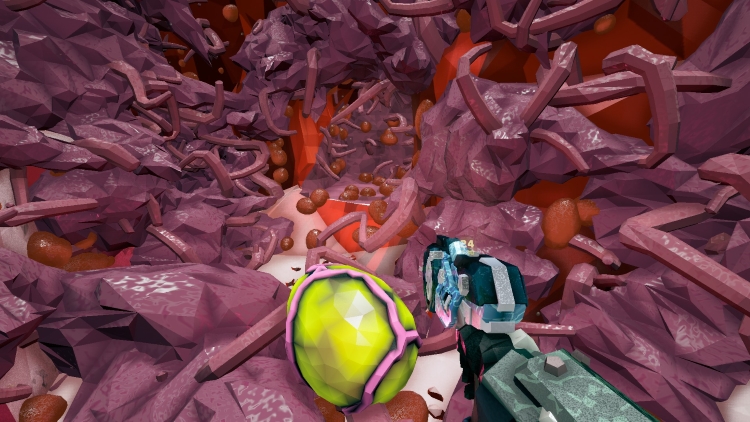
An alien egg and the nest it was extracted from.
Find the eggs, dig them out, and put them into the mule. This isn’t a particularly challenging mission type. The challenge is surviving the swarms. In a 4-egg mission, only one egg will trigger the swarm, two eggs in a 6-egg mission, and three eggs in an 8-egg mission.
All the rest of the eggs will call in a mini swarm when dug out. This provides an interesting risk-reward mechanic. You can pull more eggs to speed up mission progression, but then you’ll have to deal with more bugs as a result.
Elimination
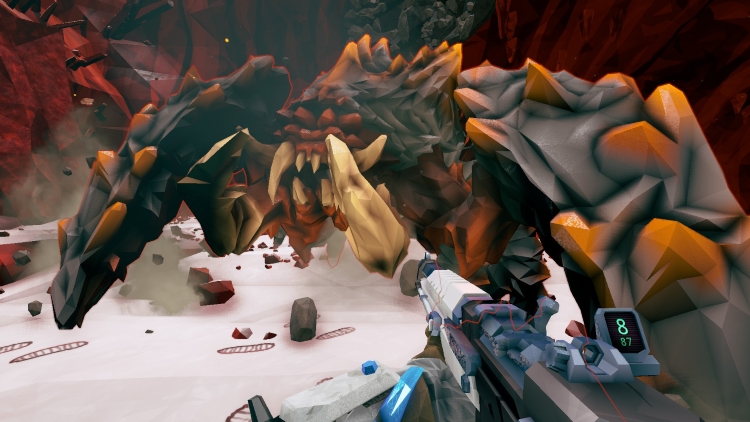
One of the dreadnought variants that can spawn when a cocoon is broken.
Find the dreadnought cocoon and pop it once the team is ready and the arena terraformed. These are Deep Rock Galactic boss fights, basically. Rather than fighting the swarm, in these missions, you fight Glyphid dreadnoughts.
These bugs have massive HP pools, unique behaviors, and modes of attack that make them extremely dangerous. Single-target damage is usually preferred on this mission type.
On-Site Refining
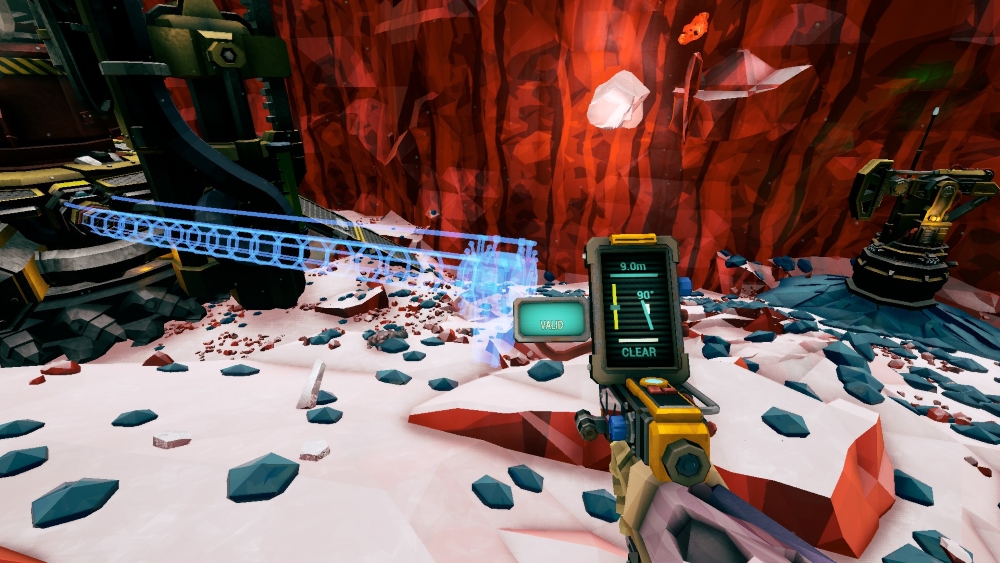
A Driller making a pipeline to connect the refinery (left) to the pumpjack (right).
A favorite amongst many a dwarf. Find the wells of boiling liquid Morkite and call in a pumpjack. Build a pipeline from the main refinery and connect it to the pumpjack. Next, build the pipes.
Once all pipelines have been built start the refinery and repair the pipes that break during the process. Dwarves can grind on top of the pipelines, which is one of our favorite parts of the mission.
Escort Duty
Dorreta waiting to be refueled. (The black-green outcrops behind her are oil shale)
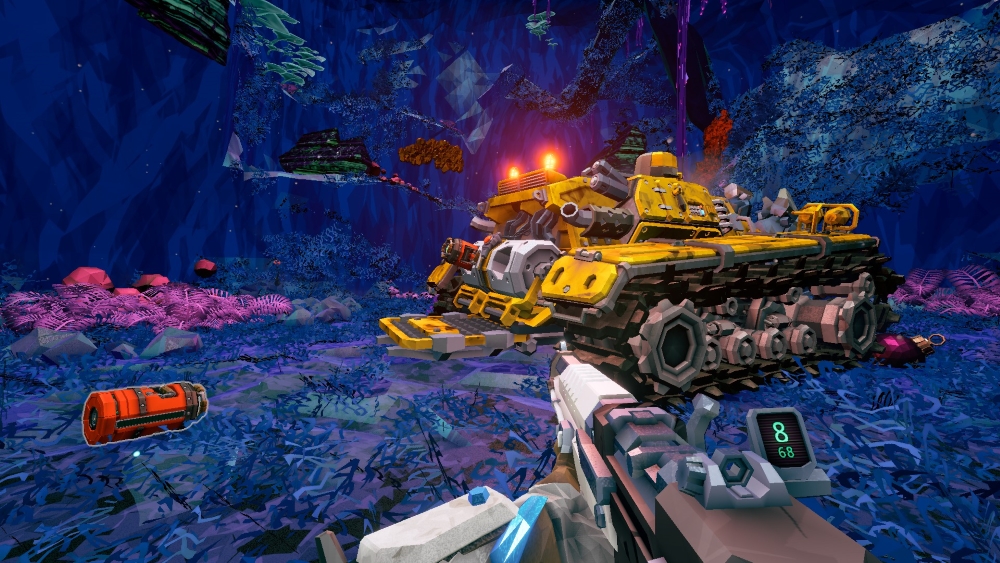
Escort and protect a large Drilldozer called Doretta. Her drilling will alert the swarm so be prepared for a fight. After a while, she will exhaust her fuel supply and must be refueled to continue the mission. To do this, pick up the empty fuel canisters from her rear, and fill them up with oil shale. If you take too long a smaller swarm will attack the immobile drilldozer and you’ll have to defend her once again. Insert the now full canisters back into the dozer and continue the mission. Repeat this process until you arrive at the Ommoran Heartstone.
Not to spoil everything, so we’ll just say protect the dozer for one last time while she drills into the rock. Deposit the stone into the mule and leave.
Interesting fact: Back in the day, after Doretta fulfilled her purpose, the dwarves would simply leave the heavily damaged drilldozer behind. The players didn’t like this at all. Shortly after this mission type was introduced, the devs made it so Doretta’s head would detach at the end of the mission.
Now, her head can be picked up and carried back to the drop pod. This usually slows down the team (especially if the pod lands in an inconvenient spot) and there’s no reward for doing it. The overwhelming majority of the player base chooses to bring her head back to the pod regardless. We do it too, no matter how desperate the mission gets. Leave no dwarf behind!
Pro tip: Dorreta can be repaired. She has two armor plates on her sides to protect her. If an armor plate is destroyed, it’s gone forever. Only one dwarf can repair the dozer at a time: more than one is wasted effort.
Pro meme tip: Be sure to pet Dorreta’s head.
Industrial Sabotage
![]()
The Caretaker.
This is a long one. At the start of the mission, you’ll find the Caretaker, this mission’s final boss, hiding behind its shields. To disable the shield you need to follow the power cables leading out of the room until you find the power station they connect to. Call in a hacking pod by interacting with the station. The pod will drop somewhere nearby and you’ll have to connect it to the power station by using the hacking pods it dispenses. Once connected, fire up the pod and protect Hacksy (the gamer drone that resides within the pod – don’t ask) while he does his job.
Repeat this process with the second power station. Go back to the Caretaker’s room, eject his shield batteries, and defeat the boss. This is easier said than done as the Caretaker will defend itself with robots, turrets, and swarms of small drones called Shredders. We even made a Caretaker beginner guide back in the day. Once the Caretaker has been defeated, deposit the data it was protecting and head back home.
Deep Scan
Introduced with season 5, this mission has you scanning for resonance crystals using a special new scanner located on your UI. In true video game fashion, it will beep louder as you get closer to the crystals. It will also show you the elevation of said crystals relative to you. Once a crystal is located, dig it up, call in a scanner and then connect the two. Do this for all the crystals and management will be able to triangulate the location of your true objective, a geode with morkite seeds.
To help you reach this geode, the company will send you down a drillevator. As you probably guessed by now, this massive machine will bore its way through the rock to get you there. However, as with the drilldozer, this is easier said than done, and you’ll have to fight off the swarm as the machine does its job. If the elevator takes too much damage it will stop working, making you easy prey for the bugs, so make sure to keep it repaired. Once you reach the bottom, collect the seeds and call in the drop pod. To exit the geode, grab the high-powered jet boots from the drillevators storage compartments and fly out of the hole.
The drillevator will break down as it digs. Keep repairing it to keep it going.
Additional Information
What we left out is that during all these missions there will be a selection of things to do and find, depending on the RnG that generated the cave. Outside of Nitra and the main objective resource, the caves will also be rich with gold, upgrade materials, and other fancy minerals dwarves likes having.
On most missions, the dwarves will be accompanied by a robotic mule called Molly, which is a storage space for all valuable things found during the match. Caves also come with secondary objectives whose completion is optional. Don’t worry, they’re nothing complicated, mostly just gathering additional resources such as plants or killing annoying bugs called fester fleas.
Some caves will hold cargo crates or bits of gear from miners who met their unfortunate end in the caves of Hoxxes. Both these will reward players with free cosmetics. Sometimes players can find useful gear like jetboots, other times the caves will be home to one of several Deep Rock Galactics minibosses.
A meteor event that has a chance to occur within the caves of Hoxxes.
Caves can also spawn with a wide variety of events in them which reward players with XP and other fun things which We’ll briefly cover later in our Deep Rock Galactic Beginner guide. Further adding variety are cave modifiers and warnings. Some are good, like killed bugs dropping gold. Others are quite harsh, such as shields being disabled for the duration of the mission.
Pro tip: The game has a miner’s manual. It provides a wealth of information to new players but it often gets ignored. It’s the first tab once you open the games menu..check it out if you have the time.
How to promote in Deep Rock Galactic
While this is a Deep Rock Galactic beginner guide, new players will have some limited exposure to the game’s endgame systems. One example is machine events that spawn within caves. However, only promoted dwarves can actually start these events. This causes a lot of confusion amongst new players, so We thought it prudent to include a brief section in the guide explaining the basics of these systems. if you wish to know more about promotion mechanics, We have also made a separate guide on How to Promote in Deep Rock Galactic.
Dwarf level maxes out at 25. At this point, a dwarf can’t earn any more XP and you will get a Promotion assignment. Complete this assignment and you can now promote a dwarf in the Memorial Hall. Promotions cost credits and minerals so be ready for that.
The first promotion is the most important as it gives the player access to Deep Dives and the Forge. It also gives the player a Tritilyte Key which allows any dwarf, promoted or not, to start machine events. Special assignments will also be made available to the player.
One of the machine events. The core infuser is the white, cube-shaped machine on the right.
Promoting a class for the first time will give it an extra active ability slot, greatly increasing its power. Every single promotion resets the dwarf level back to 1 and adds a little star next to his portrait. These resets are just a prestige system, you won’t have to buy your gear all over again.
As you promote dwarves you get more stars, and after three stars you get a fancier badge (bronze, silver, gold…etc border around the class) to show your playtime. More importantly, every single promotion will give you matrix cores.
Matrix cores can be blank, or they could come with a weapon overclock or cosmetic. Each promotion will give you one of each. The weekly assignments unlocked after doing the special “Breach the core” assignment and Deep dives will also reward these cores. But first things first.
Cores, Overclocks, and Machine events
There are two types of cores. Blank cores, which carry no data, and infused cores which can carry either a weapon overclock or a cosmetic on them. A matrix core is basically a blueprint that you bring to the forge to craft Overcloks or cosmetics.
Cosmetics should be self-explanatory: by using them you can craft yourself a fancy new cosmetic. Overlocks are more interesting. They are special weapon modifications that can either buff a weapon’s stats or sometimes change the nature of the gun entirely.
Overclocks come in three varieties:
- Clean OCs: usually give a small stat increase to a gun but have no downsides.
- Balanced OCs: usually confer much larger bonuses to the gun, but also come with stat maluses in some other area.
- Experimental OCs: are the most interesting ones as they often change the nature of the weapon.
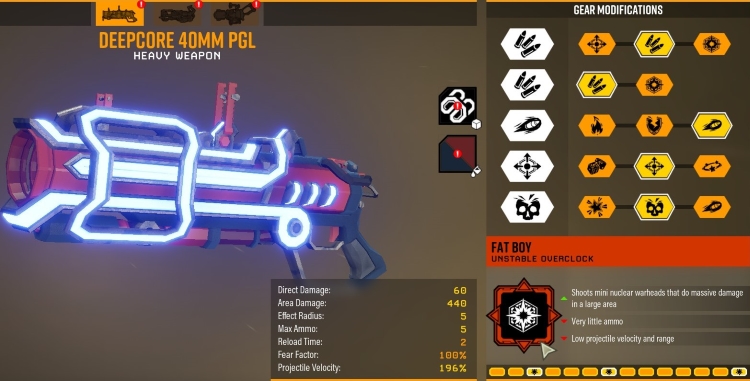
One of the many overclocks in the game.
One example is the Fat Boy OC which greatly reduces ammo on the Engineer’s grenade launcher but it lets the gun shoot mini-nuclear warheads instead of conventional explosives. Blank cores must be infused before they can be used for crafting. This is done through machine events.
Machine events are randomly found in the caves. To start them, insert the Tritilyte Key into the core infuser. It’s a small, white, cube-shaped machine located close to the event. There are several events which We won’t spoil here. If completed successfully, a blank core can be inserted into the core infuser. A random offer of infusion choices will be presented, pick one and the core will be infused.
Deep Dives and the Forge
Deep dives are Deep Rock Galactic’s endgame. Doing deep dives involves doing three missions back to back. These missions feature two primary objectives which must be completed to move on to the next mission. All resources in the team’s inventory carry over from mission to mission so there’s more emphasis on resource management.
The mission seed is also static, so the map will remain the same no matter how many times you do the Deep Dive. That being said, the cores can only be earned once. Each mission rewards a core on its completion so in the case of failure you’ll get to keep the cores from completed missions. Failure means having to redo the entire dive from the start.
There are two types of dives, the normal and the elite version. Most people can complete a normal dive, while the final mission in the elite version is the most difficult experience the vanilla game can offer and is reserved for skilled and well-equipped teams.
A dive in progress can’t be joined by other people. New Deep Dives are generated every week. The Deep Dive console is located next to the windows that look over Hoxxes 4.
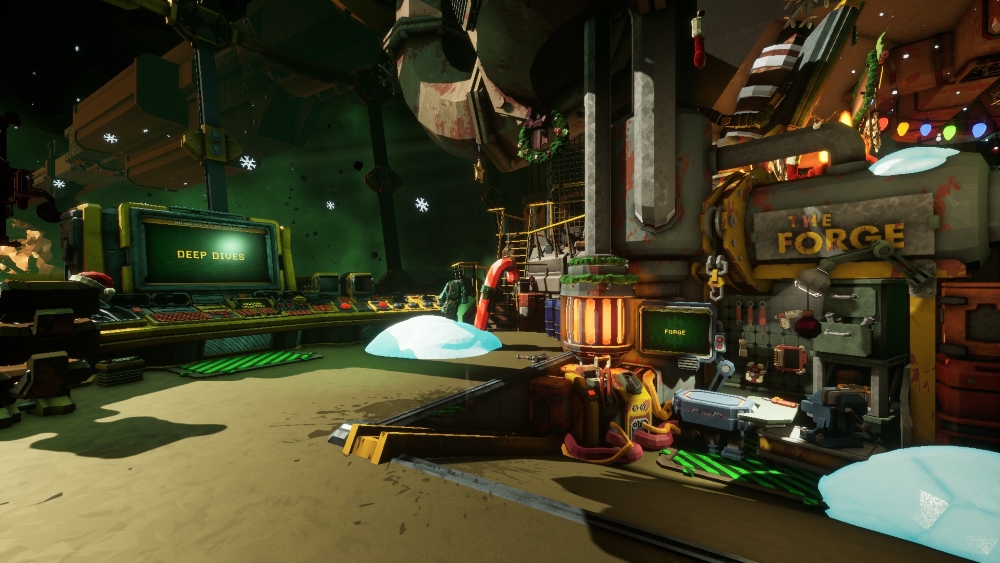
Deep Dive console (left) and the Forge (right).
The forge is right next to the Deep Dives console. As mentioned previously, this is the place where you’ll turn infused matrix cores into gear you can use. The crafting process will require credits and upgrade materials.
The interesting part about using the forge is that it can reward the player with additional matrix cores. The Forge has levels (forge mastery). For every five items crafted, the forge level will increase, and a free core will be given to the player as a reward. These gift cores alternate between being infused with weapon OCs or cosmetics.
Game Cost
In this part of the Deep Rock Galactic beginner guide, we’ll go over the game monetization systems. With the recent trends in gaming, it’s no surprise this is a common subject of interest for those looking to get into an online game. You’ll be happy to hear that Deep Rock Galactic is quite fair to its players.
Aside from the obvious cost of the game itself, the only other monetization system employed is cosmetic DLC packs. One DLC pack is launched with every new season and follows the season’s theme. These DLCs contain skins and paint jobs for weapons, armor, and pickaxes..usually some combination of those.
Packs are a fitting descriptor as they are usually stuffed with numerous cosmetics. If a DLC has weapon skins, it will have skins for all the guns in the game..and usually, it will come with paint jobs for other things such as armor as well. (Do check thoroughly before buying as usual). Their prices are around 8 euros/Dollars or 6 Pounds at the time of writing. As a result, the majority of the community finds them to be a very good deal.
The weapon skins that come with the “Rival Tech” cosmetic DLC. (For the record, it also comes with armor, pickaxe, and weapon paint jobs)
The game also sells supporter packs for those who want to help the game grow. These supporter packs come with their own skins as well as cosmetic perks like a small icon next to your name in chat to show your support to the game. Finally, players can buy the game’s awesome soundtrack.
One final bonus is that there is no annoying cash shop in the game or anything like that. The DLCs have their tab in the menu, but it’s far from the eyes of players.
Additional Information
Some important additional info is that the game has a battle pass system. Every new season brings with it a battle pass and a cosmetic tree that is unlocked by playing the game. These systems are free and have no monetization attached to them.
All players get the same battlepass: there’s no paid pass or a way to buy pass progression. One fantastic thing We wish were in more games, is that you can still replay old seasons. In the seasonal console you can reactivate old events to get access to their battlepass and cosmetic tree. You don’t need to have the same season as the host to play with them. The XP from mission completion will progress you own season regardless of what season other people have activated.
For this reason, there is no fear of missing out that applies constant mental pressure on players to keep playing their game. In short, if you don’t complete a pass, you can still get its gear. The game also features daily challenges that make pass progression faster.
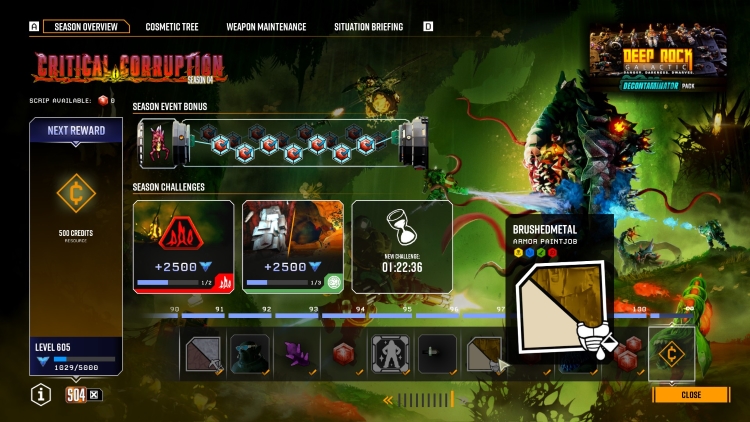
The season overview, accessed through the seasonal console next to the drop pod.
But once again DRG puts its own spin on this old system by letting the player accumulate up to three daily challenges. And even then it allows the players to reroll them if they’re not to their liking. This way the players can play when they have the time rather than be mentally pressured to play the game every day.
To summarise, all updates since the game’s launch years ago have been free, the overwhelming majority of cosmetics are earned, and outside of weekly core missions, there’s no pressure to grind. No complaints from us at all, well done Deep Rock Galactic.
Conclusion
At the time of writing this beginner guide, Deep Rock Galactic is a long-running game that respects its player’s time. It can provide tens (if not hundreds) of hours of entertainment at a reasonable price. It’s maintained by a dev team that’s in very good standing with its community.
All in all, definitely worth checking out in our humble opinion. We hope our Deep Rock Galactic beginner guide was a useful resource to get you started. Rock and Stone miner!
Image Credit: Ghost Ship Games.