In this Deep Rock Galactic grenade tier list, we’ve tried to rate grenades based on their relative power and based on our experience over the years of playing the game. Not an easy feat as there are quite a number of throwables in the game. Some are simple explosives that obliterate foes, while others deal no damage whatsoever and try to crowd-control enemies instead.
In addition to their use in vanilla, we also make a small amount of consideration for their performance in modded difficulties such as Hazard 6. This article is up to date as of Season 5.
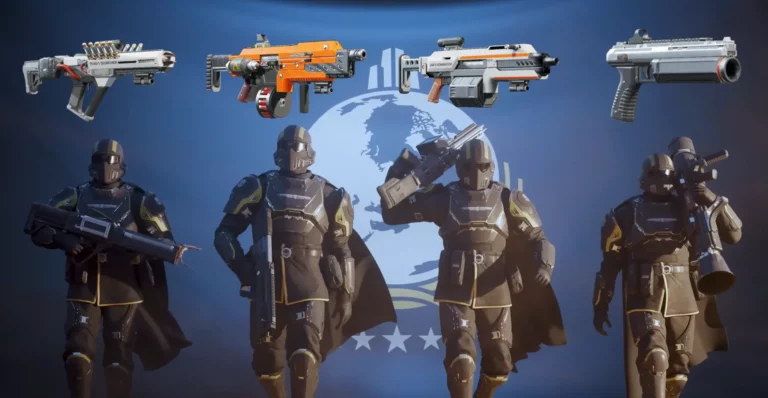
S Tier
Pheromone Canister
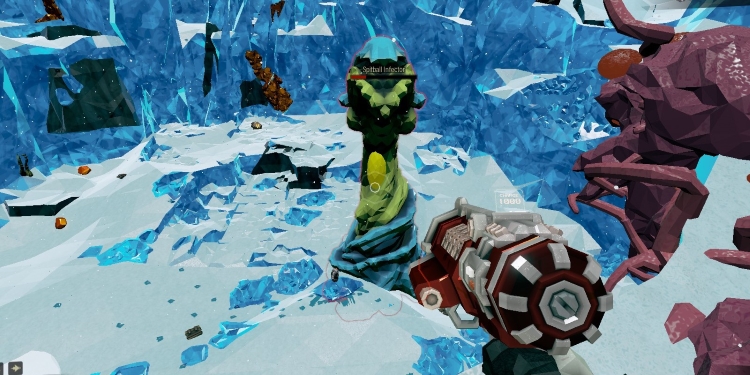
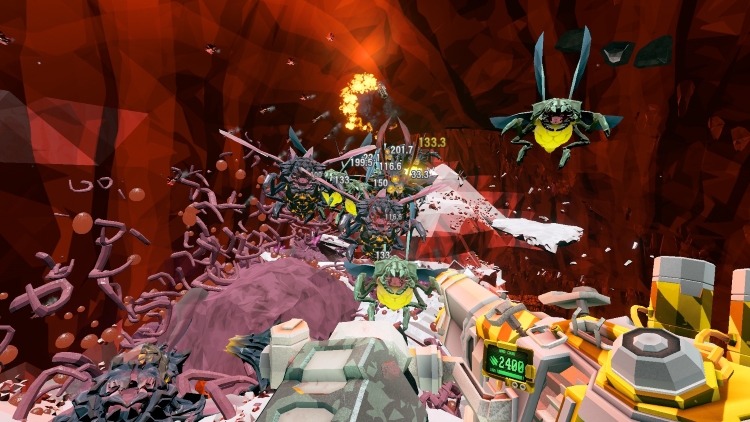
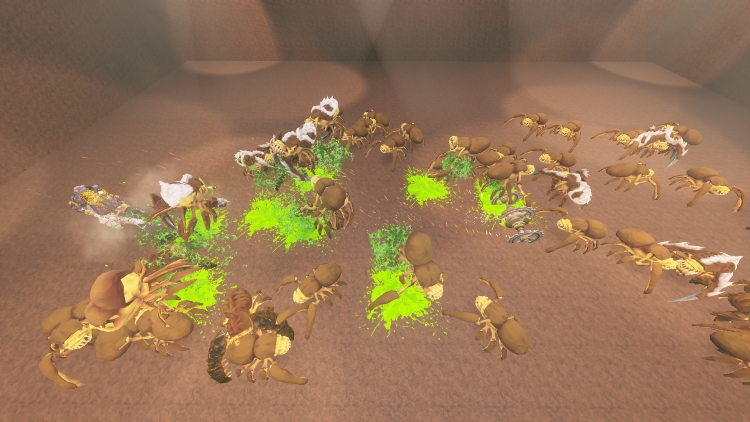
Pheromone Canisters are also a panic button of sorts. Once the canister comes in contact with the enemy, it coats a 4-meter area with pheromones for 15 seconds. Enemies covered in pheromones will attack one another, and even enemies that aren’t covered will still attack pheromone-coated bugs.
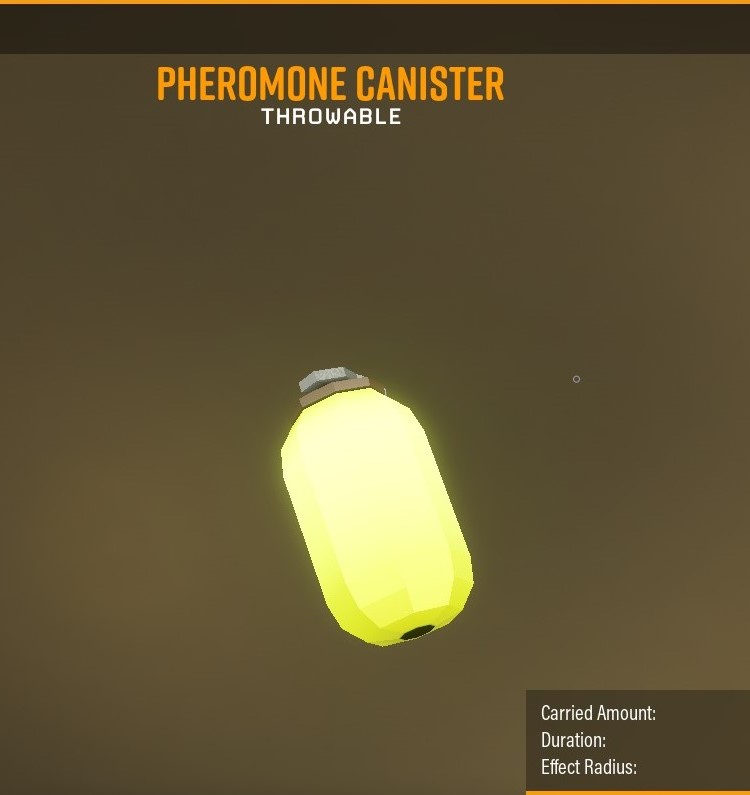
This effect can be absurdly powerful on higher difficulties. On low hazards, it’s hard to get much value as there are fewer enemies and teammates will simply shoot the bugs anyway. But as swarm size increases so does the potency of the grenade. This culminates in modded difficulties where a single grenade can force half the swarm to ignore dwarves and start fighting with itself.
When We said the effect was absurdly powerful, We weren’t overhyping it. The strength of the pheromone even let the Scout solo some extreme modded difficulties where other loadouts would result in failure. Another plus of bugs fighting one another is that it clumps them up for dwarven AoE.
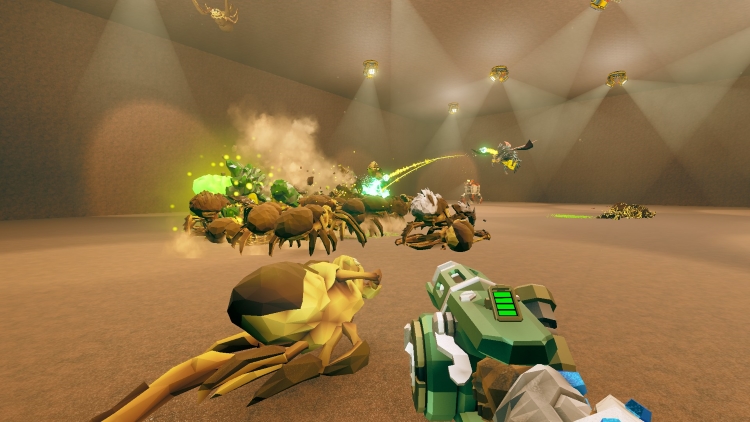
Trijaws in particular can do massive amounts of damage to other bugs.
Given these reasons, this grenades finds itself at the top of our list. Scout grenades are on a whole other level.
Impact Axes
Impact Axes are a fan favorite of most Drillers out there, and for good reason. As a class, Drillers possess incredible crowd-clear potential. To balance this out, the developers made their single-target damage lower than average.
Because of this many Driller loadouts struggle when dealing with High HP targets. This is where the Impact Axes come in. They give the Driller a nice burst of single-target damage. This gives the Driller a lot more flexibility than he would usually have, as well as an answer for some enemy types the class would usually struggle against.

Impact Axes are universally useful, and can be taken to just about any mission type without any loss in performance. From swatting an annoying Mactera Goo Bomber to bursting down Glyphid Dreadnought weakpoints the Axes have a wide variety of applications.
Their damage is divided into three distinct components. A weak amount of melee damage that doesn’t benefit from freezing, a large one that does, and a small AoE explosion that fittingly deals a moderate amount of explosive damage. If the enemy dies to either the smaller melee or AoE component, the axe can be retrieved.
Stopping a Praetorian’s Spit attack is one of the many tricks the Impact Axe can perform.
This means the axe can be used to deal damage to various environmental obstacles or neutral flora/fauna without being wasted on them. The examples are too many to list. Some of them include the poison fungus in the Fungus Bogs biome, Electric Crystals, the stinging red vines in the Hollow Bough, Naedocyte roes, and so on.
Furthermore, they’re good against robotic enemies due to their melee weakness. Especially Sniper Turrets and the Caretakers Robotic Appendages on account of their 500% melee damage weakness. Something We’ve briefly touched upon in our How to Fight the Caretaker in Deep Rock Galactic beginner guide.
The stronger melee damage component is affected by the freezing status effects 3x multiplier (2.6x on Dreadnoughts) which allows the Impact Axe to pull some fantastic numbers when quickly thrown at frozen enemies. This makes them an almost invaluable tool for Cryo Drillers.
Using Impact Axes on frozen targets is a common way for Cryo Cannon Drillers to eliminate enemies with high HP pools.
As if this wasn’t enough, since they count as melee damage, the Axes trigger melee-based perks. Such as Vampire, which gives +5HP when killing a grunt-sized enemy or larger. Combined with Drillers Power Drills which do the same, Impact axes can let the Driller rapidly regenerate health in combat, especially on a Cryo Driller.
And Vampire can further be comboed with the Iron Will perk to keep a dwarf fighting even in the worst of circumstances. Hell, if you throw a C4 in the air and hit it with an Impact Axe, it will remain to hover in the air to be used as an anti-Mactera tool. This is such a useful grenade it easily finds its spot even on modded difficulties.
Yet another of its many tricks.
For all these reasons, and many more that we couldn’t list in a reasonably quick fashion this grenade easily finds its place at the top of our Deep Rock Galactic grenade tier list.
Inhibitor-Field Generator (IFG)
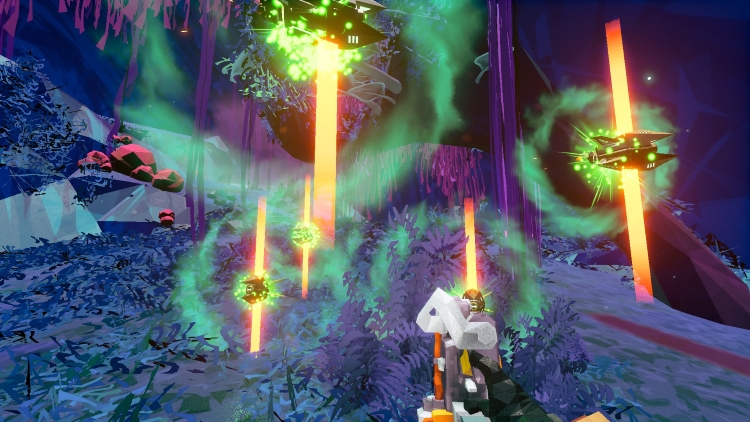
The IFG is the first throwable Scouts get to use. It’s also one of the most powerful grenades in the game despite doing no damage on its own. IFGs stick to the surface they come into contact with, making them easy to use.
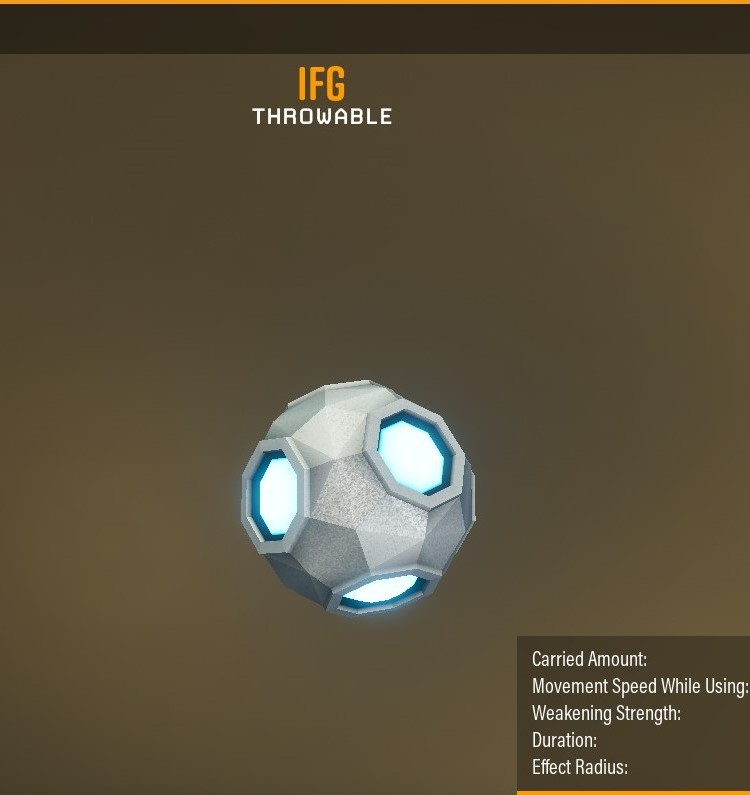
They will immediately activate after that, and project a 3-meter field that slows down enemy movement by 75% for 15 seconds. The field will additionally make it so that enemies within its radius take 30% more damage. Not only does this provide potent crowd control, but the IFGs’ slowdown effect causes bugs to clump up, making them easy prey to AoE.
This, as well as the damage bonus benefits not only the Scout but the entirety of the team. IFGs naturally combo well with most weapons. It makes it easier to afflict enemies with heat spreading. With the M1Ks T5Fear mod, the Scout can hold a chokepoint on his own by fearing bugs back into the field.

Elemental arrows from the crossbow can be combined with the IFG to create effective traps. IFGs despite not doing damage, are still considered an electrocution effect. Because of this they can combo with the zhukovs condictive bullets mod or Engineers shard diffractor.
Honestly, the only weakness of this grenade is flying enemies. It can affect them, but not reach them in most circumstances. It’s also the best Scout grenade when it comes to dealing with large targets. A decently common sight in modded gameplay, unsurprisingly.
A grenade as powerful as this easily makes it into the top tier in our Deep Rock Galactic grenade tier list.
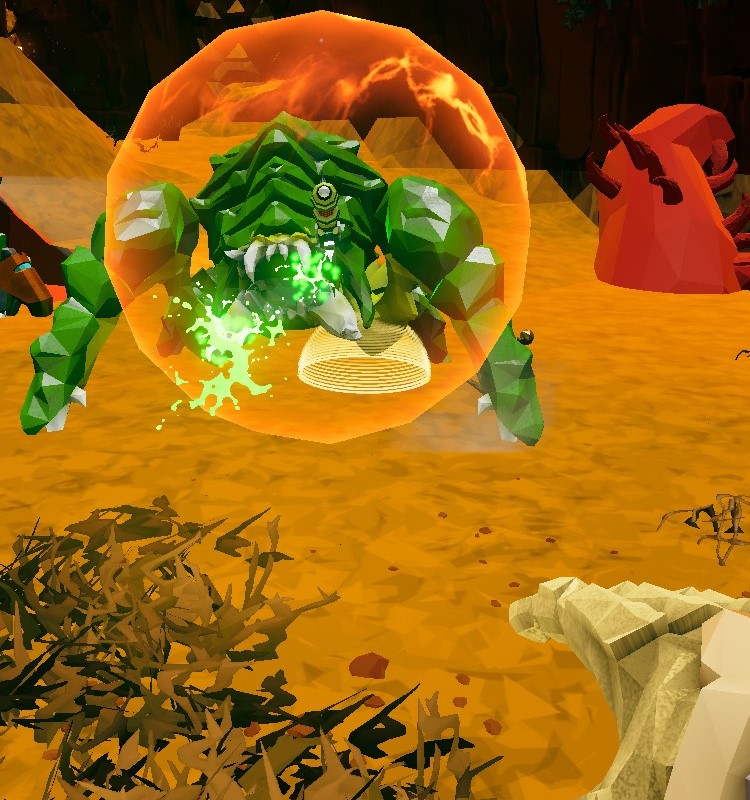
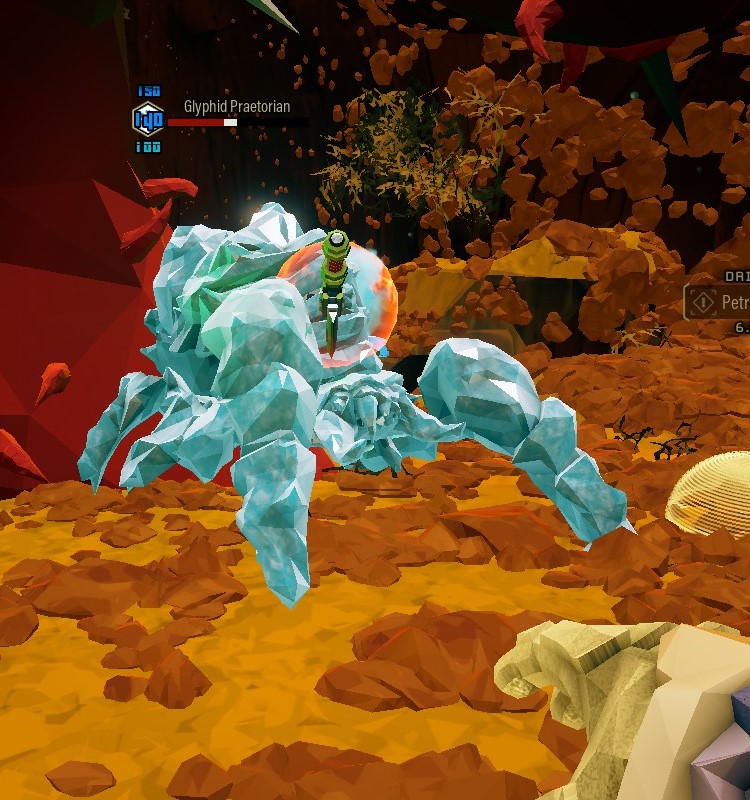
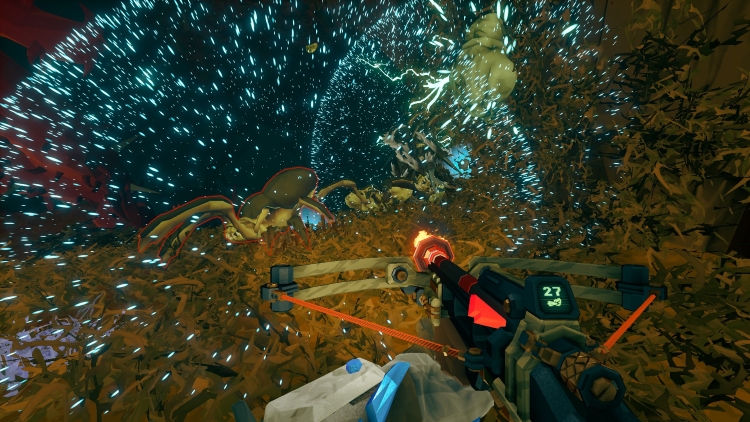
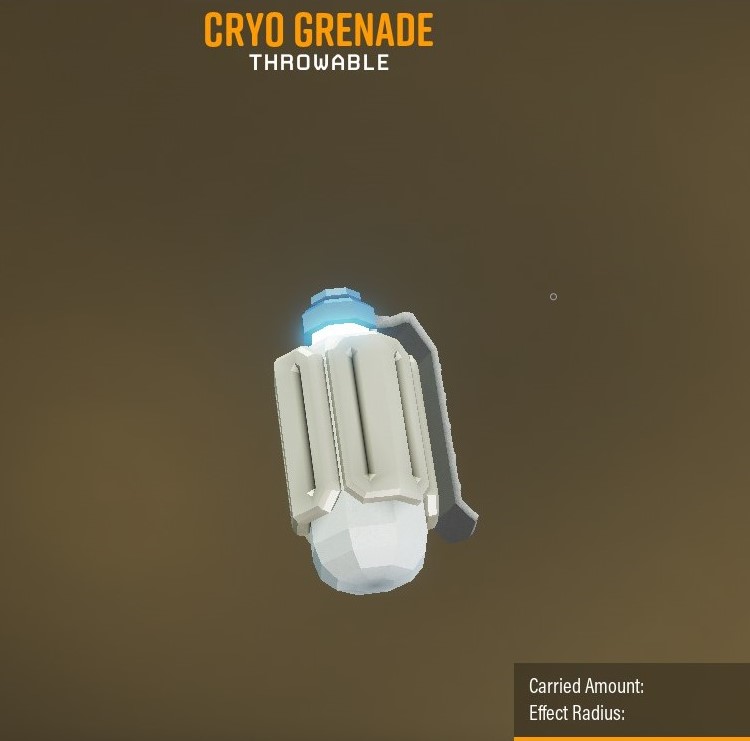
Cryo Grenade
Cryo grenades are the Scout’s panic button. Once thrown this grenade will explode either after a brief period or in contact with the enemy. It deals no damage, instead it spreads 250 Cold in a 6-meter radius. The maximum effect radius is 3 meters and then it drops to 50% at 6 meters.
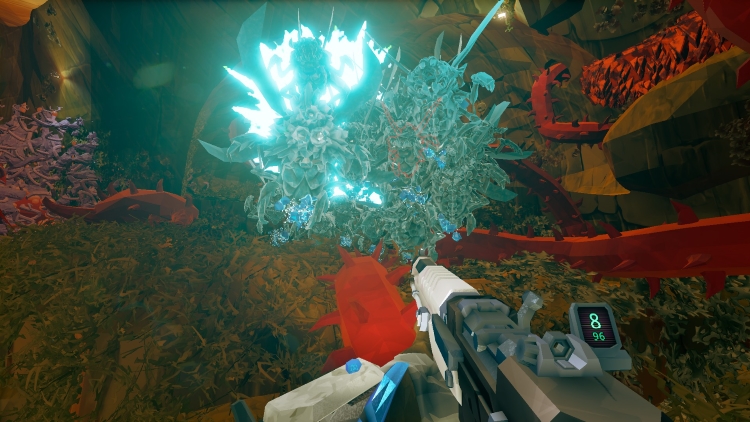
This amount of cold is enough to freeze most things in the game. Some Important enemies such as Opressors, Breeders, Patrol Bots, Dreadnoughts, and Bulks will require two greandes to freeze, however. When frozen most enemies can’t move and take 3x more damage(2.6x for Dreadnoughts) from bullets.
As such this grenade can quite literally hold half a swarm or an annoying priority target in their place for the duration of the effect and leave them open to massive amounts of damage. Something the Scout usually takes advantage of by using a white phosphorous shell boomstick to proc the Temp. Shock effect for easy swarm clear.
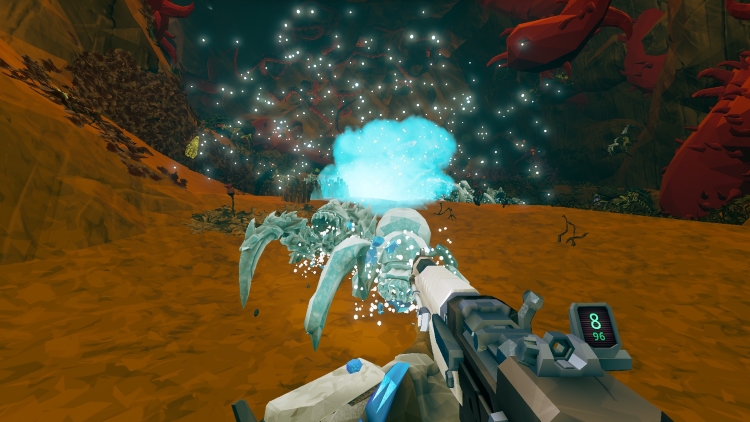
Frozen targets can’t use their abilities or attacks. This way the grenade can shut down Exploder, Bulk, Brood Nexus death explosions, or Spitballer attacks to name a few. Flying enemies are instakilled when frozen making this grenade one of the strongest anti-Mactera options in the game, and a quick answer to Naedocyte Breeders.
Much like the IFG, this grenade also finds itself in modded play from time to time. It’s especially beloved by speedrunners. Originally We put this grenade in the Great tier as it struggles against Rival tech due to their absurdly high freezing temperatures, as well as the fact it sometimes take 2 grenade to freeze foes.
One of the most satisfying things to do in Deep Rock Galactic.
But these are rare exceptions in what is otherwise an amazing performance. And so, fittingly, this grenade finds itself in the top tier of our grenade tier list.
A Tier – Great
L.U.R.E.
Lures are the Engineer’s default throwable. Once thrown, the grenade will deploy a hologram of a dancing dwarf that will draw enemy aggro to itself. The Engineer is a class with the least “Get out of jail” free cards out of all the classes.
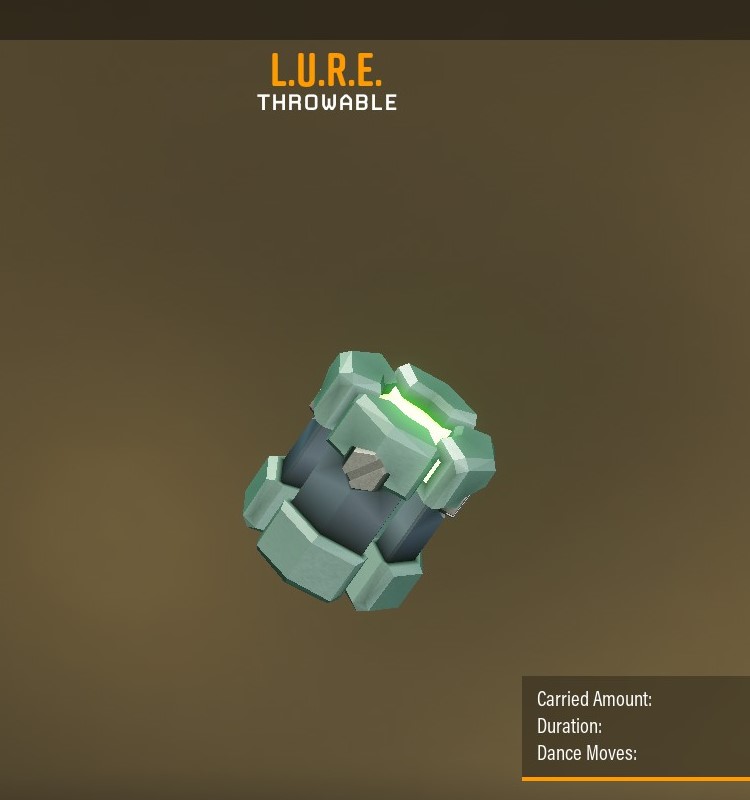
To stay alive Engineers rely on good positioning and their good burst DPS when it’s needed. These grenades are used to compensate for this drawback, and they do a good job at it. With Lures Engineers can get out of sticky situations easier or reduce pressure on the team.
Additionally, lures can be used offensively to group up enemies, increasing the value of AoE weapons. Lures can only affect 10 enemies, however. The chance that a lure will diver an enemy’s attention depends on the enemy itself and whether it was aggroed on a dwarf already.

On an Industrial Sabotage, for instance, Lures will aggro Shredders, Patrol Bots, and even the Caretkaer’s tentacles onto itself but very rarely the Sniper turrets. Despite this, they’re usually quite reliable. One of their downsides is that the grenade has its own health pool, which can’t endure prolonged attack from the swarm.
In heavy combat, lures can die fast if bugs aren’t cleared from them. Once destroyed, lures will deal a small amount of electric damage with a high electrocution chance as a small bonus. Their ability to make mistakes less punishing means they sometimes manage to find their way to modded difficulties.

All in all, it’s a great little grenade that increases survivability for the Engineer. In some circumstances, for the team as well.
Proximity Mines
Proximity mines are another great addition to the Engineer’s arsenal. Once thrown, there is a 3-second arming time before the mine becomes active. An active mine will deal 110 explosive damage to enemies that enter its radius. This radius is projected on the floor in the form of a yellow circle.
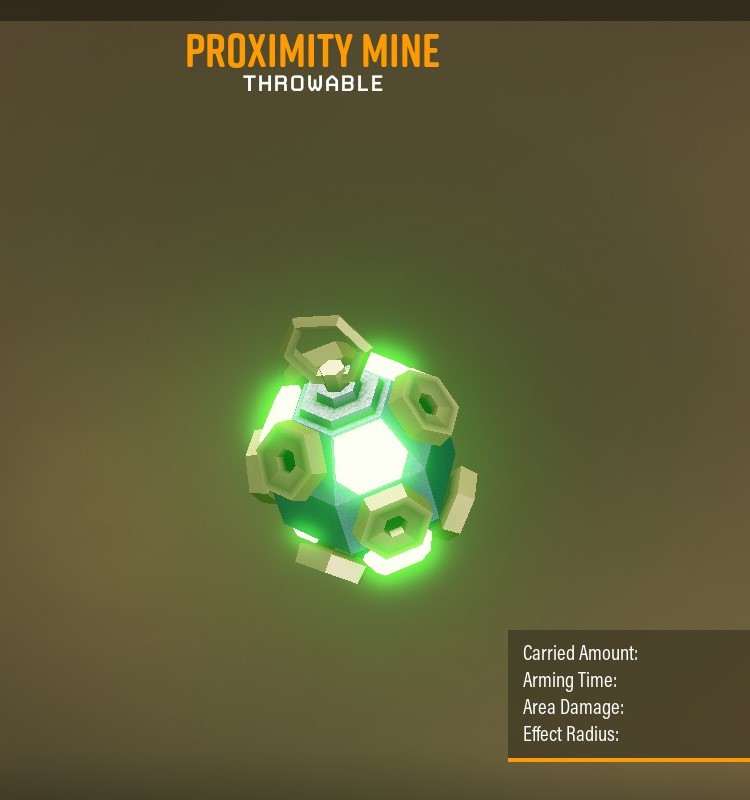
110 Explosive damage is enough to kill basic Grunts, Slashers will survive, albeit heavily damaged. This doesn’t mean much as the mine can actually detonate up to 4 times before finally expiring, or after 3 minutes if it still has some charges left. This ability in particular makes the mine the Engineers grenade that can potentially do the most damage.
A single mine can provide massive value when used well against the swarm while also keeping the team safe. Their nature as a mine makes them mostly a defensively oriented throwable. That being said, even in regular combat experienced Engineers can use mines to great effect.
This grenade is powerful enough that it does find its way to modded difficulties as well. Mines that didn’t explode once can be retrieved. Their downside is that their use against flying enemies is often limited. More importantly, their sensors aren’t activated by swarmers.
This is so one or two swarmers don’t end up wasting an entire charge, but it means the grenade offers limited protection when facing a larger amount of them. They’re capable of doing decent damage to dwarves. Dwarves won’t trigger them, but inexperienced Engineers often place them in the path of other dwarves.
No complaints here, just a great grenade by most measures. As such, We’ve placed it in the “Great” tier of our Deep Rock Galactic grenade tier list.
Tactical Leadburster
Less a grenade and more a set of gun barrels and a firing mechanism glued to a stick, Tactical Leadbursters are where things get strange. This grenade can stick to any surface making its placement a trivial effort. Once it attaches to a surface there is a 0.4-second delay before the grenade activates.
After this delay, the grenade will spin around its axis, showering just about anything in the cave in a hail of bullets. In total, it will fire well over 500 bullets in what is always a spectacular display. The amount of damage done per bullet increases with distance as a way to compensate for lower bullet density at range.

That’s 2 piercing damage up to 1.8m, 20 from 1.8m to 7m, and finally 50 at 7+ meters. Usually, the grenade will still perform better up close than far away, though. While the bullets are always fired in the same pattern, the difference in terrain geometry and enemy position will ensure that an element of randomness is always present when using the Leadburster.
This is the grenade’s main weakness as it can often be inconsistent. However, its high damage potential and its absurd firing pattern always ensure that a good amount of value can be extracted from each grenade. Its firing pattern means the Leadbursters are terrain agnostic and as such present the only Gunners throwable that can reasonably be used against bugs on walls and ceilings.

Turns out, it’s impossible to miss if you just shoot everything
It also makes them the best anti-Mactera option in the Gunner’s arsenal since the bullets fired from below will often hit their weakpoints. Leadbursters are especially effective against Mactera
Spawn who have a 33% weakness to pierce damage.
Much like with the cluster grenade, when properly placed, a large portion of its damage can be focused on a single enemy. This makes the grenade a good option for combating stationary targets. It’s great for softening up targets when entering a new cave for the first time.
Praetorians and Oppressors have a good amount of resistance to the pierce damage type, so they’re not as great there. However, Bulk Detonators, who are massive targets without any pierce resistance will take utterly devastating amounts of damage from well-placed Leadbursters.
They may just be the most potent Bulk killers out there. Leadbursters scale very well on modded difficulties where there are usually a lot more bugs as well as stationery enemies to hit. This makes them a common sight on modded difficulties. As mentioned previously, its main disadvantage is its inconsistency.
It will always deal a lot of damage, but how said damage is distributed is anyone’s guess. (you might have to throw out another grenade if the first one fails to achieve the desired effect). Furthermore, when We said that it would hit anything in the cave…this wasn’t a joke. It will damage you as well as your teammates.
Not only is avoiding friendly fire difficult with it, but the grenade up close can deal good damage to your team. So while it’s easy to use, it’s hard to use safely. It’s not uncommon to see beginner Gunners waste shields to try and save their team from a poorly placed Leadburster.

Ideally, place it in such a way that the Bulk walks under it. This was just for show.
Still, these grenades bring a lot of potential damage, and fill a few niches that help the Gunner round out his loadouts, so despite their random nature We still consider them to be a “Great” throwable in our Deep Rock Galactic grenade tier list.
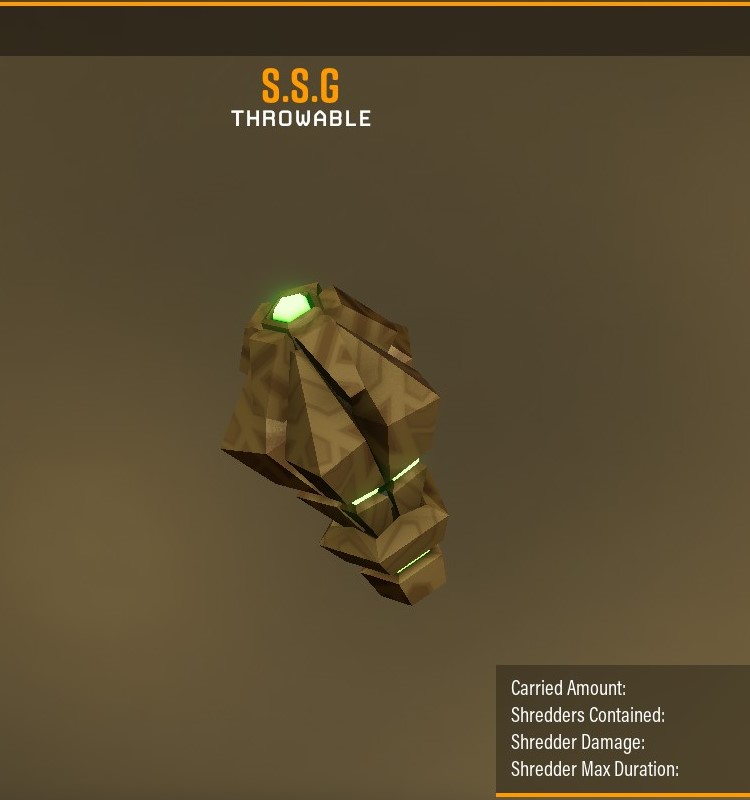
Shredder Swarm Grenade (SSG)
SSGs are yet another interesting entry in Engineer’s unusual arsenal of throwables. Once thrown, this grenade will quickly deploy a swarm of 5 reprogrammed Rival Shredders. The way they deal damage is complicated. They deal 8 damage on a hit. They also apply a very slow DoT that acts as a damage limiter because DoTs don’t stack.
Otherwise, Shredders would quickly kill any enemy they attacked in unison. Despite this limitation, the Shredders can still deal good damage if they attack a single enemy. Against the swarm, their effectiveness is limited based on its size, but they always provide a decent boost in Engis firepower, which is the point.
Enemies under attack by Shredders have their move speed slowed by 30%. This all sounds like a mixed bag, but it’s actually the SSG’s main strength because it ensures that they’re always able to provide value in any scenario. Shredders operate on their own, which reduces the stress on the Engineer.
Shredder summoning fx.
This way they can boost Engis firepower, help while defending a point, kill swarmers, slow down a Dreadnought while dealing some damage to it, and many more. Their downside is that they have a mind of their own.
They will prioritize targets around the Engineer and usually won’t wander far away from him, thankfully. Their power starts to drop off with the size of the swarm, which is their main weakness as compared to something like a proximity mine. Still, because of their sheer utility, they can often be found on modded as well as vanilla difficulties.
The SSG finds its place in the “Great” tier of our Deep Rock Galactic grenade tier list. The little guys can be slapped by looking at them and pressing the interact key, which is a neat little trick.
Cluster Grenade
Cluster grenades are an unusual agglomeration of small explosives stuck to one another. Once thrown there is a short delay before the grenade activates. Once this delay has passed, the grenade will release bomblets in an umbrella-shaped pattern and carpet bomb the area.
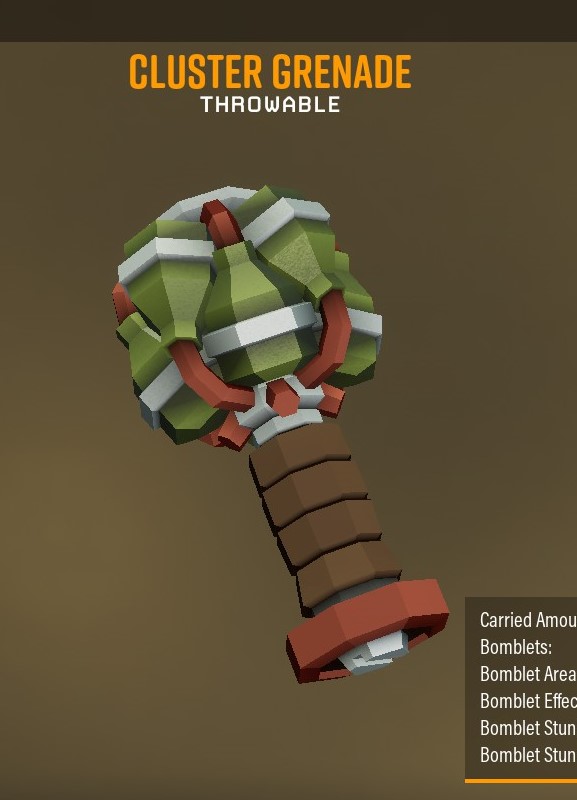
It releases 9 bomblets, each of which deals 40 explosive damage in a near-4 meter radius. Max damage is done within 2 meters and then it drops to 50% at the edge of the blast. Additionally, the bombletes have a 50% chance to stun for 1.5 seconds. As one can gather from this info, these grenades pack a lot of punch.
When used properly the Cluster grenade can be used to Carpet bomb a large area. This has two benefits. The obvious one is that the bugs (usually grunt variants) in said area will take tremendous damage. The second one is that all these bomblets working in unison will stun just about anything that can be stunned.
This way, the grenade can not only be used for efficient crowd clearing but can also act as a “Get out of jail free” card when the Gunner finds himself in a tight spot. By mastering grenade placement the explosion damage from the bomblets can be focused to deal a large chunk of damage to a single enemy.
Such as softening up Praetorians, or maybe even doing big chunks of damage to the Caretaker’s appendages. Its sheer explosive power and crowd control capabilities mean the grenade finds its place on modded difficulties reasonably often. The main downside to this grenade is that it is quite difficult to use well.

Before it activates, it will happily bounce around the terrain, so placement can be a pain for inexperienced gunners. The delay on the grenade means Gunners have to anticipate the swarm’s movements as well.
Because of its deployment pattern, terrain shape can also pose a problem for beginners, as well as limit its use against flying enemies. Another problem with the grenade is it’s easy to damage players with it. The Gunner has 50% explosive damage resistance, so he’s not particularly phased by this damage, though.

This can let him use this grenade even in close-quarters combat to panic-clear some bugs off him. To summarize, it is a grenade capable of doing impressive damage but is limited by its clunky mode of deployment. Still, it manages to land on the “Great” tier of our tier list.
B Tier – Good
Plasma Bursters
The Plasma Burster is interesting because of its simplicity. It’s the grande Engineers bring when they need a simple and easy burst of damage. Once it hits the terrain it will explode 4 times. Each explosion comes right after the other in a precise sequence.
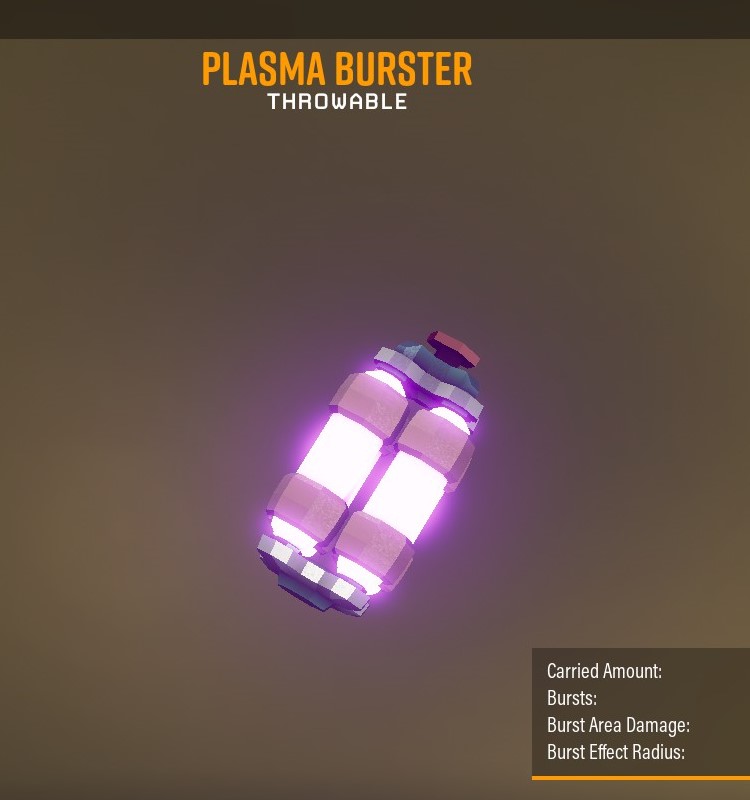
Each explosion deals 60 Explosive damage in a 3.5-meter radius (no falloff). The explosions tend to follow the trajectory of the thrown grenade. Explosions can bounce off walls, terrain geometry, and ceilings. Strange as it may sound, thinking of the grenade as a constantly exploding rubber ball might just be the best way to quickly explain its nature.
The Engineer gets 6 of these grenades, so when used properly they can be quite potent. Two bursts will kill a grunt and three will kill a slasher. By bouncing the grenade properly, its full damage can sometimes be focused on one opponent.
Learning how to bounce the grenade properly on terrain is required to get the maximum out of it on uneven geometry.
Their main disadvantage is their sometimes unpredictable nature. Plasma Bursters can also deal a good amount of friendly fire to the team. Plasma Bursters are a good grenade designed to give the Engineer some simple direct firepower against the swarm and it does its job reasonably well. No complaints from us.
Neurotoxin Grenade
Neurotoxin grenades are an interesting choice. Like the HE grenades a part of their function is to add additional crowd clear to the Driller. Which, as We’ve said before is not something the class is much in need of. However, despite this, the Neurotoxin grenades are a surprisingly good choice on the Driller.
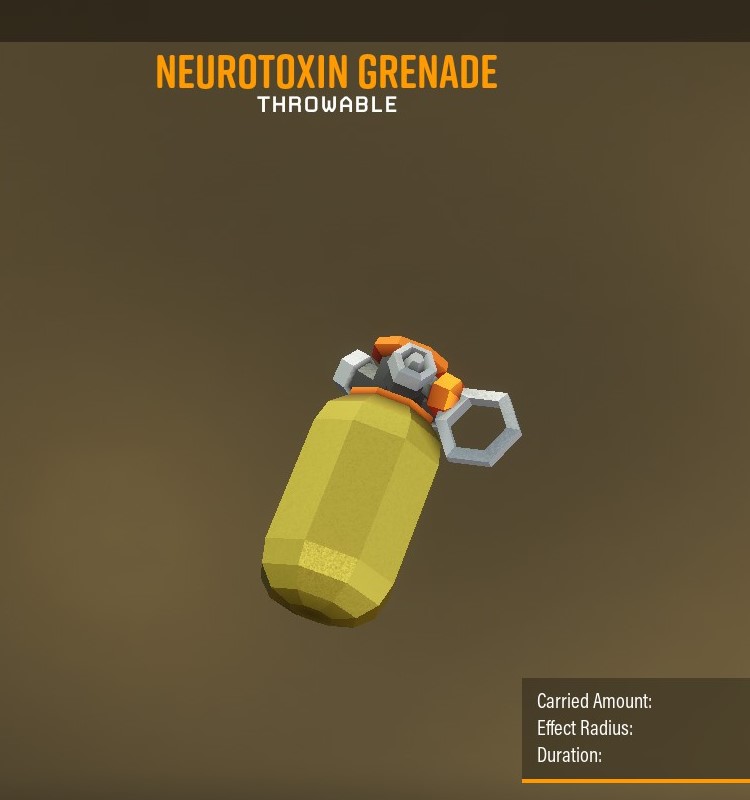
This grenade has the largest AoE of all the throwables in the game at 7.5 meters. Once thrown it deploys a neurotoxin gas which afflicts almost any enemy that passes through it with neurotoxins. This DoT deals 12 poison damage every 0.75-1.25 seconds for half a minute.
This means that any weak bug that passes through its massive cloud is doomed to die if given enough time, and targets with large HP values will take a lot of damage eventually. Additionally, the enemy will have its move speed reduced by 30% for the duration of the DoT.

The neurotoxin cloud lives for 13 seconds. At any time it can be detonated with a heat source to deal 65 Fire damage + 65 Heat. It can actually deal 100.75 heat to enemies caught in its blast, most likely due to an old bug, which means it can set most bugs on fire, further increasing its damage.
This is also enough heat to instakill rival turrets. the grenade also has a decent little synergy with the Collete Wave Cookers T5A mod. The most powerful thing about this grenade, compared to the HE grenades, is its sticky-flame-like quality.
What We mean by this is that the Driller can throw this grenade in the path of one part of the swarm and safely go and divert his focus elsewhere knowing full well that the grenade will keep him and his team safe.. drastically increasing efficiency as a result.
Their nature as a gas through which bugs have to pass also means they scale quite well with large bug numbers, making them an option in modded difficulties. With so many good things going for it, We originally planned on putting it in the “Great” tier.
However, getting them to their maximum potential proved very difficult in random play as most teammates would open fire on the bugs regardless. Weapons with the ability to act as a heat source are more than plentiful, and many of our gas clouds succumbed to friendly fire before they could ever become useful.
They’re also a bit on the slower side when it comes to their deployment speed. Drillers need to anticipate the pace of the swarm and their path if they wish to use this grenade successfully, so it takes a bit of skill. The neurotoxin cloud is also very dense and does a good job of obscuring vision.
For these reasons, We’ve put it into the “Good” tier of our Deep Rock Galactic grenade tier list. That being said, in a proper team of people who communicate and coordinate well, this grenade can easily become great. It’s rarely used in the game sadly, so We encourage Drillers to try it out.
Voltaic Stun Sweepers
Voltaic Stun Sweepers are electric boomerangs. They fly fast and can be thrown at targets up to 40 meters away. On impact, they will deal 35 electric damage, which is honestly just to give the ability to kill small enemies.
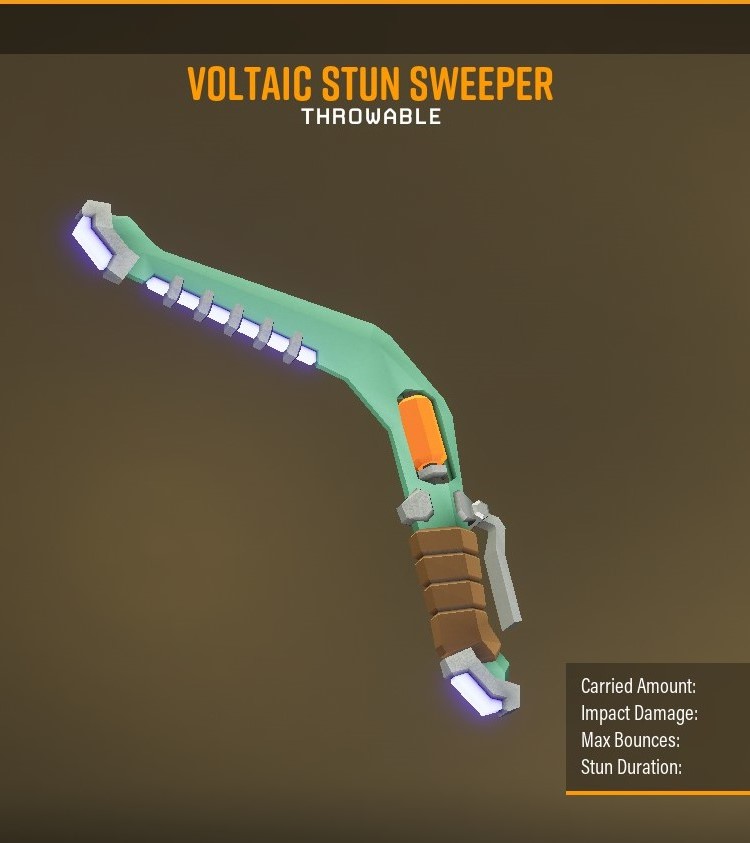
More importantly, it will stun targets (provided they can be stunned) for 8.5 seconds, which is the single longest stun in the game. Additionally, it will inflict a weak 4-second electrocution DoT that deals a bit of damage, but more importantly, acts as a form of additional crowd control against stun-immune targets. (There is also a secondary electrocution DoT, but now it’s just getting complicated)
After it hits its main target it will bounce around 8 more times, spreading the stun to more targets as a result. The Sweepers prioritize the enemy in the Scout’s crosshairs, and as such they can be used to stun a priority target when necessary.

Those would be enemies such as Wardens, Spreaders, Menaces, and Stingtails. It is decent at taking out swarmers and naedocytes, and great at taking out Shredders. This allows the Scout to round out his loadouts by bringing some anti-swarmer capability. Swarmers are an enemy type the Scout usually struggles against.
They are a decent anti-Mactera option as the stun can keep them at bay for a long time. The electrocution effect can immobilize flying Patrol Bots or Bulks in a pinch. The grenade’s main weakness is that it can only affect 9 targets and the Boomerang can’t be spammed.
Despite being able to carry 8 charges, this still makes it the weakest of all the Scout’s grenades. It’s rarely seen on modded difficulties.
For these reasons, it sits at the “Good” tier of our Deep Rock Galactic tier list. If there are no enemies nearby the Scout will use it as a regular boomerang for his amusement when the grenade key is pressed. For this alone, it’s top tier in our hearts.
Incendiary Grenade
Incendiary grenades are simple but useful throwable in the Gunner’s arsenal. This grenade doesn’t deal any damage once it detonates, instead, it afflicts enemies in a 3.5-meter radius with 100 heat. This is enough to set most bugs on fire instantly.
It also creates a 4.3-meter patch of flames that burn for 6 seconds and deal 10 damage every 0.5-1 second. This amount of damage, combined with the On Fire! DoT once they leave the puddle means that Swarmers, Grunts, and sometimes Grunt Slahers will die to the flames.
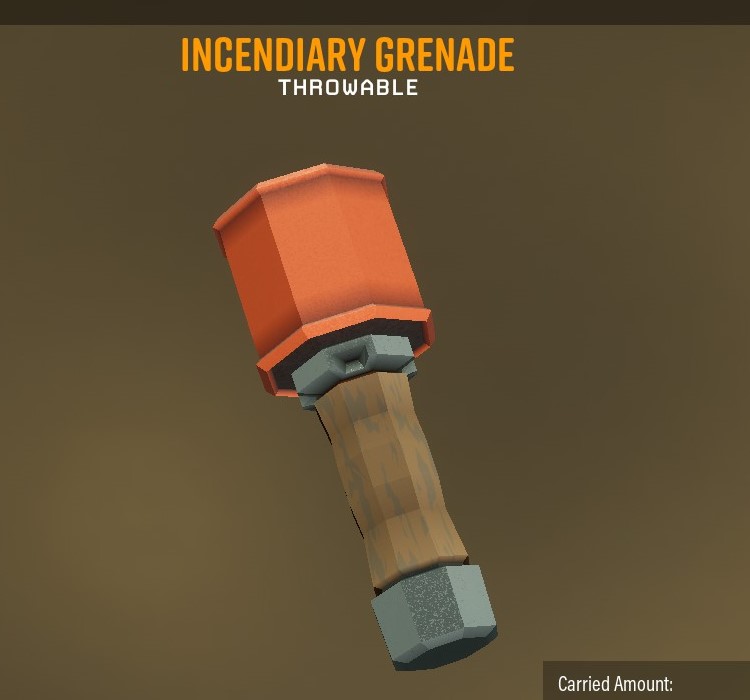
Grunt Guards will survive it usually but take heavy damage in the process. Its ability to quickly heat targets can be used to instakill rival turrets. The flames prevent enemies from cooling down which also boosts their anti-rival capabilities when comboing them with other weapons that can ignite.
Two grenades can be used to set the Caretakers tentacle on fire should the need to do so arise. Its most well-known quality among experienced Gunners is its synergy with Vollatile Bullets Bulldog OC. This OC enables the Bulldog to deal tremendous damage to enemies on fire.

These grenades allow for easy synergy when quick ignitions are required. The grenade is also very beginner-friendly as it detonates simply once it hits enemies or the floor. Interestingly enough, it will not detonate if it hits the walls or the ceiling.
The Incendiary Grenade deals low self-damage as well. It does find itself in modded difficulties, though usually for its Volatile Bullets synergy. Its main downside is that it doesn’t kill its targets particularly fast, with swarmers as the exception to that rule.

Bugs can sometimes pathfind around the flame patches. Using it in chokepoints is the better option. However, this quality can be useful sometimes.
Because of this, the grenade’s ability to act as an Area of Denial is nothing special, and Gunners will often have to keep their attention on enemies coming through it, rather than focusing their attention somewhere else. The way that the flame patches spawn can also be somewhat inconsistent.
This, combined with its short 6-second duration is why this grenade ends up in the “Good” tier of our Deep Rock Galactic grenade tier list. It’s a grenade brimming with potential, but We still wish it had a bit of slowdown much like how Drilers sticky flames do to spice it up.
D Tier – Decent
High Explosive Grenade
The HE grenade is unique in Deep Rock Galactic because it can be “cooked”. Thanks to this mechanic, with a little practice, it’s easy to get the maximum out of each explosion. Failure to throw the grenade will result in it comically exploding in Driller’s hand, which is a bonus in our book.
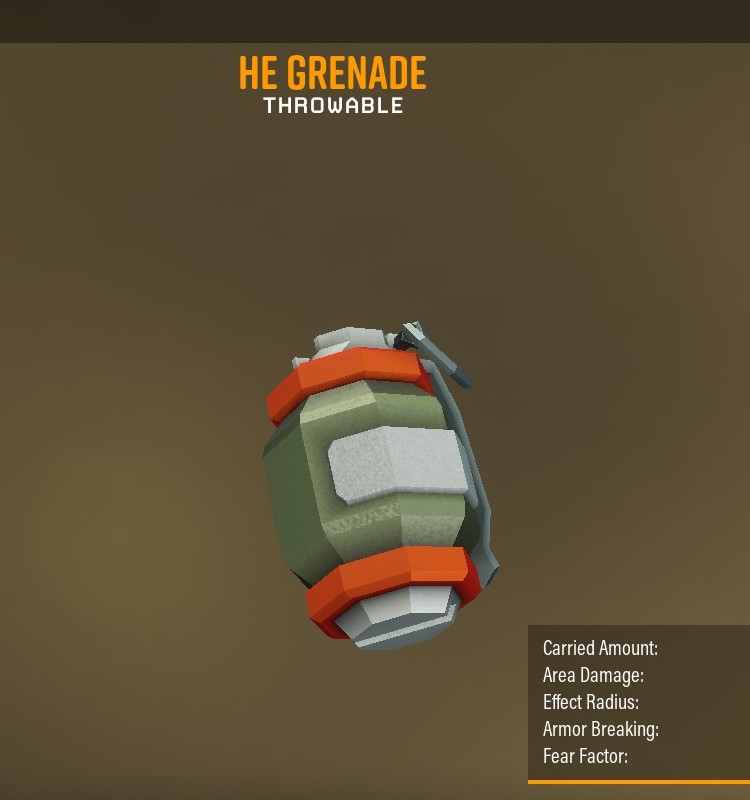
It deals 140 explosive damage. This is enough to instakill both Grunts and Grunt Slashers, which are the main enemies this grenade is designed to deal with. It has a 4.3-meter explosion radius. However, the max damage radius is 2.8 meters, and then it drops to 35% of the total at the edges of the blast.
It’s still enough to kill swarmers at its entire range, and it will kill grunts past the 3-meter mark so all in all, not a bad grenade. It has a moderate fear chance (100% base fear chance) that makes it a decent anti-Mactera option (they have no fear resistance).
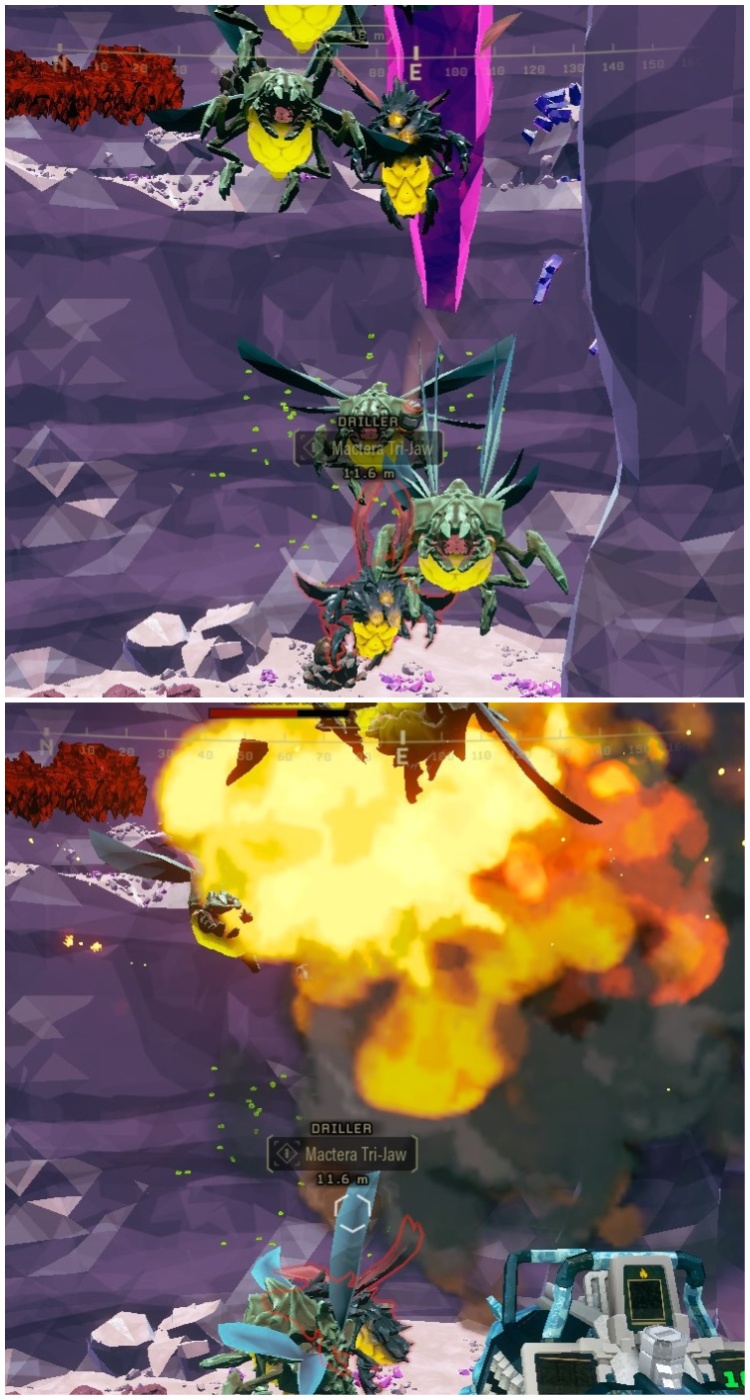
It will deal enough damage to instakill Mactera spawn, and can heavily damage Brundles and Trijaws (Mactera are usually weak to explosive damage). The fear will then see the Mactera scatter, making them less of a threat.
Although its description says it can carve rock as well as bugs, its actual carve radius in the game is too small to be used for either Terraforming or quick retrieval of resources. It can be used to quickly blow up red sugar from the ceiling or other high places.

The grenade is decent at what it does, and We don’t have much bad to say about it. The main problem with the HE grenade is that it boosts crowd clear potential on a class that’s quite literally designed around quickly removing large groups of weaker enemies.
And even in this role, the HE grenades are competing with the potent Neurotoxin grenade. To compensate for this, the Driller gets to have 6 of them, but it’s just not enough. On modded difficulties, this grenade can’t compete.

For these reasons, the grenade lands in the “Decent” tier of our Deep Rock Galactic Grenade tier list.
F Tier – Not Useful
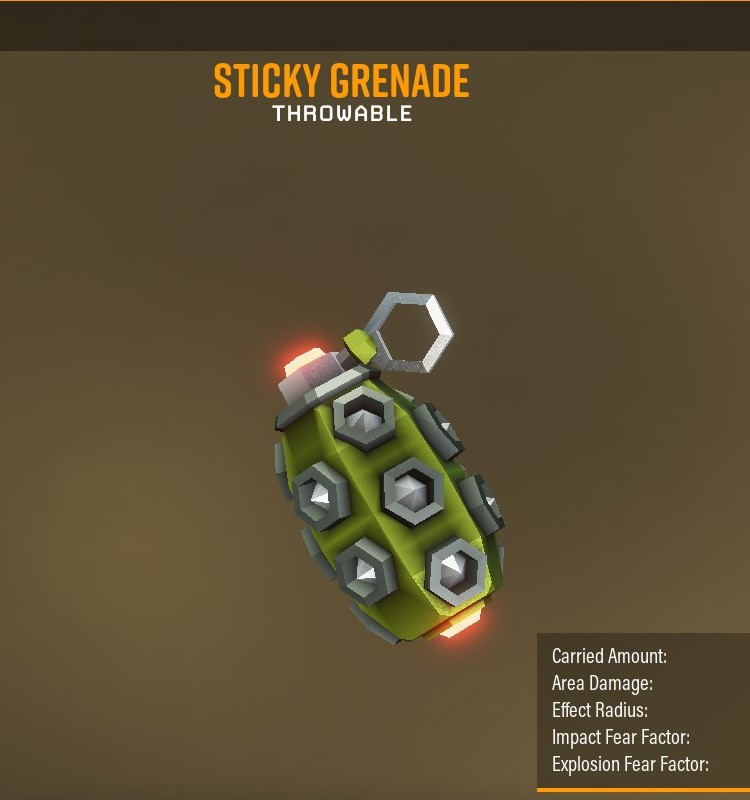
Sticky Grenades
Sticky grenades are the Gunner’s default throwable. They’re also the simplest of all Gunner’s throwables. As their name would imply, they stick to any surface so they can easily be placed in the path of the swarm on just about any surface.
The grenade has a short delay before it explodes after it attaches to a surface. They deal 130 explosive damage in a 4-meter radius. Maximum damage is dealt at 1.5 meters and then drops off to 20% of the total at 4 meters.
This amount of damage is usually used to kill grunts. Grunt slashes will die on direct impact, but will survive the grenade (heavily damaged due to their explosive weakness). These grenades also come with a decent amount of fear. Explosions have a moderate 100% fear chance.
The direct impact of the grenade has an impressive 250% fear chance. A common trick is to stick the grenade to a Praetorian’s face to make it run away in fear and expose its weakpoint while it does so. This fear can sometimes be a disadvantage as the feared enemy can run away with the grenade still attached to it, lowering its effectiveness if it detonates in a suboptimal position.

Feared enemies can sometimes decide to run in panic towards the player rather than away from him. While the explosion radius is decent, since the maximum explosion radius is just 1.5 meters, its damage against grunts quickly starts to fall off. They’re the weakest of all Gunner’s grenades by a wide margin.
To compensate for this, the game gives you 6 of them, but it’s not enough. A single cluster grenade will often do a better job at clearing the horde than several sticky grenades, while still doing decent crowd control via stuns.
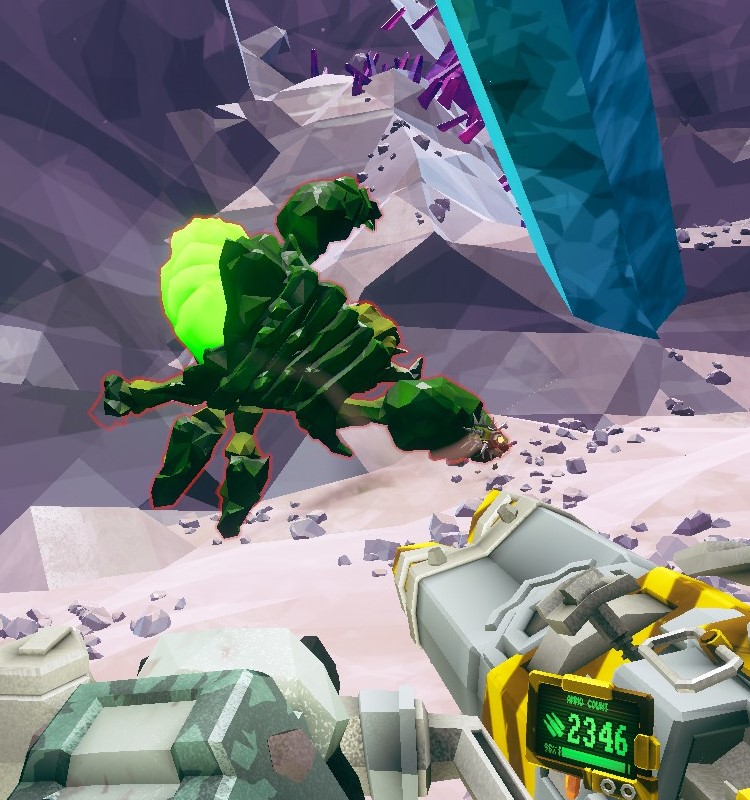
Praetorian runs away after having a Sticky Grenade attached to it.
While the argument could be made that fear is the point of the grenade to keep the gunner safe in close-quarters combat, We still find that its effect is somewhat weak. For these reasons, We’ve put Stick grenades in the F Tier of our Deep Rock Galactic grenade tier list.
Spring Loaded Rippers
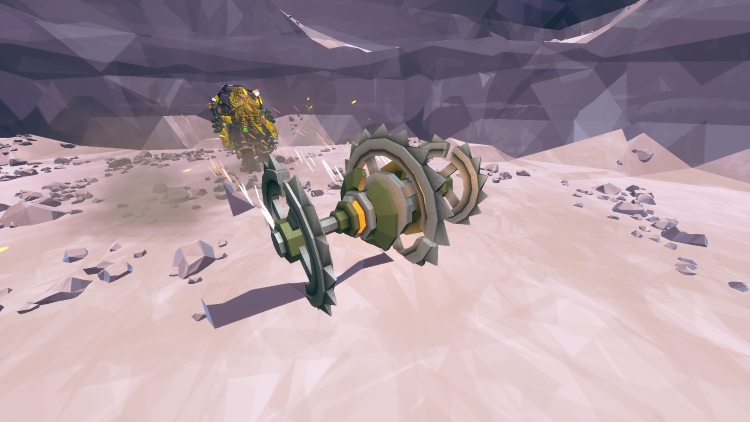
Spring Loaded Rippers are about as unusual as grenades in Deep Rock Galactic can get. They are a giant buzzsaw that runs along the terrain in the direction it was thrown. We say “terrain” because it will happily climb along the walls and then start running on the ceiling if allowed to do so.
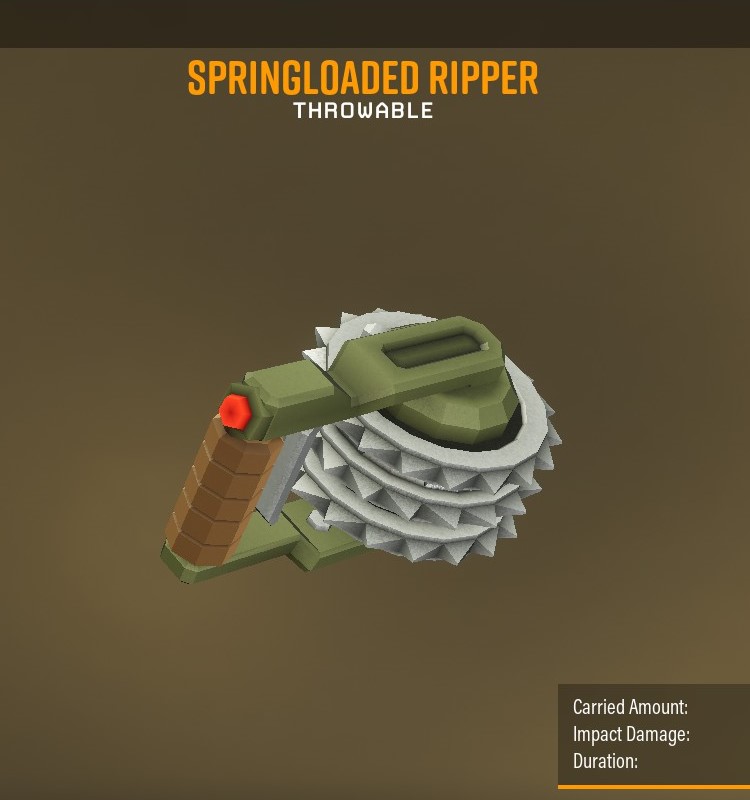
It will slice its way through any enemy in its path. Bizarrely enough, it deals 145 Explosive damage per hit rather than melee. This is enough damage to kill Grunts and Grunt Slashers. The Rippers also have a damage cap of 950. Whenever it fails to instakill an enemy, that 145 damage is subtracted from the cap.
This method of movement is the grenade’s main weakness and only strength. It can potentially deal a massive amount of damage to a large number of foes, but for this to be true the Ripper needs to be deployed inside of small spaces.
This way the Ripper can spin around the terrain to keep hitting enemies as they pour in, acting like a giant makeshift deathtrap in the process. It has a short lifespan of 7.75 seconds, so out in the open it can usually only hit enemies in a straight line once.
This is the main problem of the Ripper; it’s designed to fill a very specific niche. Which is fighting in small enclosed spaces. And while a good chunk of caves have narrow tunnels that connect them, the caves themselves are too big usually for efficient Ripper use.
An argument often made is that the Driller is the class all about digging tunnels. This is true, but as a class with the most potent crowd clear you should be staying with your team and not in a tunnel behind a bunch of Rippers.
In Deep Rock Galactic experienced dwarves fight out in the open so they have room to maneuver. Experienced players move defensively, to dodge attacks, and aggressively, to group up bugs to make weapon AoE more effective.
Probably one of the most fun things to do in the game.
Bunkering is a niche strategy that has its place, but outside of personal preference, it is best avoided unless absolutely necessary. Some Drillers like to dig out trenches connected by little bridges on which Ripers can spin around.
While making makeshift deathtraps that are equally dangerous to the bugs as well as the team is on-brand for the Driller, the value of such a maneuver was always suspect. The Rippers also deal massive amounts of damage to players, even after the nerf to friendly fire damage.
Rippers are a saw that blindly navigates randomly generated terrain geometry, and many players have been accidentally killed when it looped around in some unexpected manner. Even in a tunnel, its damage cap can limit its use if a High HP enemy shows up. These grenades are a rare sight in moded gameplay.
For all these reasons, these grenades are our pick for the weakest grenade in Deep Rock Galactic and they land at the bottom of our grenade tier list as a result. A shame really, since they’re probably one of the coolest grenades in Deep Rock Galactic.
Summary on our Deep Rock Galactic Grenade Tier List
After much deliberation, this is how we would rank the grenades in Deep Rock Galactic. While We have organised these grenades into a tier list for simplicity, in reality, years of updates and fixes have made the overwhelming majority of them reasonably balanced. As such We don’t find that there are any grenades that we would ever call useless.
While some can perform a certain function better than others, most grenades exist to serve their class. In doing so they either balance out a loadout, cover a weakness of the class or further add to the class’ strength. We hope that this Deep Rock Galactic grenade tier list was an entertaining read. Rock and Stone, miner.
Image credit: Ghost Ship Games.