In this Deep Rock Galactic perk tier list, We’ll attempt to rank the game’s various perks based on our years of experience in the game. Perks are a wide variety of bonuses that can be applied to dwarves to give them a boost in performance. We’ve briefly mentioned them in our previous Beginner Guide. While a few references have been made towards modded difficulties, the ranking takes into account only their performance in the vanilla game. Finally, this article is up to date as of Season 5.
S Tier – Always Worth Having
These are perks whose sheer power often makes them core components of dwarven loadouts.
Iron Will
Iron Will is a powerful safety net that gives the team one more shot at completing the mission when things go from bad to worse. Once per mission, this perk allows a downed dwarf to pick himself up for 12 seconds at max rank. This perk will instantly reload all equipped weapons, increase movement speed, and make you slightly more resistant to movement speed debuffs.
More importantly, it makes the player invulnerable to all damage types for the duration of its effect. This perks cling to fame, however, is that you get to keep all the health you accumulated once it finally deactivates. This can be achieved by mining red sugar, grabbing a resupply, or by using the Vampire perk.
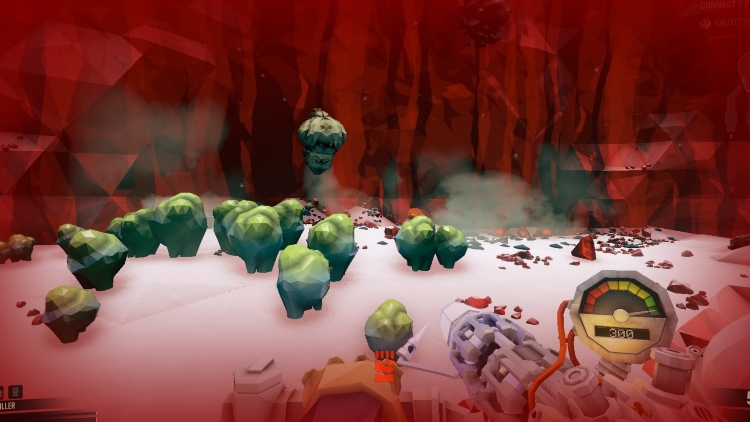
The Iron Will perk overlay.
If the player’s HP bar is above 0 when the perks effect ends, he gets to keep fighting as if nothing happened. Not only that but so long as someone has an IW charge, this perk will prevent the mission from auto-failing if the entire team gets downed. This way the player gets one final chance to rez his team.
This perk’s only weakness is that it provides no benefits during combat. For this reason, it has often been argued by experienced dwarves that taking this perk is simply planning for failure. In truth, in DRG many things are left to the whims of the game’s RnG system so it helps to have a backup.
Whether on high-hazard missions, Deep Dives, and especially modded difficulties, IW is the backup plan that greatly increases a team’s chances of getting to the end. For this reason, Iron Will easily makes it to the S tier in our Deep Rock Galactic perk tier list.
Dash
While Iron Will might save the team once, and even then usually when things go poorly, Dash is the perk that will keep players alive through every scenario the game has to offer. Dash gives a 220% buff to move speed for 1.5 seconds. This lets the player move out of the way, dodge attacks, relocate to a better position, or just run.
Not only that, but this move speed buff is of great use even outside of combat. Uses such as covering more distance, increasing the length of jumps thanks to the extra momentum, and just in general reaching places that a dwarf normally couldn’t without it.
Add to this its short 25-second cooldown at max rank and you finally realize why the overwhelming majority of loadouts contain it. Scouts are the only class that sometimes doesn’t take the perk due to their high innate mobility. Even then, some Scouts still equip it, especially those who use its mobility to bunnyhop more easily. All in all, this is easily an S-tier perk.
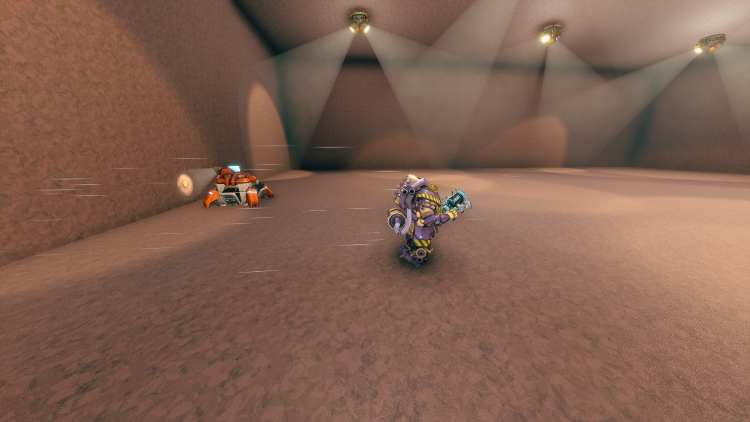
Driller using Dash.
Resupplier
Resupplier is a perk that makes grabbing ammo from a supply pod a faster process. Additionally, resupplies will grant more healing. At max rank, it will even auto-reload all weapons upon a successful resupply. There’s not much to say about it because it’s simply that good of a perk.
Even if its effects were split into 3 different perks, they would still be worth consideration. Granted, it’s difficult to see the value it provides on lower hazards. On lower difficulties less ammo is needed for a swarm, so having to resupply during a swarm is less common.
On high-hazard missions, and not to mention modded difficulties, resupplying during a swarm is a much more common occurrence, and this perk starts to shine. For these reasons, just like the perks before it, you would be hard-pressed to find a graybeard loadout that doesn’t possess it. One more perk for the S tier in our Deep Rock Galactic perk tier list.
A Tier – Almost Always Worth Having
These are perks that are as powerful as those in the S-tier but aren’t as omnipresent as them in dwarven loadouts.
Field Medic
Field medic is a simple but useful perk. It makes reviving downed teammates a faster process. Additionally, once per mission, you can instantly revive a teammate. At max rank, it causes a potent fear effect in a 5-meter radius upon a successful revive. Once again, there’s not much to say here as the perk is quite straightforward.
It’s often seen on meta Scout builds where it’s taken instead of Dash. It usually gets outcompeted for its place in the active slots by Dash and Iron Will but it’s still a great perk worthy of consideration. It lands solidly in the A tier of our Deep Rock Galactic perk tier list.
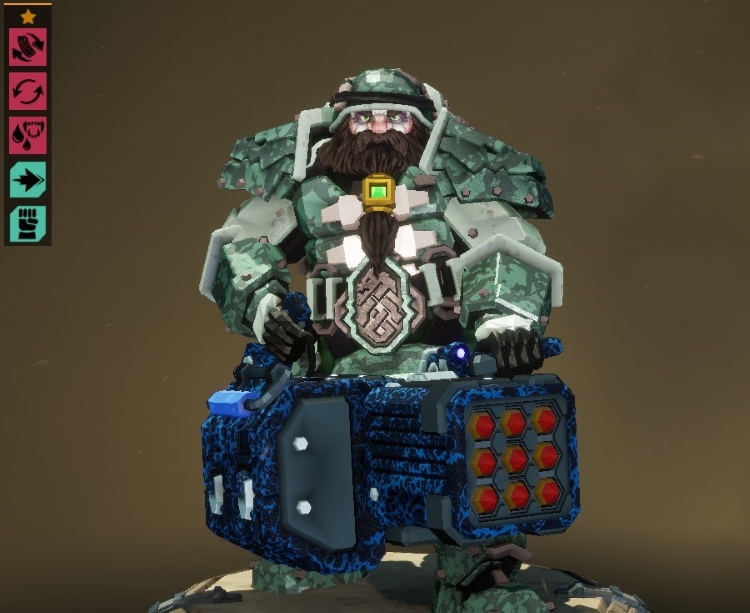
A common selection of perks for the Gunner class. IW and Dash are the most commonly chosen perks in most classes (sans the Scout) if We’re to be honest.
Born Ready
This perk auto-reloads weapons after they have been unequipped for 5 seconds (at max rank). It also works on dwarven equipment, such as Scouts Flare Gun or Engineers Platform gun, further increasing its usefulness as a result. The usefulness of this perk varies based on loadouts. It’s most common in the Gunner class, for instance.
Gunners have weapons with massive ammo pools and absurdly long reloads. Some gunner loadouts can achieve impressive uptimes by switching between guns and then letting the perk reload them. This perk opens up new playstyles, where one gun is used for a quick burst of damage before being stowed back to let the perk reload it for another time.
This perk’s usefulness is such that some players bring it even if they only have one gun that can be auto-reloaded. Since its usefulness varies on the build, We’ve placed it in the A tier of our Deep Rock Galactic tier list. However, We wouldn’t be surprised at all to find this perk reaches S rank in many player’s lists.
B Tier – Decent Picks
These are good perks which are usually used to fill out remaining perk slots once the core perks in the A and S tier have been chosen.
Vampire
With Vampire equipped, melee killing any medium-sized enemy (grunt-sized) or larger restores a small amount of HP. Because of this, it greatly synergizes with Iron Will. To the point that it’d be hard to find a loadout with Iron Will that doesn’t run Vampire to help it out. On its own, the perk is just decent.
Melee combat was never a focus of the game, and the developers have said many times that the game deliberately focuses on ranged combat. For this reason, melee takes on a more supportive role. Pickaxing a few bugs here and there when the opportunity arises or dealing a quick burst of damage via a melee power attack.
In most cases, this perk will not be able to restore great quantities of health. However, over time it can restore enough to help a dwarf survive an extra heavy attack or two. The exception to this is the Driller whose access to melee drills, impact axes, and the cryo cannon can let him restore impressive amounts of HP through this perk. All in all, Vampire is a decent perk that gives a nice little boost in survivability.
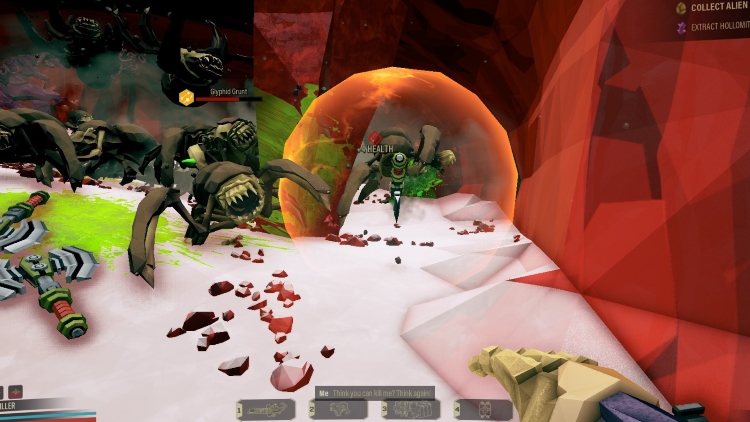
Vampire restoring HP on melee kills.
Sweet Tooth
Sweet tooth is a simple but effective perk. With it equipped, you’ll get 30% more health from red sugar crystals at max rank. At max rank, grabbing red sugar will also give the player a 20% movement speed buff. This is a good addition to the perk as that’s usually when you’ll need the speed buff the most.
Sometimes this speed buff also allows the player to collect red sugar when it would be tactically unsound to do so without it. This perk also leaves more HP for your teammates as it’s common practice for players to share a red sugar vein when there are multiple injured team members on the team. No complaints from us, just a good little perk. For this reason, it lands in the B tier of our Deep Rock Galactic perk tier list.
Thorns
Thorns is another simple but useful perk. Melee attacks on you will deal 24 melee damage back at your attacker at max rank. This low amount of damage is enough to instakill swarmers and naedocyte jellies. In short, this is a perk used to clean very small enemies off you.
There is a hidden quirk that limits the power of this perk, however. It can only deal damage once every 0.75 seconds. As such it will not be able to save you if you’re taking damage from several swarmers simultaneously. Its best quality is that getting rid of swarmers lets you better focus on tasks or enemies of greater importance.
Instead of wasting time and ammo just to deal with one or two annoying swarmers that trickle in from time to time, you can now freely focus on the fight at hand. As such this perk greatly benefits single target-focused loadouts, and the Scout class especially. Thorns is a decent perk.

Thorns instakilling a swarmer.
Unstoppable
The unstoppable perk grants a 50% reduction to environmental slowdown effects found in the caves of Hoxxes at max rank. Or so it says. This perk does make environmental effects less harsh, but its value is very inconsistent at that.
For instance, it will make you less affected by blizzards and sandstorms but the effect is so minimal We needed mods that track player speed to notice the difference (2.4 m/s without the perk and 2.7m/s with it). On the other hand, it allows the player to sprint over the loose snow in the Glacial strata, something you can’t do without the perk.
This means that the slowdown from snow can be almost entirely ignored. (again, through mods, there is a slowdown present but it’s too little to be noticed). It will also help with various goo patches or electro-crystal slowdowns. However, the best thing about the perk is that it affects slowdowns caused by enemies.
Slowdowns such as Glyphid Slasher, Naedocyte, and Web Spitter attacks. It also works against goo bomber patches. In short, while there is a bit of inconsistency with the perk, it is able to provide value in a wide variety of scenarios, and as such it is worth consideration if there’s free space left for passive perks on a loadout.
Additionally, it makes carrying heavy objects a bit faster, but as these objects are best moved by throwing them, this is just a small bonus in our eyes.
C Tier – Situational Perks
These are perks that in certain situations or loadouts can produce great results but are usually outcompeted by perks that can provide value more consistently.
Hover Boots
When activated hover boots will keep a dwarf suspended in mid-air for 3.5 seconds at max rank. In most cases, this perk is simply used to avoid fall damage. Some players also use it to aid their combat mobility by jumping from high enough places as a means of kiting the swarm.
Scouts frequently use them to help them mine minerals or dig a hole in the wall in places where even their grappling hook can’t take them. New players and Scouts in training can greatly benefit from having this perk equipped. However, with experience, players learn DRG’s physics system as well as good positioning and the value of this perk starts dropping rapidly.
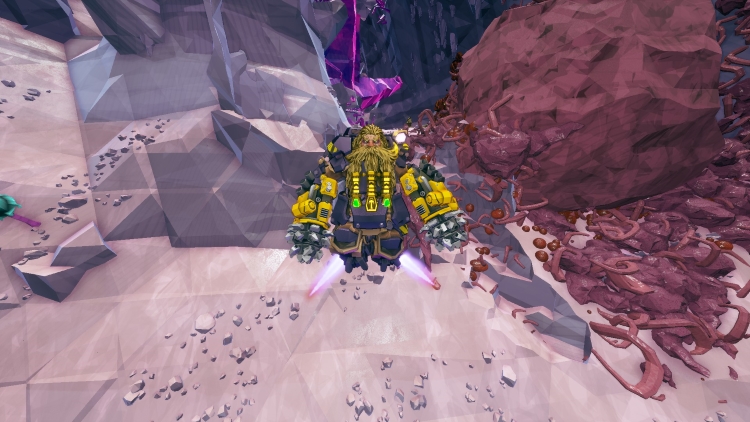
Driller using Hover Boots.
Fall damage is the number one killer of both green and graybeards alike so this perk can come in handy from time to time..especially when fighting enemies that can fling dwarves around. However, it can often take a long period of time (spanning several missions even for experienced players) where there’s no use for this perk.
And at that point, it’s just a wasted slot. As such experienced players usually opt for something that can provide value more consistently. This is by no means a bad perk, and in certain situations, it can provide great value but outside of them but its usually outcompeted by the perks in higher tiers.
Heightened Senses
Heightened senses is a perk designed to combat enemies that have the ability to capture the player. Enemies such as Leeches or Grabbers, for instance. Normally, when caught the player’s only hope of survival is to be freed by his teammates (or Bosco). With this perk equipped you can free yourself up to two times at max rank.
Additionally, the perk will display an overlay when an enemy is preparing to capture the player. Unsurprisingly, this perk makes dealing with such enemies significantly easier. With these perks equipped players can brave the darkness without fear of cave leeches, making it great for solo players.
Solo speedrunners or Scout players often take this perk as well so they can stay focused on their objectives. However, this perk’s value starts to drop off significantly with the competency of the team. A team with a good scout doesn’t need to fear leeches, for instance.
An experienced team will always prioritize killing enemies that can capture teammates making them less of an issue in the process. Sometimes, the caves can generate without any enemy types that can grab players (this is true even for leeches sometimes) at which point the perk is practically useless.
And so the story repeats itself where in most cases players will opt to take perks that can provide value more consistently. For this reason, the perk sits in the situational tier of our Deep Rock Galactic perk tier list.

Heightened Senses prompt after being captured.
Friendly
This is a perk that reduces friendly fire damage dealt and received by 50%. Multiple instances of the perk don’t stack, and it doesn’t reduce self-damage. Depending on the competency of your team this perk’s usefulness ranges anywhere from F to S tier.
Unsurprisingly, most players understand that Health and Ammo are two of the most precious resources down on Hoxxes so wasting both in an impromptu deathmatch is considered poor form in the community. As the experience level of the players increases, friendly fire becomes less common.
It should be no surprise that this perk is among the very first ones new players will obtain, exactly when it’s most valuable. Then again, if half of your team consists of nuke engineers (like ours often do, Karl help us) maybe this perk isn’t a bad choice. For these reasons, We’ve placed it in the situational tier of our Deep Rock Galactic tier list.
Deep Pockets
Deep pockets are a convenience perk that lets the player carry +15 more minerals in their pouches at max rank. Very few mineral veins carry more than 55 units worth of minerals. Because of that, the increase in pouch size can save a bit of time by having the player cross less distance in total in the process of acquiring and depositing said minerals.
Despite this, its value greatly depends on a multitude of factors such as mission type, playstyle, class, and so on. Veins that usually carry over the base 40 carrying capacity worth of minerals are most commonly Gold, Morkite, and Nitra.
Morkite is only found on mining expeditions. Sometimes teams forgo Gold mining entirely for the sake of speed/efficiency. Speedrunners only grab just the amount of Nitra they need to get the mission done, for instance. Its value also changes depending on whether or not you’re playing solo or not. Its usefulness also varies greatly depending on the class being played.
Gunners have the lowest mobility so they usually gather the least amount of minerals, usually those in easier-to-reach locations. In short, with this perk beauty is in the eye of the beholder. To some, this is a must-have perk without which they never leave the space rig. Others couldn’t care less about it.

A max rank Deep Pockets perk increases mineral pouch capacity to 55. With the T1C armor mod, this can be further increased to 60.
D Tier – Could Use Some Balancing
This is a heterogeneous group of perks that find common ground in this category by the fact that they could use some adjustments to make them properly competitive with the rest of the perk selection. Some of these perks in the category are simply weak. Others are powerful but can have issues providing value consistently. And others are simply at odds with how the game is played.
Beast Master
This is probably the most contentious perk on this tier because Beast Master is a fan favorite in the community. It’s a perk that lets the player tame one of the basic Grunt variants (Usually a grunt guard for its higher HP value, sometimes a Slasher on missions with the “Regenerative Bugs” modifier).
The tamed bug, always called Steeve, basically acts as bait. This perk will buff his HP, friendly fire damage resistance, and attack power to help him stay alive. Steeve will draw aggro from several bugs, keeping them locked in place and fighting him until either he or the enemy bugs are dead.
Because of this Beast Master can provide great value on lower Hazard levels where enemy bug numbers are lower. In doing so Steeve can reduce pressure on the player during a swarm, something that beginner dwarves greatly appreciate. However, Steeve’s power starts to decline as the mission difficulty increases.
For one there are a lot more bugs so his aggro can only do so much. The great number and variety, as well as the increased damage enemy bugs now deal, means Steeve doesn’t have as much staying power as before. However, the biggest problem with Beast Master is its inconsistency.
Steeve has a mind of his own and he will usually blindly charge enemies that enter his aggro range. This can sometimes be the high-value bug that demands immediate attention. Other times it could be the 3 grunts next to it. At worst it could be a pack of Glyphid Exploders that will instakill Steeve 5 seconds after he has been tamed.
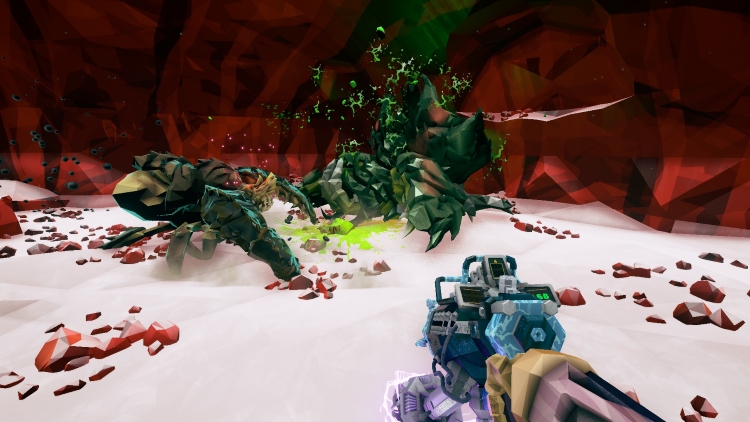
Steeve soloes a Glyphyd Opressor.
As mentioned previously, Steeve will keep enemies locked down in place..but this also means that he won’t move once he is in combat. This is a problem as combat in DRG is a dynamic affair, so it’s a common sight to have Steeve duke it out with several grunts while his owner is quite literally fighting for his life on the other side of the cave system.
Steeve also has no way of dealing with flying enemies. As yet another AI entity that can freely move around the player, Steeve can sometimes contribute to the chaos in a negative way. He can get in the way of doing objectives, block sightlines, run into the fire of dwarven guns, and accidentally keep you from performing some common interactions (The interact key can be used to pet steeve as well as interact with the environment).
Because of this annoyance, some players don’t allow Steeve in their lobbies. Despite all this, some players still bring Beast Master with them for the companionship of a Steeve alone. The absolute worst thing about this perk is that bugs aren’t allowed on the Space Rig. For this reason, surviving Steeves must be left behind on the planet.
A dwarven heart might be made of rock, but much like stone, it can be broken. For these reasons, Beast Master ended up in the D tier of our Deep Rock Galactic perk tier list.
See You in Hell
See you in Hell is an activatable perk that lets downed players create a pulse that deals heavy damage and high fear to the enemies around them. The purpose of this perk is to clean bugs off you so your teammates can have an easier time reviving you. In that capacity, the perk can be useful.
However, the bugs that group around fallen dwarves don’t present a danger to the rest of the team so it’s best not to carelessly explode them until the time is right. The main disadvantage of this perk is simply its opportunity cost as it competes with powerful perks such as Dash and Iron will and even Field Medics instant revive.
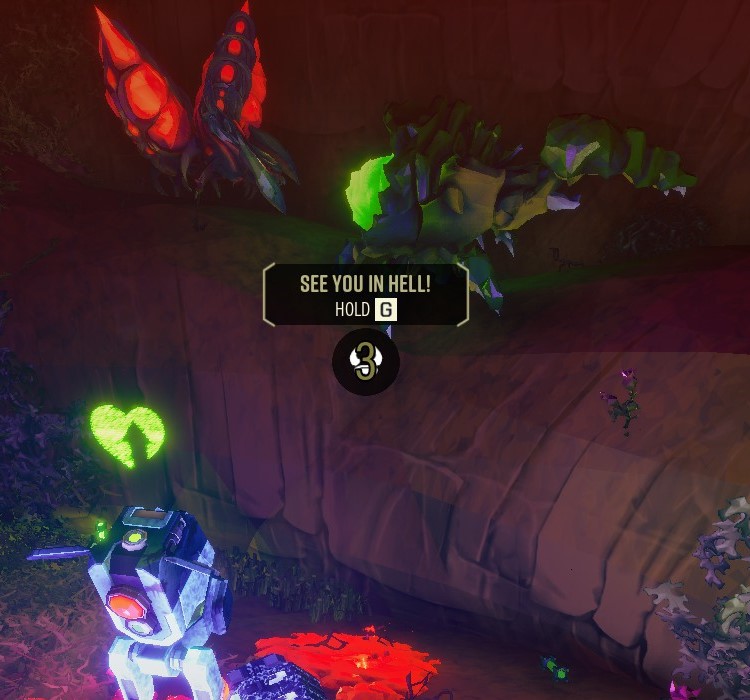
The SYIH prompt that shows up after the player has been downed.
This perk’s passive increases your melee damage by 20 for 1.5 seconds after being struck with a melee attack. This buff is strong enough that the player can one-shot a basic grunt with a pickaxe to the head. However, Deep Rock Galactic isn’t a melee-focused game so the value provided by this has never been particularly great even with the Vampire perk.
All in all, this is an unimpressive perk usually used by beginners before moving on to better perks. As a result, this perk lands in the D tier of our Deep Rock Galactic tier list.
Berserker
Berserker is an activatable perk that greatly increases the cooldown of the pickaxe power attack for 10 seconds. These rapid power attacks can be used to eliminate a large HP target such as a Glypid Oppressor, and in doing so save some ammo in the process. Berserker can be used to quickly carve through durable terrain if the need to do so arises.
Combined with the Vampire perk, and some careful maneuvering, it can be used to regenerate quite a bit of Health. Berserker’s main disadvantage is its long cooldown for what it offers at 4 minutes at maximum rank. Berserker is a powerful perk but its long recharge time really holds it back from providing good value consistently.
Because of this cooldown, there’s a tendency among players to keep this perk in reserve while waiting for an opportunity to get maximum value out of it. Funnily enough, because of that, this creates a scenario where the perk goes unused for the entirety of the mission sometimes.
Despite its power and coolness factor, it lands in the D tier of our Deep Rock Galactic tier list. It really could use a reduction to its lengthy cooldown.
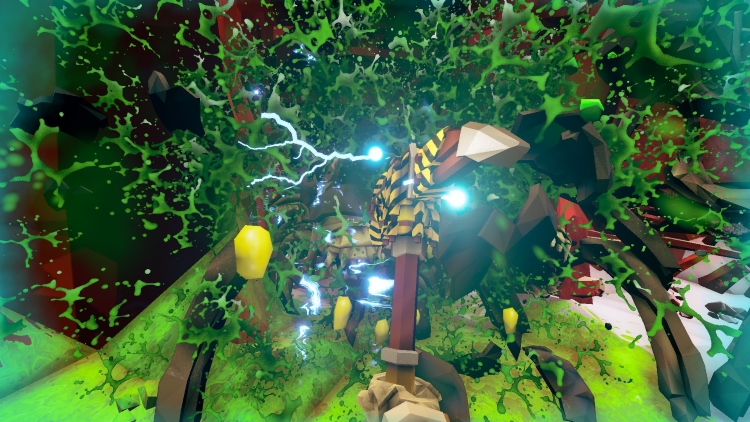
Berserker in action.
Elemental Insulation
Elemental insulation is a perk that reduces elemental damage taken by 30% at max rank. Those would be Poison, Radiation, Fire, Ice, and Electricity damage. It also reduces effects that would Freeze/Ignite the player. It does not reduce melee, kinetic, explosive, or lithophage infections.
The perk also reduces elemental damage dealt by enemies. Honestly, that would pretty much be Praetorian elemental spit and radiation AoE attacks as well as clouds of poison left behind dead Praetorians/Opressors. It will reduce the weak poison DoT from a Glyphid acid spitter but not the actual kinetic damage of its projectile.
It will reduce a part of the Ice Goo bomber’s attack since it’s been recently changed to deal Cold. Honestly, this is an unimpressive perk. Enviromental elemental effects aren’t that prevalent outside of maybe the Magma core or Fungus bogs biome. The overwhelming majority of enemies don’t deal any elemental damage making this perk mostly an anti-praeorian measure.
Melee bugs deal melee damage fittingly. Ranged enemies mostly deal kinetic damage (Menace, Mactera, Web Spitter). Trijaws and Goo Bombers deal explosive damage. Shellback and Spitballer projectiles are a mix of poison and explosive and are best avoided. The Dreadnought Lacerator is the only enemy with a pure fire-based attack. Some dreadnought attacks are a mix of fire and explosive, but you’re still better of dodging. Simply put, it can provide bits of value here and there, but there are better choices out there.
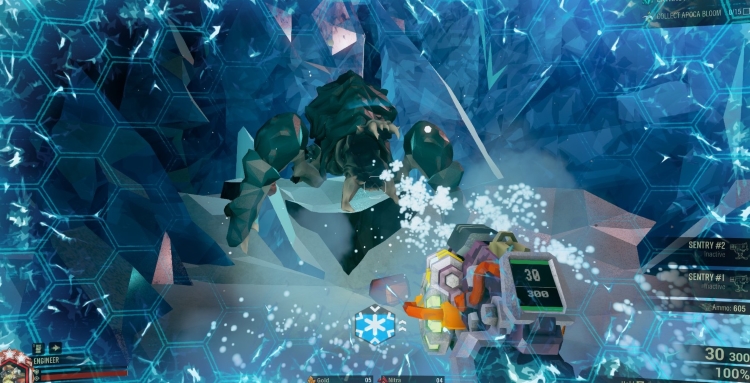
With the E.I. perk the frost Praetorian breath attack isn’t strong enough to break through full shields.
Second Wind
Second wind is a perk that increases sprint speed by 12% after running for 4 seconds at max rank. To be blunt, this is an out-of-combat mobility boost perk. It’s able to provide value when the player needs to cover a large distance. The sprint speed buff, while nothing special on its own, is passively up for a decent time as sprinting is the default form of movement through the caves of Hoxxes anyway.
With this perk, the player becomes just a bit more efficient. It’s quite lenient when it comes to maintaining the buff. It will not deactivate while jumping, hitting obstacles, and mantling as long as momentum is maintained (and the run key is held while in contact with the ground). This means it works quite well even on uneven terrain.
However, firing weapons, even while in mid-air will deactivate the buff. In combat, this perk provides little value (outside of running away) because the way players move around when dodging attacks or kiting bugs won’t activate the perk. This isn’t a bad perk by any means, but it isn’t good either. It’s simply outcompeted by the much more powerful choices in the higher tiers. Its low combat utility makes it further unappealing to some people. Honestly, We wish its speed buff would slowly ramp up while sprinting.
Strong Arm
Strong arm is a simple utility perk that lets the player throw flares and heavy objects further. By 50% and 20% at max rank respectively. There’s not much We can add honestly: the perk does exactly what it says on the tin. Extra flare throwing distance is quite nice honestly, especially when used to check the ceiling for leeches but outside of personal preference it’s hard to recommend this perk over so many others.
Shield Link
Shield link is a perk that when activated buffs and regenerates a friendly player’s shields. Despite what the perk says, it actually just gives your teammate an Overshield that can take 60 damage before collapsing. This Overshield doesn’t regenerate, is unaffected by shield mods, and will disappear after 30 seconds (at max rank).
Additionally, the perk will boost shield recharge speed by 50% if standing within 4 meters next to another player. This perk can’t be used on yourself. To be honest, giving teammates 60 extra temporary shields isn’t a bad way to help someone stay alive. Especially when playing with less experienced (or just heavily injured) dwarves.
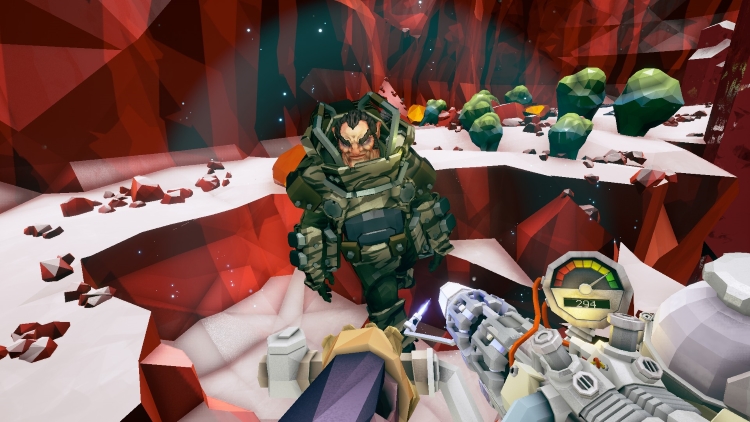
The faint glow around the Gunner is the Shield Link in action.
This perk’s main problem is the method by which the overshields are deployed. That being going up to your teammate and pressing the interact key. This means having to put yourself in the same lackluster situation your friend is in to give them the shields, or preemptively buffing them and hoping the shields provide some use before they deactivate.
This perk would be decent if you could just point at the player you want to buff and give them the shield from a distance, but as it stands it’s an unimpressive activatable. It’s the only perk that lets you directly give a buff to your teammates so people that enjoy playing a more supportive role still bring it with them sometimes. All in all, it ends up in the D tier of our Deep Rock Galactic tier list.
Veteran Depositor
Veteran Depositor increases depositing speed by 50% at max rank. Additionally, it grants 30% damage resistance when at 7m or closer to a deposit point or the mule. This is yet another perk that suffers from value proposition issues. It’s interesting because its value is reduced by the fact players can use animation canceling to deposit at far greater speeds than normal.
However, this perk also makes animation canceling even faster when it’s equipped. As for the Damage reduction, it’s less useful than it sounds. It can provide some value during point hold on defense missions where movement isn’t possible.
Deep Rock Galactic is a game where dodging, kiting, and proper movement are the best ways to stay alive in combat. Even when stacking damage reduction sources, not getting hit is still the best course of action. Once again, this is a perk that`s outcompeted by better choices.
F Tier – It’s a Bug Thing
This tier (barely) contains (the power of) the “it’s a bug thing perk”.
It’s a Bug Thing
It’s a bug thing is a joke perk basically. There really was no point in putting it into a tier. This perk represents the final step on the path to that which all dwarven warriors strive to achieve …to kill a foe just by looking at it.
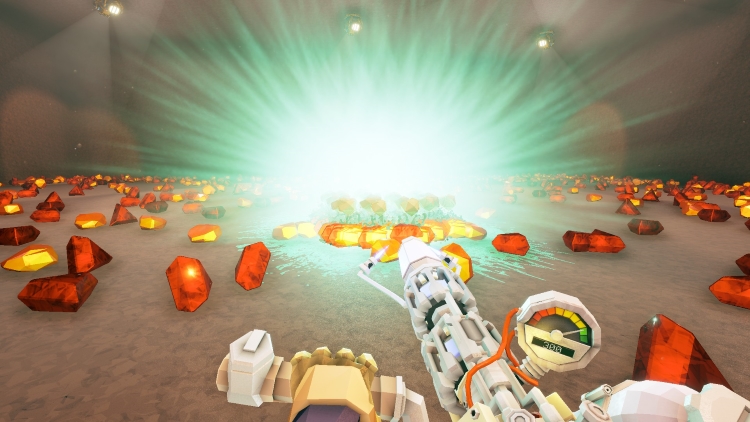
It’s a bug thing exploding 100 Lootbugs and our CPU.
If by a foe you mean a small, barely mobile grub-like creature that makes adorable sounds, possesses no form of attack or defense, and simply wishes to coexist peacefully…then it’s a bug thing has you covered. With this perk equipped every lootbug within 5 meters of you (at max rank) will instantly explode for no reason.
It should be no surprise that a perk as powerful as this is located in the final tier of the perk terminal. This perk is basically the IQ Bell Curve meme expressed in Deep Rock Galactic as those actually using it are people who have no clue what they’re doing and veterans of the game that are far beyond ever caring whether something is optimal or not.
Conclusion
Deep Rock Galactic’s perk system is quite strange in terms of balancing. On one end some perks are so overwhelmingly useful that not taking them makes a build weaker for it. On the other end of the spectrum are perks that are so niche they wouldn’t be picked outside of personal preference.
If there’s one system that could use some balancing in Deep Rock Galactic, it would be this one. We hope this Deep Rock Galactic tier list was an entertaining read. Rock and Stone, miner!
Image Credit: Ghost Ship Games.
