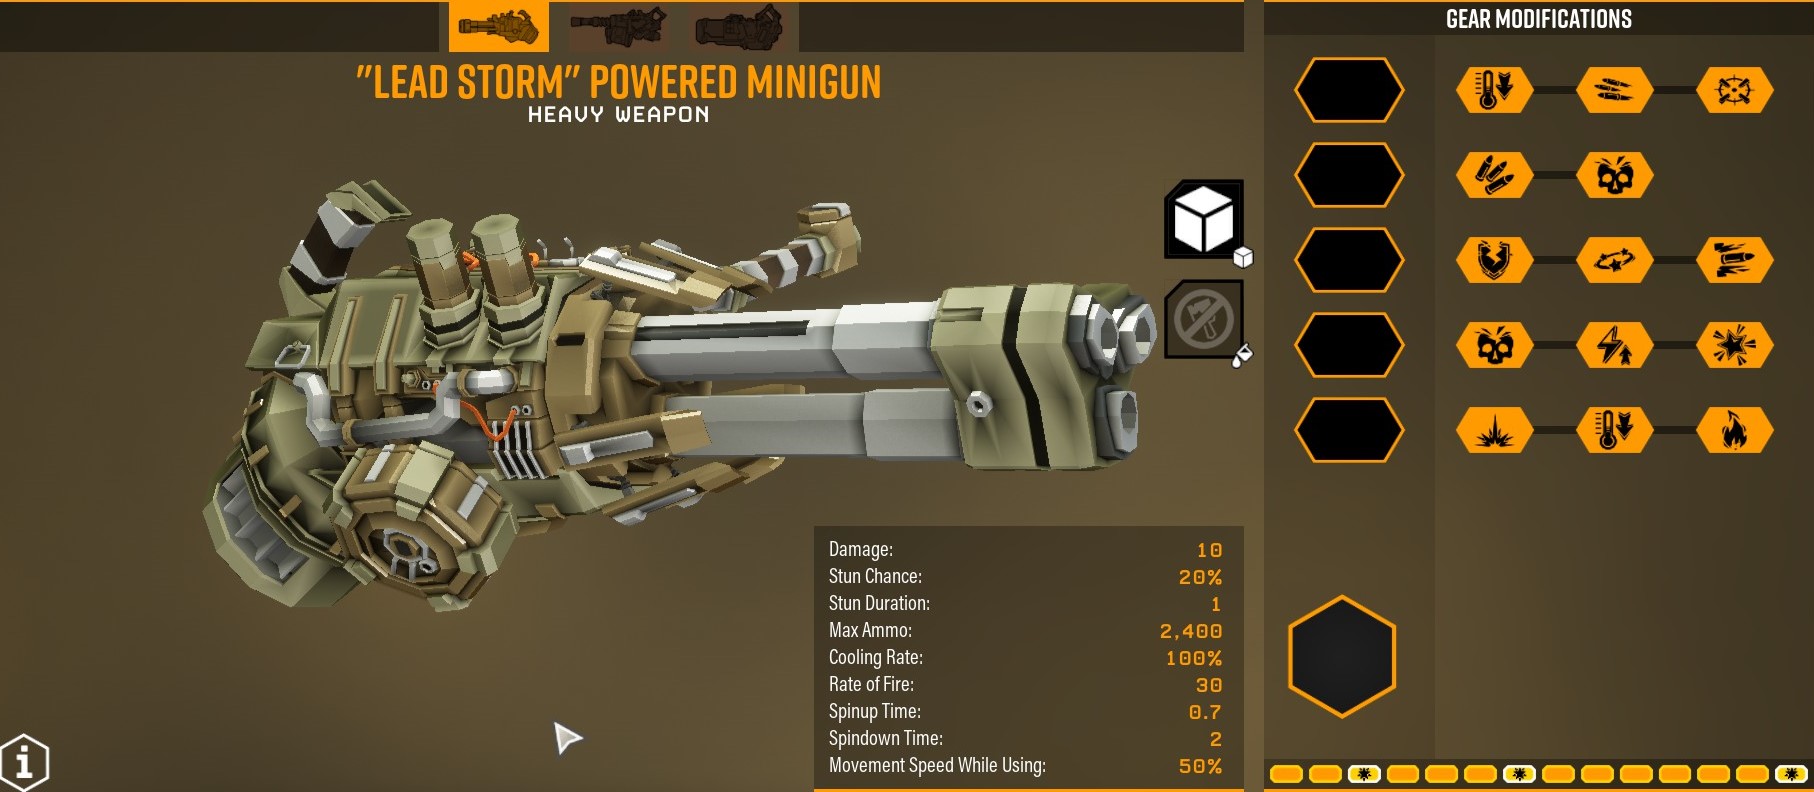
In this Deep Rock Galactic Minigun Build guide, we’ll be covering how to build and optimize the Gunner’s most iconic primary weapon. As with all weapons in Deep Rock Galactic, the Minigun comes with its own comprehensive upgrade tree.
No easy choice with 14 different mods to choose from. As such we’ll be going over their strengths, weaknesses, and overall value they bring to a minigun build. Lastly, this Minigun Build guide is geared toward vanilla difficulties in Deep Rock Galactic, and not towards moded gameplay. This article is up to date as of Season 5.
Deep Rock Galactic Minigun Build: The Basics
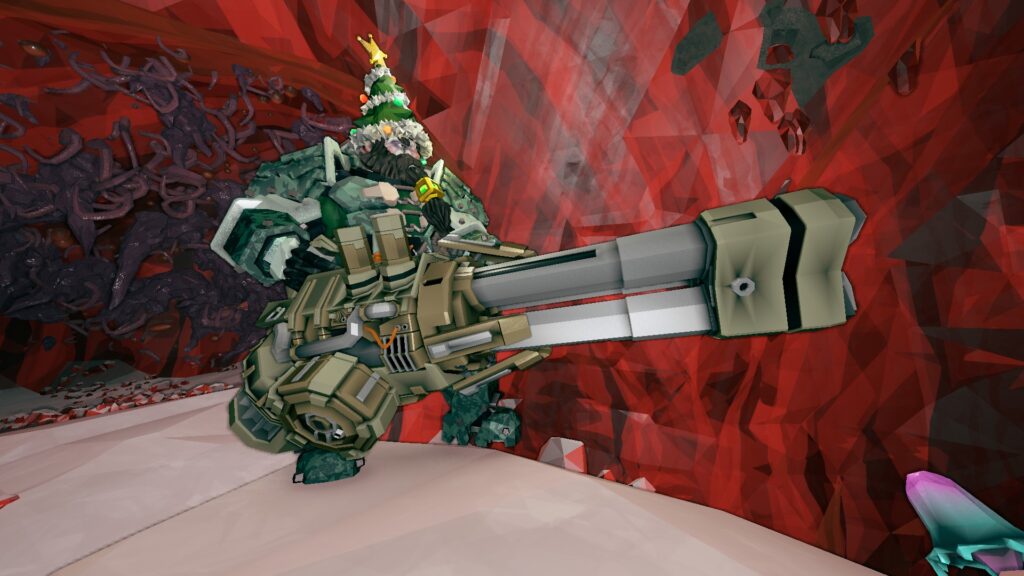
First things first. The “Leadstorm” powered minigun is Gunner’s premiere single target damage primary. Unsurprisingly, overclocks make it hard to generalize in DRG, so there will always be exceptions. As such, overclocks can turn any of Gunner’s primaries into capable single-target weapons, but the minigun’s good accuracy and easy-to-use hitscan nature make it uniquely well suited for this role.
The main thing anyone will notice about the Leadstorm is that it doesn’t want you to stop firing it. In fact, the devs have put several mechanics in place specifically to discourage players from making prolonged pauses after the weapon has begun firing.
Spin-up Time
The first of these is a 0.7-second spin-up time to get its barrel assembly rotating at maximum speed; before this moment, it’s unable to fire. Once the trigger is released, it takes it 2 seconds to fully spin down; giving the player some time to switch targets.
Stabilization

The second is its strange reverse spread. The Leadstorm starts with an absurdly large spread that makes it difficult to hit anything that’s not right in front of the player. However, this spread is reduced with every bullet fired until a certain base spread value is reached, at which point the gun is at maximum accuracy. This process of getting more accurate as the gun fires is referred to in-game as “stabilization”. Accuracy decays over time when the gun is not firing.
Large Ammo Pool

To no one’s surprise, the final one is its large ammo pool and the absence of any form of reload mechanic. Par for the course for the Gunner, honestly. He is a sustained DPS class, after all, and this is achieved through his primaries having both massive ammo pools and long uptimes before needing to reload/cool down.
As you can imagine, having a gun that encourages its operators to shoot it for extended periods of time, and no reloading feature, presents a challenge when it comes to game balance. The way the devs solved it without making the minigun underpowered was via a heat mechanic.
Heat Mechanics
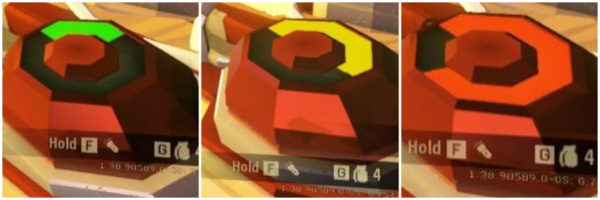
For every second the trigger is held, the gun gains 1 heat, up to a maximum of 9.5. This means that after firing the gun for 9.5 seconds, it will overheat.
It loses heat at a rate of 1.5 while not firing after a delay of 0.3 seconds, so it takes it just above 6.5 seconds to fully cool down when near maximum heat. If the gun overheats, it will jam, and you’ll need to wait 10 seconds before you can resume firing.
How to Build the Leadstorm Minigun?
Tier 1: Accuracy vs Fire Rate
![]()
Magnetic Refrigeration
Magnetic Refrigeration reduces the delay before the gun starts to cool by -0.15 (from 0.3 sec to 0.15 sec) and it increases the rate at which it cools by +1.5 (from 1.5 heat/sec to 3 heat/sec). With this mod equipped, it now takes the minigun a bit under 3.5 seconds to fully cool from near-maximum heat.
This is an interesting one because it’s considered the least valuable pick in the first tier. As you can tell, this isn’t for a lack of power. In fact, the boon it grants is quite fine. However, it’s facing stiff competition from the other two choices in this tier, and it is further undermined by the choices in the fifth tier, all of whom modify the way the minigun interacts with its heat mechanic.
It is sometimes paired with the “Burning Hell” Overclock as a way of mitigating its increased heat generation.
![]()
Improved Motor
Improved Motor will provide a moderate (+4) boost to your rate of fire. While the fire rate increase is nothing special on its own, being able to send more bullets flying in a given period of time provides more benefits to the minigun than simply killing bugs faster.
As mentioned previously, the weapon becomes more accurate with every bullet fired, so as a bonus having a faster fire rate allows you to reach maximum stability faster (accuracy also deteriorates at a set rate, so firing faster means you’re affected less by this mechanic). Lastly, the Leadstorm accumulates heat at a set rate, so Improved Motor will allow you to fire more bullets before you overheat.
![]()
Improved Platform Stability
Improved Platform Stability is the simplest mod to explain on this tier. It reduces the base spread of the gun to 25% of its base value.
In short, when at maximum stabilization, the minigun becomes extremely accurate, which in turn enables to it engage enemies at sometimes pretty absurd distances, or rapidly drill into weakpoints at medium range. It’s not as “laser-accurate” as the community would say, but it’s close enough.
Conclusions for T1
It’s a choice Between Improved Motor Or Improved Platform Stability.
As mentioned previously, Magnetic Refrigeration is good at what it does, but it’s competing with choices in T5 as well as T1, making it the least valuable pick in this tier.
Fire rate vs. Accuracy is a difficult one to answer. In close range, the fire rate is easily more valuable, but as the range of engagement increases, accuracy starts to win out. In our testing, somewhere around 15 meters is where the lines start to get blurred, as the minigun with IM begins missing weakpoints and hits flesh/armor instead.
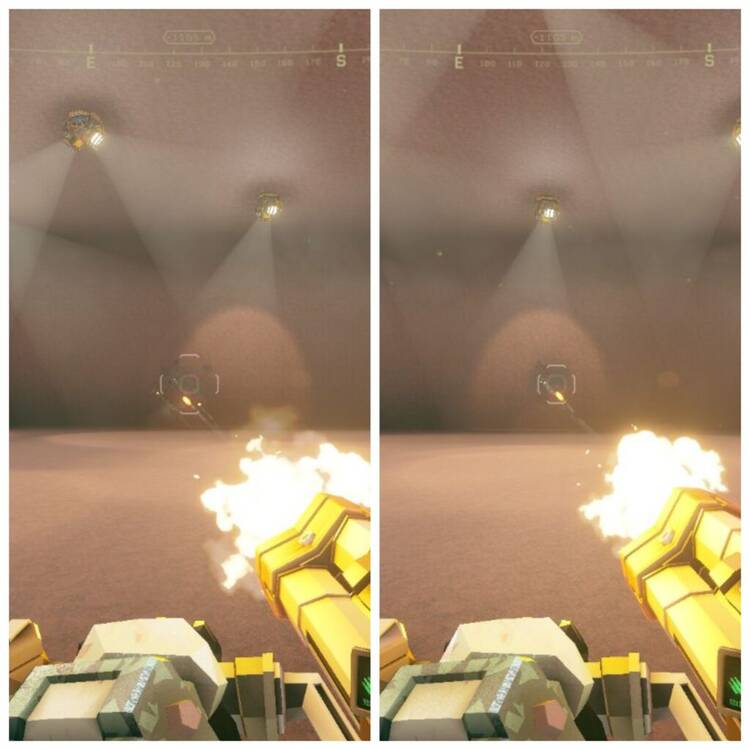
Improved Motor Accuracy (left) vs. Improved Platform Stability Accuracy (right) at max stabilization
Further complicating matters are the caves of Hoxxes IV themselves and the missions to be carried out within them. IM is a good choice in dreadnought hunts. Mining expeditions, especially short ones, often produce tight claustrophobic caves which also benefit from more fire rate. Biomes like crystalline caverns often produce compact cave designs in which IM is often the better choice.
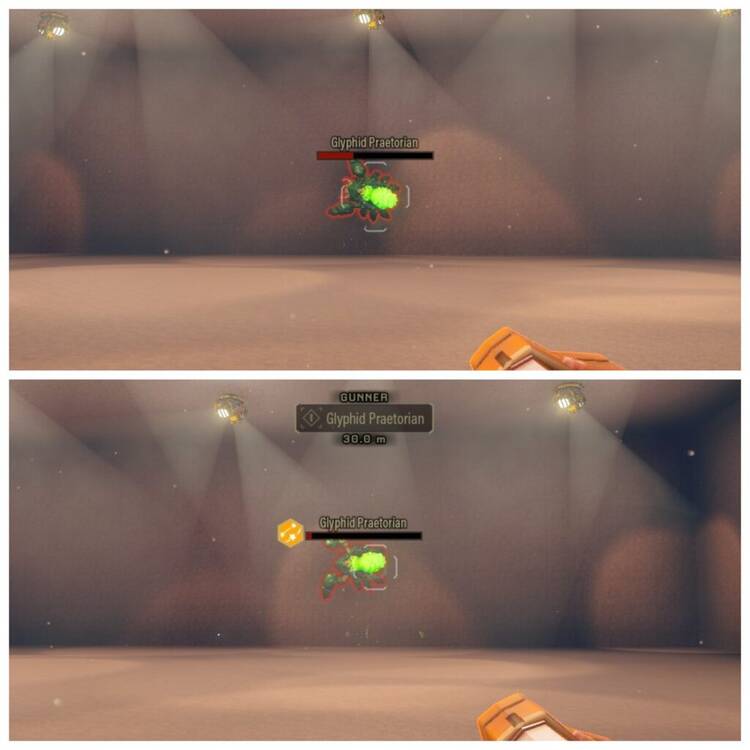
IM (up) vs. IPS (down) at dealing with a Praetorian at 30m
On the other hand, longer missions with more complex cave systems can easily produce large cave designs where minigun builds can benefit more from improved accuracy. On-site refining and salvage missions in particular fit the bill. Biomes like Sandblasted Corridors have a penchant for generating large open caves.
Improved accuracy is also preferred on missions with the Mactera Plague Warning since it can more easily hit their weakpoints. In the end, one is not inherently superior to the other, and you’ll have to decide for yourself which one fits your needs better on the minigun.
That being said, Accuracy is the more commonly used option, especially among graybeards, where it is used to round out the weapon. With it, the minigun can engage all types of targets at just about any range.
Tier 2: Total Damage vs. Direct Damage (In Theory)
![]()
This tier is supposed to present players with an interesting choice. Do you take Oversized Drum, and carry more damage in total at the expense of direct firepower, or do you go for High Velocity Rounds, where the inverse is true? An interesting choice…in theory at least.
Taking extra ammo leaves you with 15,000 damage in total. Going the damage route leaves you with 14,400 damage…but also gives you a 20% boost to your damage output. With HVR, you not only have a similar amount of total damage as OD, but you can deal more damage quickly. There’s not much real choice here, on non-OC minigun builds, and even for the majority of OCs, damage is the superior pick.
The best use-case for taking extra ammo would be the Burning Hell OC, where having more ammo means you can sustain the heat cone in front of the minigun for longer, as well as trigger Aggressive Venting more often.
Tier 3: Fancy Bullets
![]()
Hardened Rounds
Hardened Rounds is another simple one. +200% to armor breaking (More damage against armor HP. Higher chance to break armor on chance-based armor. As with all armor break mods, that work at least, the final bullet that breaks through armor doesn’t have its damage reduced…not that this matters on a low damage/high fire rate weapon like the minigun).
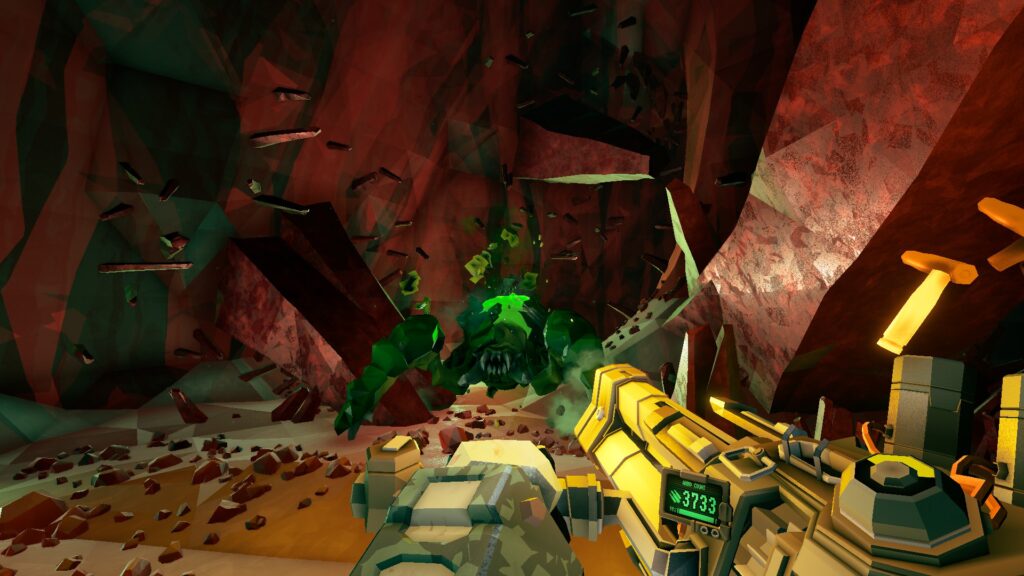
It helps the gun deal with armored targets. Notably: Shellbacks and their young, Praetorian plates(usually to expose the weakpoint when walking up to one is not an option), Mactera Brundles, and Glyphid Stingtails.
![]()
Improved Stun
Improved Stun is the least valuable option in this tier. Adds +20% Stun chance (from 20% to 40%) and +2sec Stun duration (from 1 sec to 3 sec). For starters, it’s limited by the weapon It’s attached to, as the minigun can only affect a single target with it at a time. It provides little value against small targets like grunts, who will die quickly to the gun.
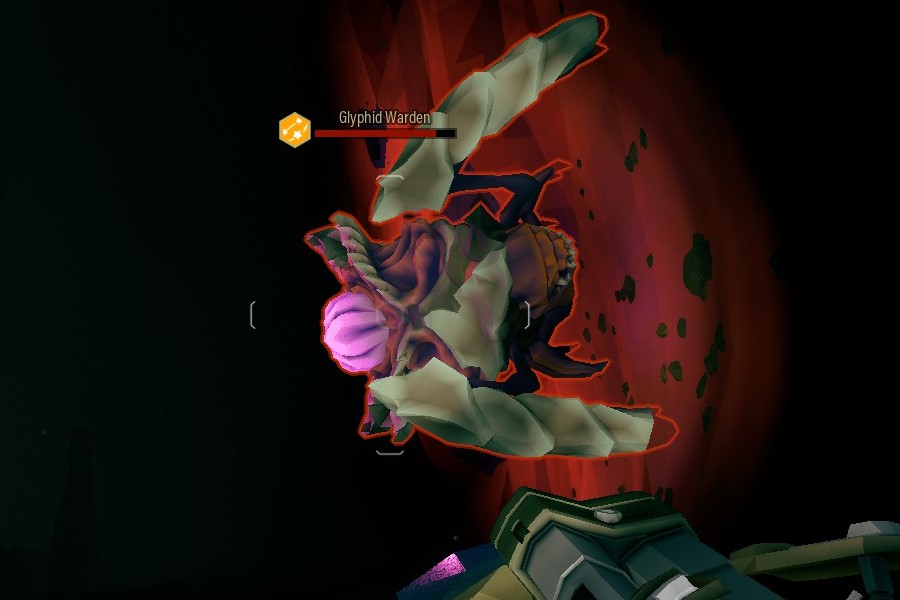
It’s useful for stopping grunt guards in their tracks, just be aware that after the stun wears off it gains stun immunity for a brief period as an anti-stunlock mechanic. It’s best against medium-sized enemies like wardens and menaces, where it allows the minigun to easily drill into their weakpoints.
Praetorians are also susceptible to stuns, but they have 20% stun resistance (duration of stun is reduced by 20%), and like the guards, they also gain immunity once the stun has passed. Some enemies are stun-immune. These include: Shellbacks, Grabbers, Bulks, Oppressors, and Dreadnoughts. All in all, unimpressive on a non OC minigun.
![]()
Blowthrough Rounds
With Blowthrough rounds, bullets can now over-penetrate enemies and hit one additional target that finds itself in their path. Unsurprisingly, being able to hit two enemies with one bullet makes this the preferred pick in this tier, and a long-running mainstay in most minigun builds in deep rock galactic.
You won`t always be able to capitalize on this one as it’s very terrain-dependent, but when you are it provides great value.

Conclusions for T3
We’re going to be honest; it’s most likely Blowthrough Rounds. The value it can potentially bring is quite high, and when used well it pushes the minigun outside pure single-target territory and more into a generalist (Weapons that can deal with swarms of weak enemies as well as kill heavy targets) role.
It’s especially good for Gunners that are new to the game, as their default primary and secondary, both being single-target weapons, leave them lacking in trash mob removal. Second place goes to Hardened Rounds. The minigun is nothing special when it comes to dealing with armored targets, so the use of this mod is for builds where the minigun is the only source of single target damage and trashmob removal is offloaded to Gunners secondary.
Penetration or armor break; avoid the stun. Stun is not particularly impressive on standard minigun builds. However, it does find its place in combination with the Burning Hell and Bullet Hell OCs. In the case of the former, the stun can provide some extra safety in close-quarters combat scenarios Burning Hell pushes players into. In the case of the latter, stun can affect multiple enemies, greatly increasing its value (especially in moded difficulties against a large number of bugs).
Tier 4: A Difficult Choice
![]()
Variable Chamber Pressure
With Variable Chamber Pressure, when the gun is at maximum stabilization, it gains a +15% damage buff. Not much to say about this one, as it’s such a straightforward mod. It’s similar to blowthrough rounds in that you aren’t always able to make the most of it, but when you can, it provides great value.
Like all classes, the Gunner needs to stay mobile in combat to survive, so VCP doesn’t have as much uptime as people would like to believe it has, but it’s great in those moments where you can get away with holding the trigger for prolonged periods of time. It also synergizes well with Improved Motor, since it helps the minigun reach maximum stabilization faster.
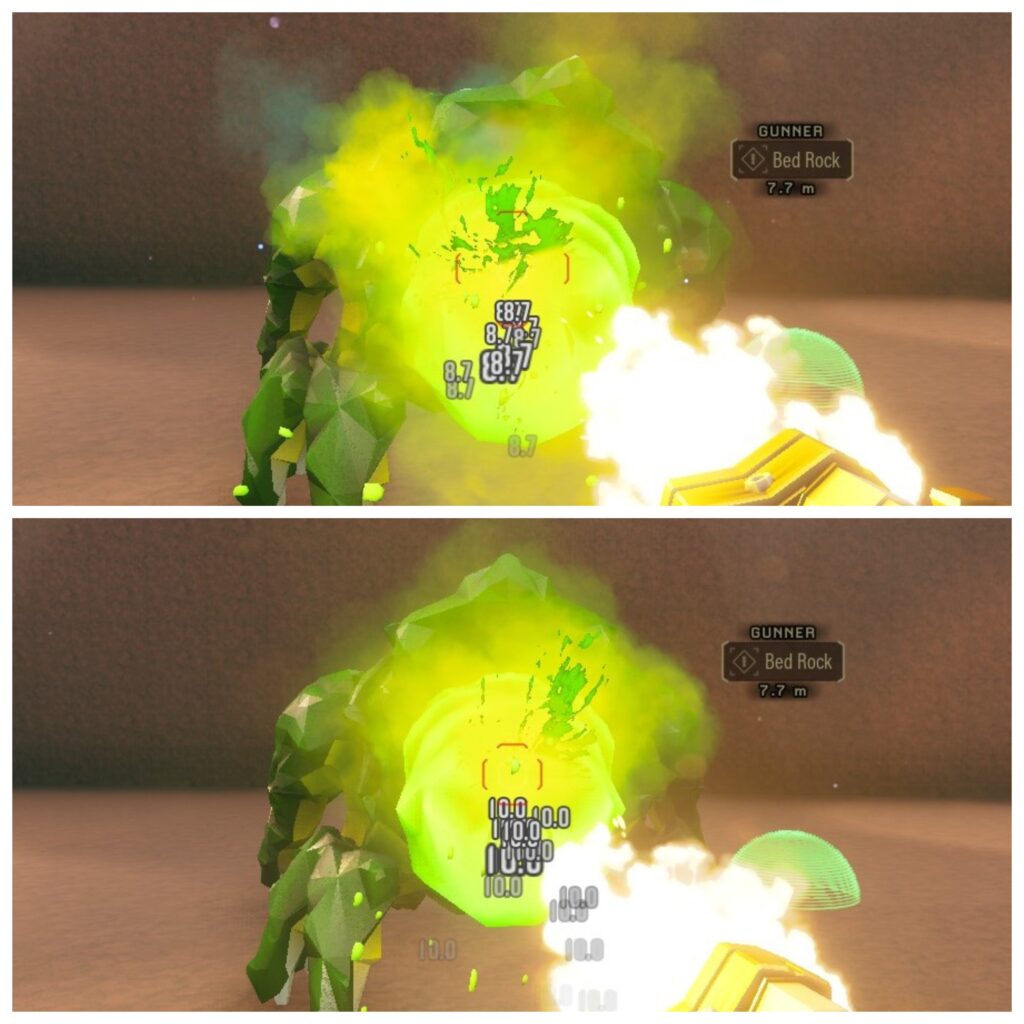
VCP before and after on a haz5, 4-player scaled Praetorian
![]()
Lighter Barrel Assembly
Reduces the time it takes before the minigun can fire by 0.4 secs (from 0.7 sec spin up time to 0.3 sec). It’s a great option. It enables you to react to threats much quicker, and it almost entirely eliminates the need to keep proactively spinning up the weapon.
Not only that, but in doing so it aids combat-mobility since you’re not penalized as much for letting the barrel spool down.
![]()
Magnetic Bearings
MB keeps the barrels spinning for longer after the trigger is released by 1 extra second (from 2sec spin down time to 3sec). It also provides a small hidden benefit. For some reason, firing the minigun after it has fully stabilized prevents it from losing accuracy for 0.5 seconds. With this mod equipped, this duration is increased to 1.25 seconds.
Honestly, we have no idea why, but our testing confirms that this is still true at the time of writing. Much like the mod before it, MB also aids your combat-mobility, since you have more time to maneuver before the minigun spins down/starts losing accuracy.
Conclusions for T4
This is probably the most balanced tier on the Leadstorms upgrade tree. None of these is superior to the other as they all bring something useful to the table.
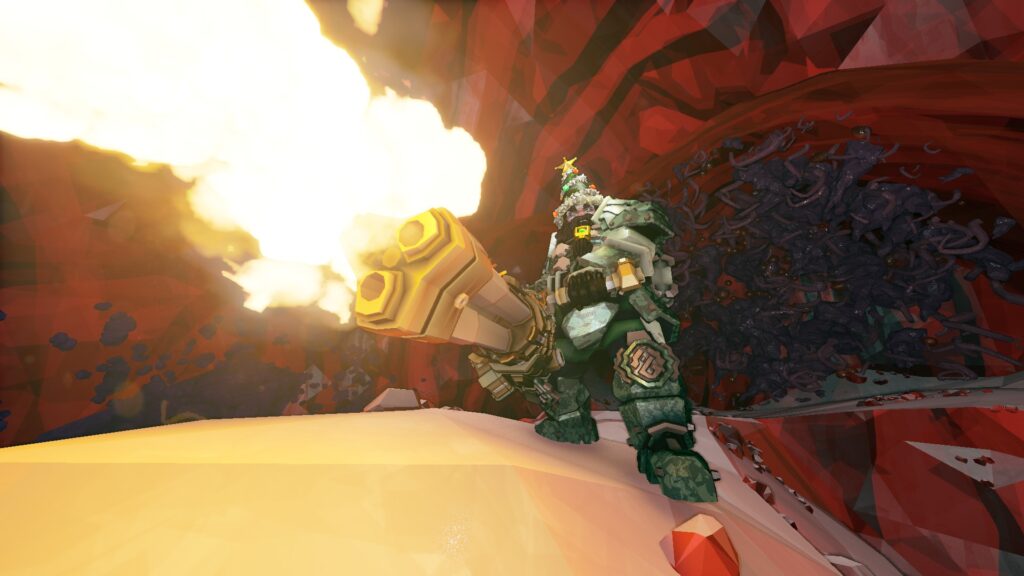
Variable Chamber Pressure will increase your DPS output in those moments where you can shoot for long periods of time. Especially great against heavy targets or on dreadnought hunts. Be careful not to slow yourself down too much. Mobility is key to survival, and sacrificing it in an attempt to keep the minigun firing for as long as possible can get you into trouble.
Lighter Barrel Assembly lets you quickly respond to threats. With it, it’s easier to avoid those situations where the bugs spawn on top of (or get the drop on) you and all you can do is spin barrels while being chopped to bits. It makes it easier to burst fire the weapon by combating spin down with faster spin up.
Magnetic Bearings also make it easier to burst fire, this time by slowing down the spin-down rate, and the ability to maintain accuracy for longer means those bursts will also be more accurate.
This is a choice based on either build or personal preference. All are good, honestly, so don’t worry about picking the wrong one. Ideally, try them all out, and see what works for you. The faster spool-up mod would probably be the most popular choice in the community, especially on the “Burning hell” Overclock.
Tier 5: The Fun Stuff
![]()
Aggressive Venting
Once the Leadstorm overheats, it spreads heat and fear in a 10-meter radius around the Gunner. It spreads 60 heat. This is enough to set fire to all grunt types, swarmers, and all Mactera. Larger enemies like praetorians will not receive enough heat to set them on fire, outside exceptionally rare cases through heat spreading mechanics.
AVs maximum effectiveness extends to 6 meters, after which it steadily weakens to 25% at 10 meters. It’s hard to gauge AVs effectiveness outside 6–7 meters, as it’s heavily dependent on the aforementioned heat spreading. All ignited bugs act as a small source of heat, and can potentially ignite bugs next to them.
Through this, AV can ignite bugs far outside of max effective range, as long as the swarm is large enough. In addition to heat, it also inflicts fear (bugs are forced to choose a random spot and run to it). 1000% base fear chance. Which is enough to scare away any enemy that’s not straight-up immune to fear. Fear-immune enemies are Oppressors, Bulks, and Dreadnoughts.
AV also deals a minimal amount of damage to enemies in its radius, but that’s probably for cosmetic purposes. As an additional bonus; Leadstorms overheat duration is halved (from 10 secs to 5 secs). This way, letting the gun overheat can actually cool it down slightly faster than letting it cool normally (ignore this if you’re running Magnetic Refrigeration), obviously, at the cost of actually being able to fire for a bit.
Aggressive Venting in action
![]()
Cold as the Grave
For each enemy killed, 0.6 heat is subtracted from the gun’s heat value. In short, kill things to shoot for longer. Any kill counts, including Swarmers and Naedocite Jellies.
![]()
Hot Bullets
When the heat meter is red, 50% of the damage done per bullet is added as heat. (That would be 6 heat per bullet with the damage mod, 5 without it on a non-OC minigun)
Interestingly, the heat meter works in a very unusual way. It fills up faster when the gun is cool, but slows down as the gun heats up. The gun still gains heat as normal, and the heat meter will reach the maximum at 9.5 seconds, which is when the gun overheats. Since it takes somewhere around 3.5 seconds(ish) for the heat meter to go into the red, this is where Hot Bullets activate, which would be at around 1/3d of the gun’s actual maximum heat.
Heat by itself does no damage, but once an enemy takes enough heat it is set on fire and takes about 15 Fire damage per second (on average).
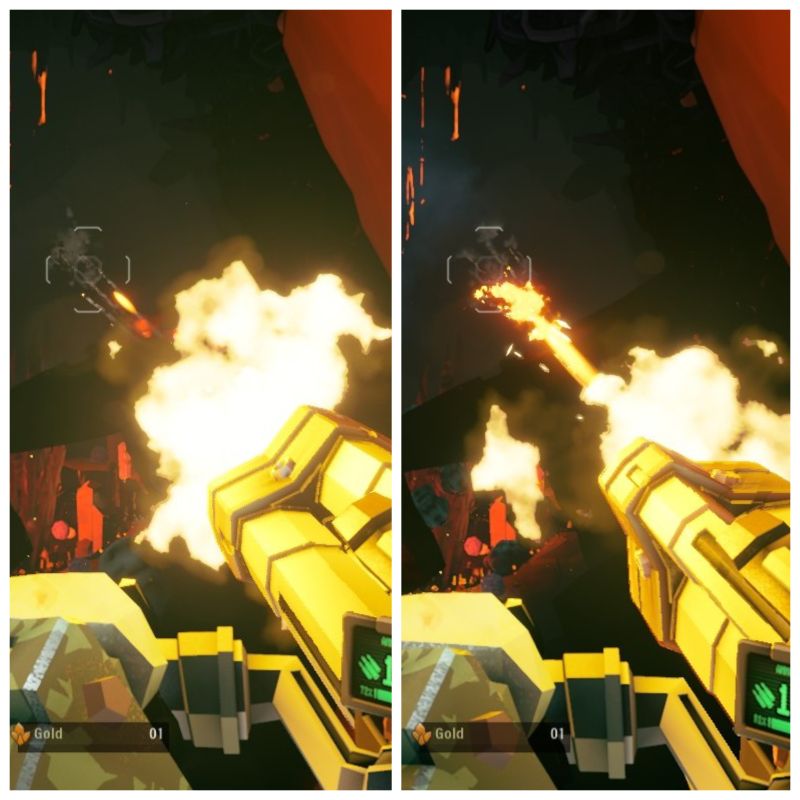
Before and after Hot Bullets activate
Conclusions in T5
This one depends greatly on the minigun’s intended role in a build. Cold as the Grave and Hot Bullets synergize better with standard minigun builds that simply want to shoot at things, and don’t really modify the way you use the gun. CatG can provide great value when used to shoot at smaller targets, in a generalist setup with blowthrough rounds, for instance, but provides little to no benefit when shooting targets with high HP pools.
The limiting factor when using CatG is that you need to fire the gun for a long period of time before it starts to provide value. At this point, AV becomes a consideration and HB has already been active for a while.
HB can deal with big targets a bit better by setting them on fire for a bit of extra DPS. It can also get some extra efficiency by letting weaker enemies (grunt variants and Mactera mostly) burn to death instead of spending extra ammo on them, and in some cases affect more enemies through heat spreading. HB also gives you the ability to set distant enemies on fire, which is great for combating rival tech. Its downside is that you have to shoot the gun for a few seconds before it kicks in.
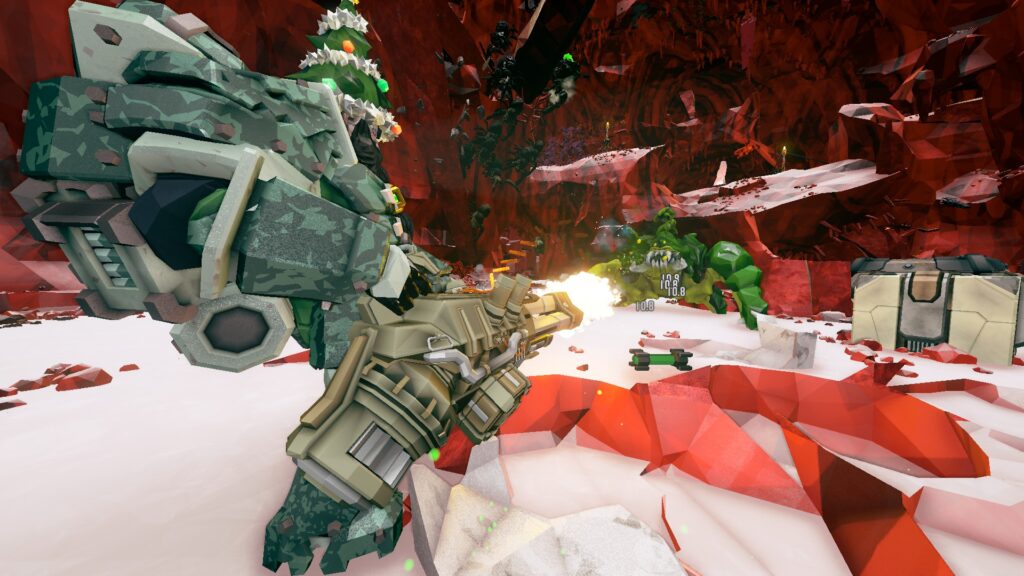
Aggressive Venting is a powerful option and one that can do wonders to keep you safe by afflicting enemies with fear, but is limited by its high activation cost. At a minimum, you’re looking at 9.5 seconds of firing the gun.
We say “at a minimum” because you’ll no doubt be forced to move, stop firing, throw grenades, or perform some other action that’ll make getting to overheat more difficult and require more time and ammo as a result. It could be worth it for the shorter overheating duration, though.
In short, most options are decent. Despite our love for Aggressive Venting, we would probably have to recommend Hot Bullets as being slightly more valuable.
HB doesn’t change the way you operate the minigun and its benefits are gained simply by firing the weapon, making it very easy to use. We would recommend AV to gunners who prefer to stay close to the enemy in combat and can trigger it reliably enough to help it keep them safe. AV does come into its own with the Burning Hell OC.
Just Give Me a Build Already!
If you’re having difficulty deciding for yourself based on this Deep Rock Galactic Minigun build, or just want builds quickly, we’ve provided some down below. However, as you can probably tell, the minigun’s upgrade tree leaves some room for choice, so there is no “One build to rule them all” in its case.
So, treat our builds as suggestions and not the final word on how to build the weapon. They’ll get you through what Hoxxes has to throw at you, but as you grow accustomed to the minigun, feel free to make changes that better suit your needs.
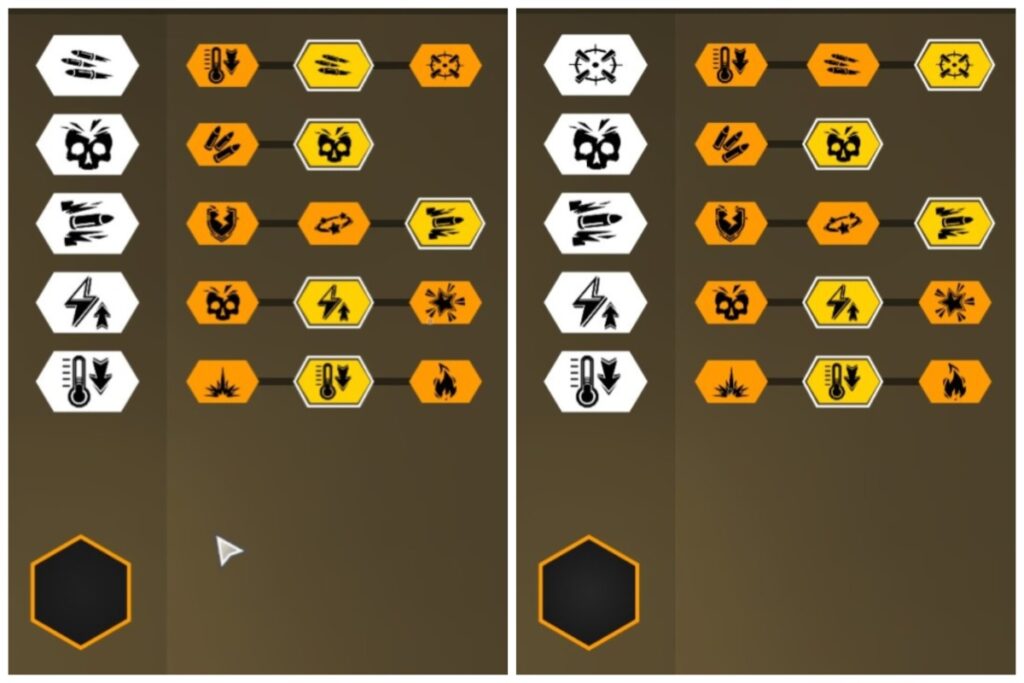
The first configuration (left picture) is a very simple build uniquely geared for players just starting out. It’s quick to begin firing, stabilizes fast, and requires little thought aside from connecting bullets to weakpoints. This alleviates some of the struggles a greenbeard might have while mastering the minigun’s myriad mechanics.
Its high volume of fire coupled with Blowthrough Rounds helps it deal with large swarms of trashmobs (something new Gunners struggle with due to both starting weapons being primarily single target) and heavy targets alike. However, the loss of accuracy means that taking care of long-range priority targets is offloaded to the Gunners secondary.
The second build(right picture) is a much more common configuration in the community that takes Improved Platform Stability to create the perfect all-rounder setup. It’s a generalist build that can engage both swarms of weak bugs, as well as heavy targets, at just about any range. Personally, we would pair it with Hot Bullets, though.
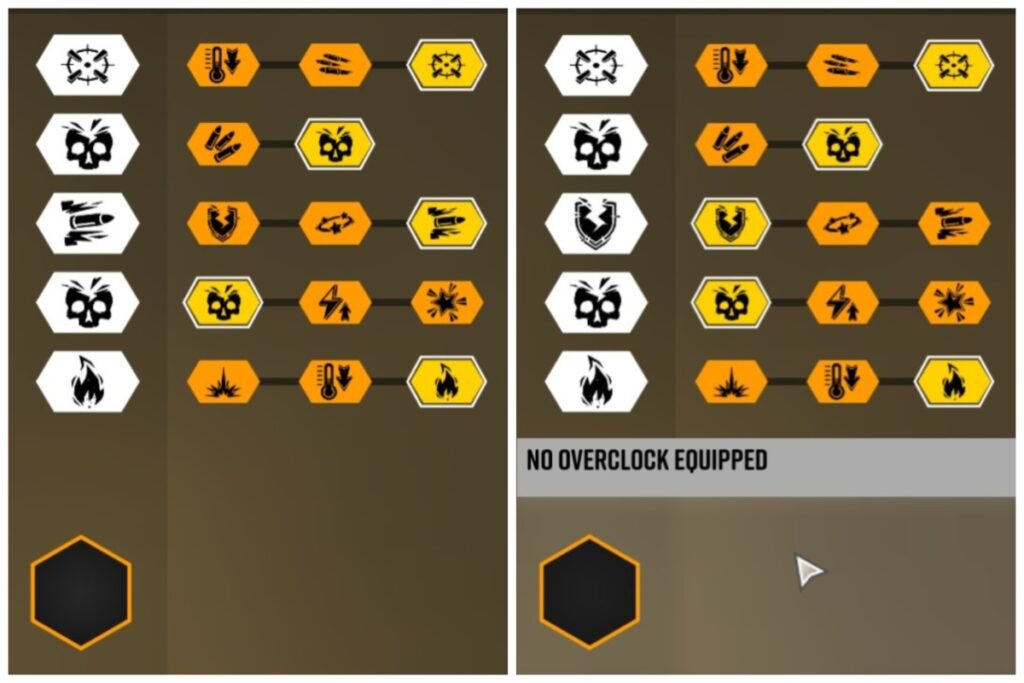
These two are slightly better geared for taking on Heavy/Priority targets. Accuracy is preferred as it lets you deal with priority targets at long range (Menaces, Wardens, Spitballers for instance), or to take out a heavy enemy before it gets close.
The first setup keeps Blowthrough Rounds in Tier 3; behaving as a single-target-focused generalist as a result. As such, it easily slots into most builds.
The second one(right picture), on the other hand, takes Hardened Rounds and exists solely as a single target weapon. In such a setup, your secondary is in charge of killing trashmobs. (These can be a “Magic Bullets” Bulldog revolver, an “Electro-Minelet” BRT, or some flavor of Coil Gun geared for trail spam). Such a build is often brought by more experienced Gunners into high hazard level missions, and even modded difficulties sometimes.
Greybeard Tips & Tricks
Misleading Stats
The minigun’s fire rate and ammo count are misleading. The gun’s fire rate is actually half of what is listed (so 15 at the base, not 30). For every shot fired, 2 ammo is subtracted from the ammo pool and one instance of damage is dealt.
According to the devs on Twitch, the engine has hit registration issues at high fire rates, so it was done this way to sell the players the illusion that they’re operating a minigun
Pre-emptive Spin-up
When not using Lighter Barrel Assembly, it helps to proactively spin up the gun. So if an enemy appears, you can start firing immediately.
“Bunny Hopping”
One important lesson to learn when using just about any of the Gunner’s primaries is how to move properly. The moment you press the trigger, your speed is instantly reduced by 50%. This mobility is restored the moment you let go of the trigger. But this is not true while you’re in the air.
You can run or sprint, jump, and then fire midair while inertia carries you away or towards the bugs. Let go of the trigger before you hit the ground, and you won’t lose speed, then repeat the process. This allows you to keep your movement speed and still fire your weapon. It lets you dodge and relocate to a better position as well.
You won’t be able to maintain your weapon’s full damage output since you’re firing in bursts, but that’s better than the 0 DPS you’d do when running away. We’ve heard this technique referred to as “Bunny hopping” or as a dance a few times. Strange as this may be to say, but the best Gunners dance the best.
Minigun’s “reload” Animation
Spinning the Barrels by pressing the reload key doesn’t actually make it cool faster or make the gun perform better in any way. It just gives you something to do while the bugs eat you alive.
Terrain Damage
Like all the Gunners primaries, the Leadstorm deals a minor amount of damage to the terrain. This has a mostly cosmetic purpose, big guns should make holes in the walls. However, you can use this feature to shoot health crystals off the ceiling. A feature that comes quite in handy thanks to Gunner’s low mobility.
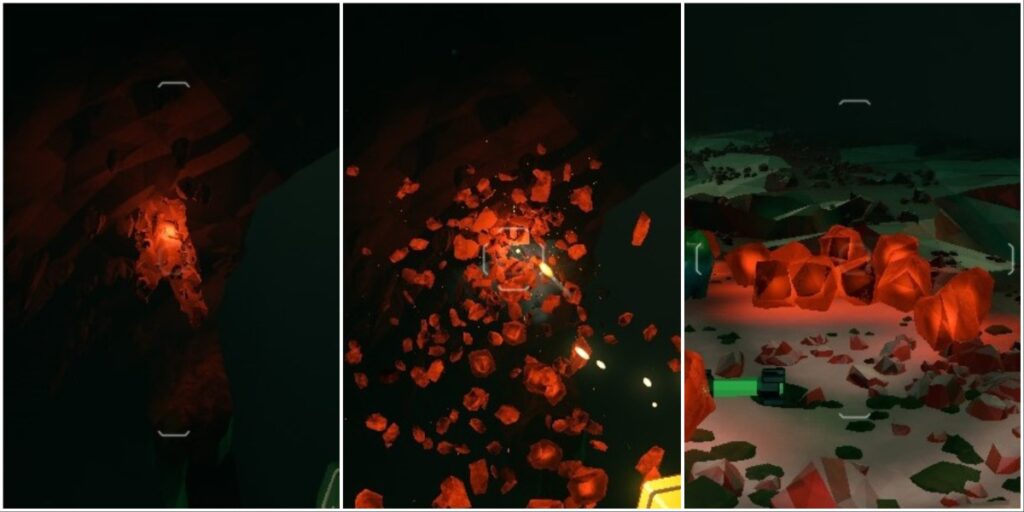
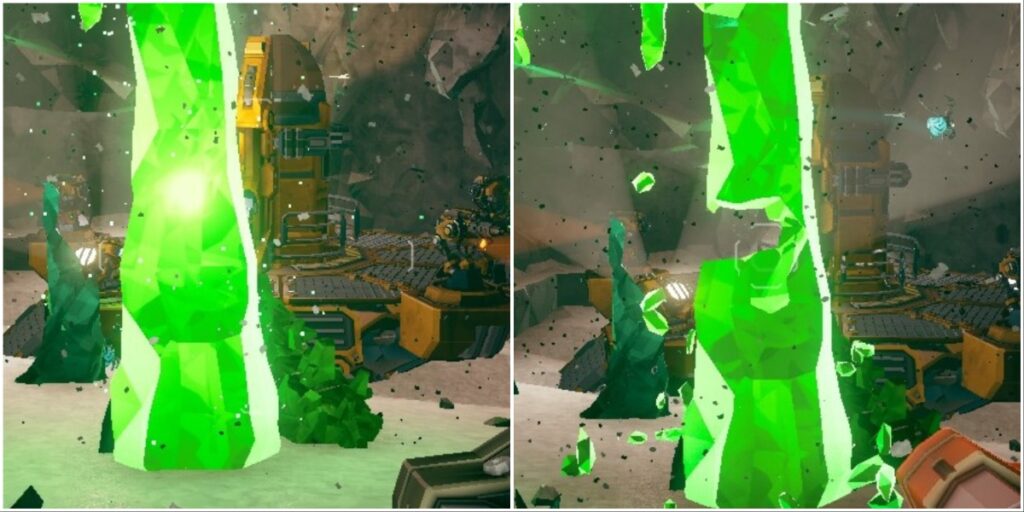
Another thing you can do is shoot the glowing cores out of uranium crystals in the Radioactive exclusion zone to deactivate them. You can easily and quickly shoot out the tips of Ommoran Beamers to deactivate them as well.
Heat Meter Reminder
As mentioned previously, the gun’s heat meter works in a strange way. It starts to fill more slowly the hotter the gun gets. When you enter the red zone, you’re actually just 1/3d of the way to an overheat.
Conclusion
We hope this Deep Rock Galactic Minigun build guide will prove useful in helping you brave the dark depths of Hoxxes IV. Now go show off your fancy new minigun build to whatever myriad bugs Deep Rock Galactic has to offer. Rock and Stone miner!
Images Credits: Ghost Ship Games
