In this guide, we will explore the best builds in Brotato and dive deep into what makes each of them powerful and how they actually work. There are a lot of mechanics in Brutato, and with an absurd amount of weapons, items, and stats it can get overwhelming and confusing. The idea of this guide is to bring each build closer to you and add more builds as time progresses.
If you are new to Brotato, check out our Brotato beginners guide for basic mechanics and beginner tips. In this guide, we’ll assume that you know the mechanics and overall gameplay. All that said, let’s dive into our best Brotato builds.
How Brotato Builds Work
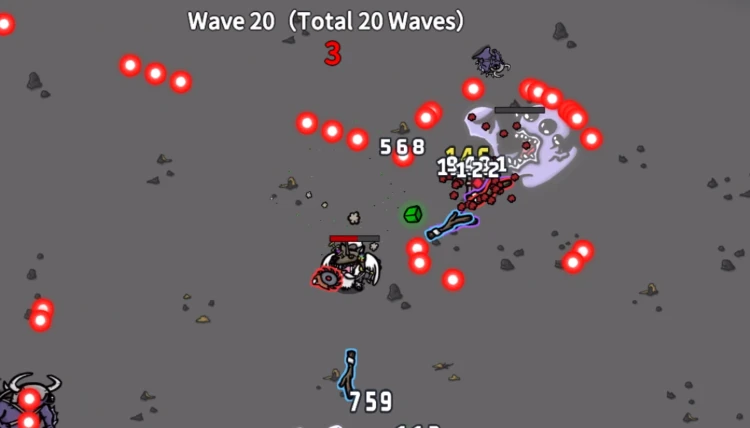
While knowing each build from each character is essential, it’s also very important to know how to build in general and what makes each build work. This is not only for optimizing builds in each part of the game but also if you happen to find a new build you want to try and are stuck. There are general guidelines that we found worked. The idea is to optimize the early game in such a way that you can survive without too much trouble, that you have enough damage and firepower to kill most of the waves, and that you have additional resources like harvesting or luck in order to propel your game and get you more resources for those essential mid-game items.
Everything is about finding the balance. You don’t need too much HP, armor, and speed in the early game, but you need some of it. And each character has its own survival mechanism. Some characters rely purely on HP regeneration, while others rely purely on Lifesteal or picking up Consumables. It’s also important to note that some characters have a strong start, for example Bull, while other characters have a troublesome start, for example Glutton. This means that each of those characters will have a different strategy and focus in the early game.
So, with Bull, your focus will be to get a bit of Luck or Harvesting because you are already powerful enough to clear everything and you should focus on the resources first. And with someone like Glutton, your focus should be to get the tankiness up a bit and a few weapons in order to clear the waves without too much trouble. This is just a general rule, and of course, a lot of it depends on the RNG of the shop. Later in the game, you really should know what you’re focusing on, because a lot of things give you something while taking something away from you.
So, for example, an item that gives you 6 melee damage and takes away 3% of crit chance is good. If you already decided that you won’t have any crit chance in this run. This means that you really can focus only on a few key stats that work well with your built-in character mechanics that are unique. This is the main idea behind making a successful build. Finally, we should emphasize that although there are different requirements for different characters, stats like Armor, Speed, Luck, and max HP are always good.
Lucky Build
Lucky has a very different way of playing the game than a lot of other characters. The two special items Cyberball and Baby Elephant are extremely powerful on Lucky because of their scailing with Luck. The gist of the build is that you get basic weapons like Sticks because they give you a lot of damage without needing to “invest” in a build. Your investment should be primarily in obtaining the key items, getting Armor, Speed, and HP up, and picking up more Luck modifiers in between. Picking up Materials damages enemies, and with the two Items, killing enemies also damages others. This can create a domino effect and just clear out everything on a map when you got the build down right. For example, in the video above (iOS platform) we can see some variation of this build.
Don’t underestimate your need for Armor and Health. You will need to get into the fray a bit because you will have Sticks and will have to pick up a lot of Material. Speaking of picking up Material, getting Sidfs Relic is key and is the most synergistic item with this build. It will be extremely helpful because you will instantly deal damage because every material will just go straight to you. Also, in the beginning, try to avoid going overboard with Luck. You need to get the base down with the Armor, Speed, HP, and upgraded Sticks. Going too much for Luck early on will get you in trouble around Level 11 when elites come. All that said, Lucky is one of the most fun and unique builds in Brotato to play with and we highly recommend you try to make him work.
Engineer Build
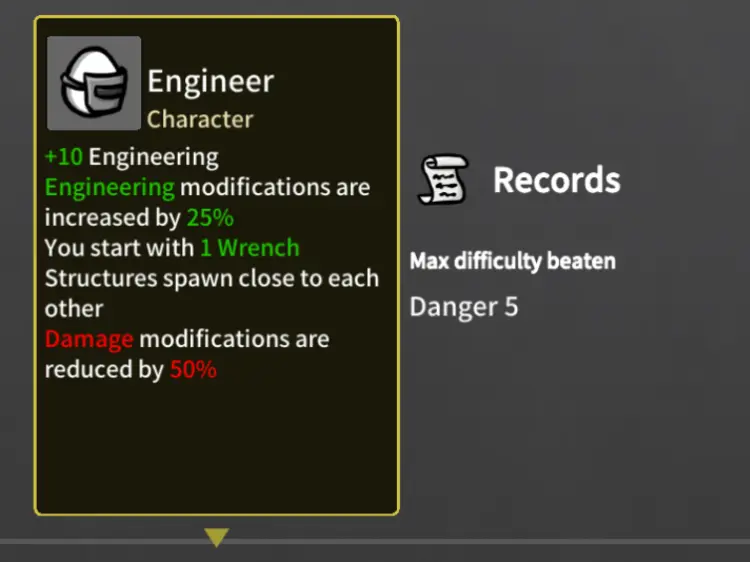
Engineer build is pretty self-evident, you will need to go for a lot of Turrets. Essentially, you will just want to stack up Engineering and some Armor and HP first. Moreover, your primary focus should be to get a lot of Wrenches.
The Wrenches have 4 different Turrents spawning:
Level 1: Regular Turret.
Level 2: Elemental Turret.
Level 3: Laser Turret.
Level 4: Missile Turret.
In the early game, focusing too much on Speed and Lifesteal/Regen shouldn’t be too much of a priority. First, get all 6 Turrets up because you will be overwhelmed if you don’t. This will give you enough firepower so you can essentially stay in place and be surrounded by your Turrets. Regarding the HP regeneration, you will need to get at least 2-3 Medical Turrets. They are extremely good and will have a high regen rate that scales with Engineering stat. Later in the game, it’s still essential to build up Speed because you will need to evade a lot of attacks. All in all, a pretty straightforward build that is Turret-focused.
Explorer Build
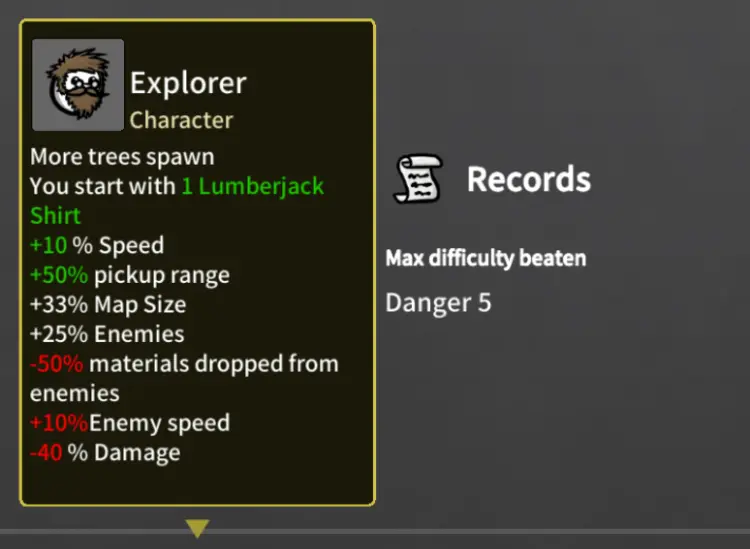
Explorer character has a districting playstyle that relies on you chopping down trees. The idea is to get your Engineering up, as well as regular survival stats like Speed, Armor, and HP, and then get a Pocket Factory with a few purchased “Spawn more Trees” in the shop. With this combo you will have a lot of Trees and by cutting each tree down, you will get a Turrent. The style of gameplay will be you running around the map, avoiding enemies, and trying to find as many trees as possible.
This will in turn set up a lot of turrets and with your Engineering up, the Turrets will do all the work. Keep in mind that with Explorer, the map will be a lot bigger and you will need Speed to get to those Trees as soon as possible. Moreover, having a Medical Turrent is super powerful because naturally, you will have a lot of Engineering. However, it isn’t ideal since you have to keep in mind that you will already have a lot of Consumables, and getting items that up your Consumable Heal is essentially here. Overall, a very fun build with a unique playstyle of running around the map, cutting down trees, and placing Turrets in their place.
Speedy Build
Speedy has a pretty interesting playstyle and as you may have guessed it, it’s all about running around the map at high speed. This of course is synergistic with the Lance weapon and it’s a pretty good playstyle. Obviously, in the early game, you would want to acquire as many Lance weapons as possible and some basic tankiness stats. Moreover, doubling down on speed is the only option you have in order to make this build work. Lance works well with speed and you will need a good amount of it in order to deal a lot of damage.
This build is kind of skill-based because you can’t just avoid a few things and stand in one place. You really have to take advantage of the enormous amount of speed that you have and that means that you can in theory dodge literally everything on the map. Every elite and boss that spawns, if you can’t kill it you can escape because you will have a lot of speed. You will also be able to pick up materials at a higher pace. It’s a relatively straightforward build but it takes a few tries to get used to the playstyle.
Glutton Build
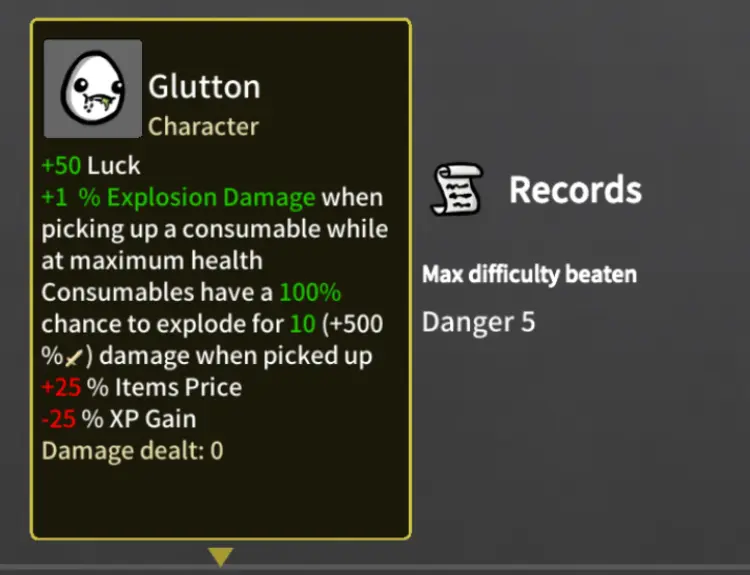
Glutton can have a very rough start and in the early stages and levels it can get a bit overwhelming. The point here is to build up your luck and trees on the map in order to get a lot of consumables around the map. This will in turn trigger the special ability each time you pick up a consumable. In the later stages of the game, you will essentially have a lot of Armor and you will be running around the map just eating consumables and making explosions everywhere. Focus on Armor, Luck, increasing Exposion Size (later on), and Melee Damage.
The focus on Melee damage is especially important because the explosion from consumables scales +500% with explosion damage. Moreover, the special ability has an interesting effect of increasing the % of your explosion damage each time you pick up a Consumable at max HP. This is very important because you will want to have at least 30-50% Explosion Damage after Level 10 from this mechanic. Later on, it can be tricky to focus on it because the game gets harder. The final build is to have enough Luck so that there will always be Consumables on drops, enough Armor/HP so you can sustain going in the masses of Enemies, and enough Explosion Size/Damage so that the enemies will just keep dying.
Bull Build
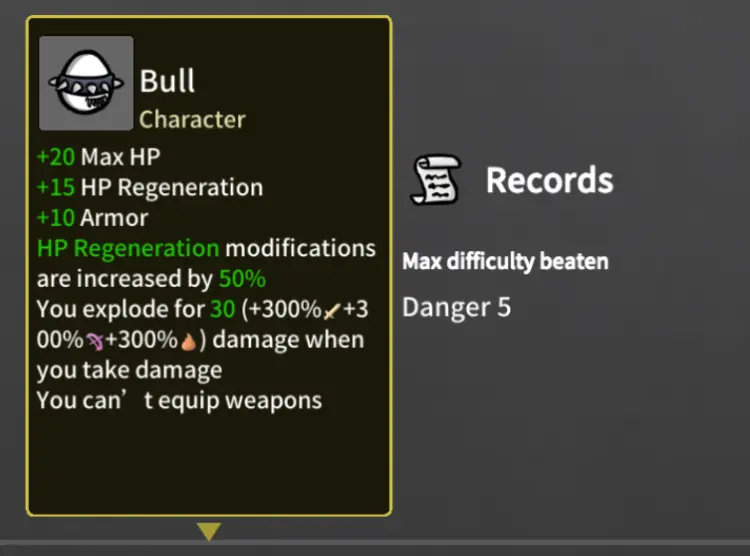
Bull is one of the most unique builds in Brotato. The essence of the Bull is that you don’t wield any weapons and the primary way to kill enemies is to explode when you take damage, a unique mechanic to Bull. The best thing about Bull is that you get a lot of tank stats from the start. +20 Max HP, +15 HP Regen, +10 Armor makes you almost unkillable in the first few levels. That is why you need to prepare and build up more of these tanky stats from the get-go. Luck/Harvesting is also nice since you get more resources early on since you will be very powerful and don’t need to focus on offense too much in this stage of the game.
That said, in the mid-game, Bull will need a lot of additional melee/range/elemental damage since everything scales with his special Explosion. Don’t think just because you have the initial tanky stats that it’s enough. It is not. Bull needs more HP Regen, more Max HP, and more Armor. The trickiest part is around 10-12 Level because you probably won’t have enough tankiness to sustain the waves. The tactic should be going in the masses, triggering a few explosions, and going out to regen the lost HP. At later stages, you should have enough “tanky stats” to essentially just outregen enemy attacks. Also, get Speed up since there are a lot of situations with Eites and Bosses where you really don’t want to take those extra heavy hits.
Builder Build
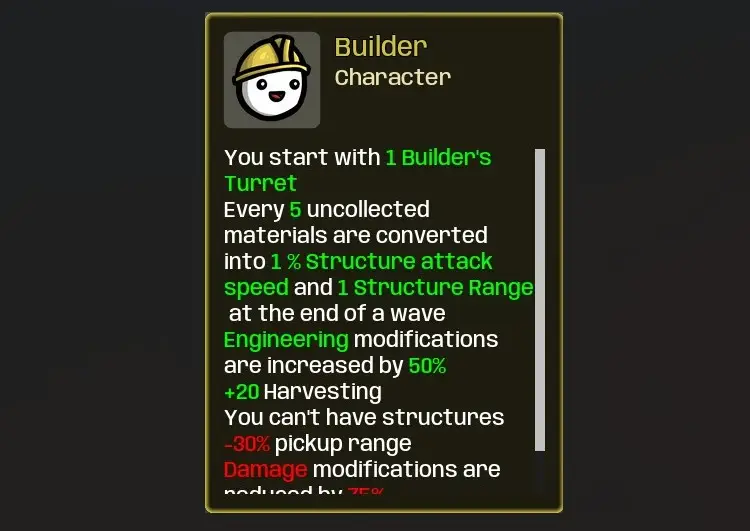
Builder is an Engineering character that is not an Engineer. To clarify, this character gets one main turret that always spawns in the middle of the map while preventing you from having any other structures.
The important thing to know for Builder is that your Builder’s Turret is your main source of damage. Don’t try to boost your weapon’s damage capabilities as it will be in vain.
The first thing you need to do is choose your weapon. As your turret’s stats are based on your best-ranged weapon, you need to pick the strongest one out there. Revolver and Laser Gun are the strongest single-target ranged weapons you can easily get, so we suggest you get those (Shredder can also work great).
Try to get 6 weapons as soon as possible during the early waves as that’s when your weapon damage is still important. As soon as you get 6x of your favorite ranged weapon, go on and level up one of them only and get it to level 4. Since Builder’s Turret takes its base stats from your strongest ranged weapon you don’t need to level all of them up.
Another important thing for this character is that you first need to build your economy. That means picking up as many materials as you can during the first 4 or 5 waves, getting your weapons, and Harvesting to about 50 (you start with 20 already). This will give you a great income for later waves when you leave most of the materials on the ground for your turret to pick up and level up.
Before you reach the first boss/horde wave make sure you have 40+ Engineering and a level 3 or level 4 weapon. If you didn’t manage to get a level 4 weapon while keeping the other 5 in your hands it’s okay. Get a level 4 weapon even if it means that you’ll have only 1 or 2 weapons in your hands as the main source of your damage output is the Builder’s Turret.
Diver Build
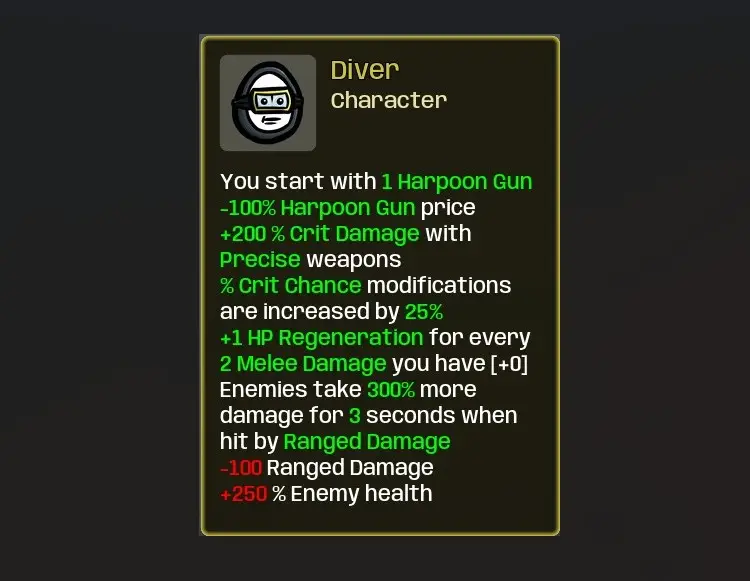
Diver is a really special character in Brotato as you need to play around his buffs in order to kill enemies and progress. Hitting enemies with ranged damage debuffs them, allowing you to deal 300% extra damage. However, all aliens get +250% health.
Since Diver evolves with Melee damage, we suggest you pick up 5 Shurikens alongside the Harpoon gun you already have. Shurikens scale with Melee damage but allow you to clear enemies from a distance giving you that extra security since you don’t have to be in their face.
Knowing that the aliens you’ll be fighting have fat HP pools you need to adjust your fighting style and focus your attention only on glowing ones (enemies affected by the debuff) since you won’t be able to kill the other ones as easily. If you want to apply the debuff effect on more enemies you can grab a second Harpoon or even pick up an SMG or Baby with a Beard item. However, we found that 1 Harpoon was more than enough.
Melee damage and Crit Chance are the essential stats that you need to focus on to be able to wipe enemies off the map. Since boosting the Melee damage will give you extra HP Regen, you will have one more thing taken off your mind. Attack Speed is the next crucial stat you should get since clearing hordes and bosses can get quite challenging.
Tip: Move around carefully as Harpoon is dragging the enemies it hits towards you. This helps you clear them out but can also put you in a dangerous situation.
Creature Build
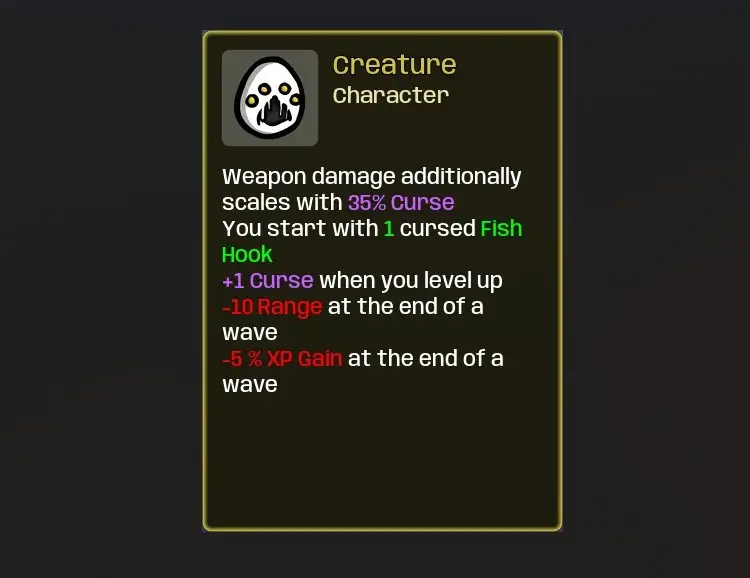
Creature is the best curse-oriented character that, if played right, will bring you many OP items and weapons. As you know cursed items and weapons are boosted and significantly stronger and this character gets +1 curse per each level and starts with 1 cursed Fish Hook.
The starting features of Creature might not sound like much but they are. Having a Fish Hook from level one means that you can have great chances of getting Cursed items and as the game progresses those chances will just keep increasing. Make sure you buy any Fish Hooks that appear in the shop because those will just increase your chances of cursing the locked items.
Ranged weapons build is the best way to go with this character, whether you go for Shredders or SMGs. We prefer the explosion build as it clears enemy masses more efficiently but you can go your own way, of course. If you notice that you’ll encounter a few hordes before level 20 explosive build is the way to go. If you encounter only bosses then the single-target attack will help you more.
Also, grab every item that gives you piercing or bounce. If you get these in the shop in normal form (not cursed), lock them and wait for them to become cursed. For example, Sharp Bullet and Bandana add two piercing shots instead of one when cursed. Locking some of the best items in Brotato while in normal form can greatly change your gameplay for the better. With one Fish hook, the game should curse the item after being locked for 2 or 3 waves tops, but with two or three those odds will increase.
Make sure you pick up the XP bonus items as well. You lose 5% XP Gain at the end of each wave, so it will be a good reimbursement for that.
Ogre Build
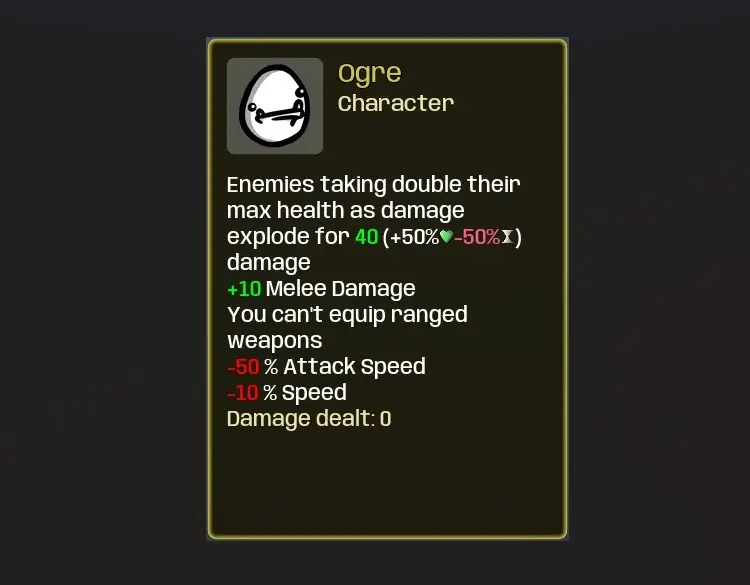
Ogre is a character that really lives up to his name and is one of the best characters in the game. He is a grunt that needs plenty of HP and Melee damage to combat the incoming alien army.
The main point of his build is his ability to make enemies explode. However, to be able to play around this mechanic successfully, you need to take plenty of Melee Damage and Damage % because enemies explode only when taking double their max HP as damage. These stats will help you achieve that. On top of taking pure damage, you should go for Crit Chance because that will increase your chances of making an enemy explode and allow for the explosions to Crit as well.
Alongside your attack damage, you need to boost your HP because the explosion damage scales with 50% of your HP. The tankier you are, the more damage the explosions deal. They also scale with slow Attack Speed, but don’t go wild with slowing down this stat for yourself. Just keep an eye out not to pick it up on level upgrades but if you lower it aggressively, you can get overwhelmed by enemies easily.
Dealing double damage to middle-class and elite monsters is difficult so it’s important to maneuver around aliens when playing Ogre and focus on attacking the small, weak ones. When you hit a small enemy with damage that equals double his HP he will often trigger a domino effect explosions that will clear the whole group of aliens around him.
Rock has proven to be an excellent weapon for Ogre as it gives you HP, and Armor by default, setting a great foundation for this character.
Technomage Build
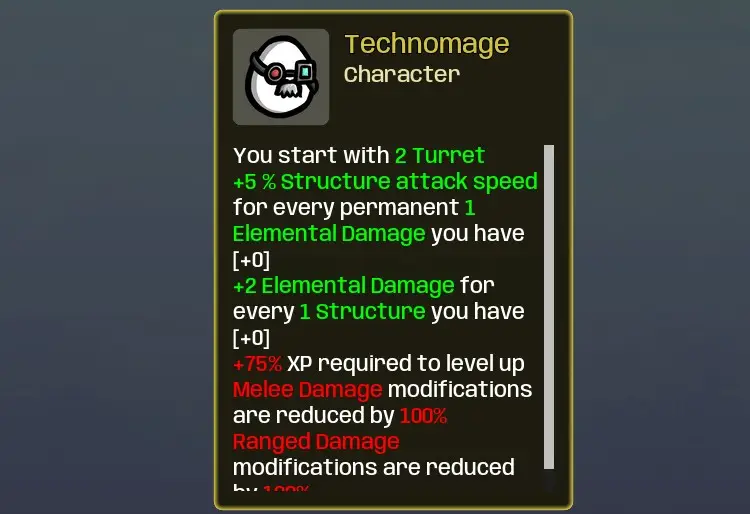
We won’t lie: Technomage is one of the most challenging Brotato characters out there. But that does make him attractive for playing, as you need to strategize in a couple of ways to make him successful on the battlefield.
As you notice from the beginning he is half-engineer, half-mage but you should treat him as an Elemental damage dealer primarily because he doesn’t scale well with Engineering. Always buy Landmines and Turrets when you get them in the shop to increase your Elemental damage but don’t spend your material or level upgrades on getting Engineering.
You start playing Technomage with Torches or Tasers, depending on whether you want a range build or a melee build. Torches are more effective as they can apply burn to enemies and help you farm that way (tier 3 and tier 4 Torch apply burn to +1 enemy). On the other hand, Tasers are support weapons and can kickstart your economy early on by giving you the much-needed Harvesting without you spending level-up upgrades on getting it.
Whatever you decide to get, try to always grab one Flamethrower as it burns many enemies quite fast and can be paired well with Lifesteal for your regen. The name of the game with this character is running around and burning as many enemies as you can. The size of your Elemental damage will decide how quickly they die.
Naturally, you should grab every Scared Sausage and Snake you find to increase the number of burning enemies on the map. However, still focus on getting Max HP whether through items or level-up upgrades, since your enemy clearing won’t be quick. You will get hit a few times so you need to be ready. Especially for boss/horde level. Technomage is one of the more difficult characters to play out there but if you enjoy a challenge he will be your first choice.
Dwarf Build
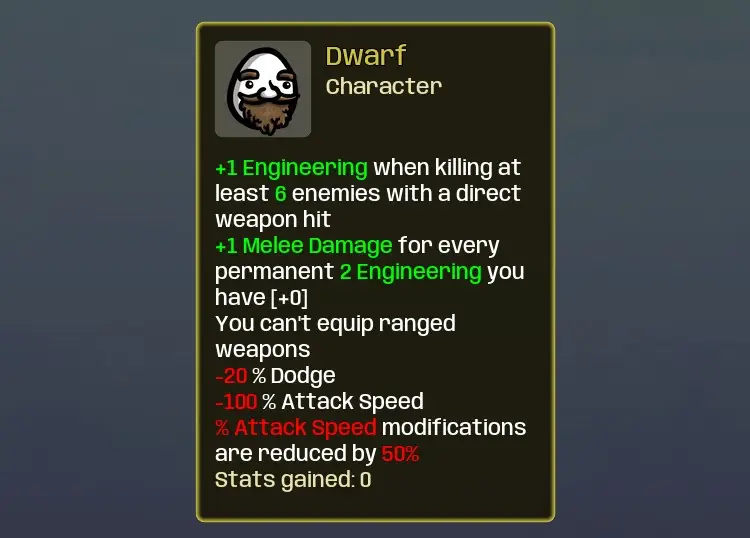
Dwarf acts similarly to Ogre, as you need to move really carefully around the map and set up that group of six or more enemies that you’re going to beat down with one hit. Even though you need to get used to the playing style of this character, it’s not impossible to own the alien army with him.
Start off with Hammer and then try and build your way up with Blunt weapons as they give a decent amount of defensive stats. Since getting more weapons will give you more hits, thus making it more difficult to one-hit a group of six enemies, you can try and level up the best weapons you’re getting.
So, for example, if you’re getting rocks, try to combine them as soon as you can keeping two or three weapons of higher level in your hands so that you can land those rewarding hits more easily.
To make killing groups of enemies with one hit simple, try getting some Speed stat early on that will allow you to run around the map and avoid those small enemies that like to get in your face quickly. Also, getting items that slow down enemies like Snail and Ugly Tooth helps.
When it comes to those tough boss/hordes level you need to know that this character is really struggling with bosses because of his low attack speed. So when fighting big ugly alien bosses, your best bet is to dodge them and wait for the timer to expire. But, if you’re encountering hordes, you’ll have no problems since Dwarf is not only great at clearing them but will also farm plenty of stats while doing it.
If you see that your character is killing aliens left and right and not allowing you to properly hit a big group, try to switch your controls to a manual attacking system. This will allow you to attack on click when you want, instead of it being automatic.
Final Thoughts on Best Brotato Builds
While there are a lot of builds in Brutato, each one of them has a very distinct playstyle. Combining the unique characteristics of each character with all Brotato items and weapons, there are so many builds to experiment with. That said, getting the basic idea of how to make a build work is what we suggest you learn first. Balancing stats like Armor, Speed, HP, etc. can be tricky. Make sure you follow the basic how-to when making a build because a lot of it depends on the RNG of the shop and the general trajectory of the run. We will be updating this guide with new Brotato builds and improving existing ones. We hope this guide inspired you to try some new builds and ways of playing the game!
Photo Credits: Blobfish
