The newest Season 13 of Hearthstone Battlegrounds has begun on the 14th of April, 2026! We have seen many changes compared to the previous seasons, specifically, Trinkets are back with significant changes to the minion pool.
Season 13 is here (14. April). Trinkets are back!
+Updated ALL builds for the newest season 13
+Added new way of explaining builds: Concept + Commitment + Win Condition
+Added Noteable Trinkets for each Tribe
+More tips for Trinkets
Guide updated for the newest 35.2.2 Patch (April 28)
+Added “Back to Back build” with new patch nerf and explanation
+Added new commentary for 35.2.2 patch notes under each build
+New screenshots/cards
~Undead/Dragon/Naga/Mech buffs, Elemental nerfs, other minor changes
In chronological order, the last few Hearthstone Battlegrounds seasons looked like this:
- Season 11 (August 2025): Quests
- Season 12 (December 2025): Timewarp
- Season 13 (April 2026): Trinkets are back!
Patch 35.2 marked the beginning of Season 13 by removing Timewarp from the game, adding Trinkets, many new minions, bringing back old minions, and removing minions from the game. For Duos, check out our full HS BG Advanced Duos Guide. Without further ado, let’s dive deep into the Hearthstone Battlegrounds Guide and explore meta builds for each tribe.
Hearthstone Battlegrounds General Tips
Even though you will find a lot of specific builds in this guide, the essence of your gameplay needs to be your understanding of tempo and when to level up. Below we put some very loose and general guidelines on how to play early and midgame, but the issue still remains – Hearthstone Battlegrounds is extremely RNG-based, and there are almost infinite scenarios that can happen with minions, your hero power, spells, combos, etc.
This is why you need to actually play the game a lot in order to develop an instinct/feel for the game. When to level up the Tavern? Do I go for a greedy play? Is my army strong enough to survive the next battle? Should I refresh and try to find this specific minion or just buy these 2 random strong ones right now? All these questions are answered by your feel and in-depth game knowledge. We mention this to say the next thing – going for a specific build isn’t really straightforward, since RNG is straightforward.
There are a few floating concepts on which the game revolves:
- Current Army Strength, aka. Tempo – Going for a high-stat early army can secure your leeway to level up the Tavern a few turns in a row.
- Generating Resources – You will need to find a way to generate something after each turn – minions, spells, gold coins, etc. This will be essential for actually developing a strong build.
- The Lobby aka. Other Players – You need to keep an eye on and play a guessing game on who will be strong, who is currently strong, what they are playing (in order to counter it), and the potential of other players.
- Countering and Tweaking Builds – Since the game is very situational, it’s important to know how to counter your opponent. For example, if you’re playing Murlocs and have no Divine Shields, your last opponent has Mechs. Grabbing a Tunnel Blaster, you win the game here.
- RNG Above All – Sometimes, even though you did the “good” play, RNG can still punish you. The key thing here is to go for the play that has the highest chance of succeeding.
This kind of stuff is really hard to teach, given its extremely volatile nature. The best thing you can do is play a lot and watch other high-level players and see how their brains work in certain scenarios. The guide is meant to steer you in a direction and show how mechanics and builds work, but the above stuff is a feel for the game and what you get by playing a lot.
Early Game and Lesser Trinkets in Season 13
In this guide and in specific tribe builds, we will generally focus on mechanics, mid to late game commitment, winning conditions, and a few tribe-related greater trinkets. So, in the specific tribes, we don’t really have lesser trinkets or early game builds because in this period of the game, there are too many variables to just go for a specific tribe generally. You will want to get tempo and get some resources, and that is all dependent on what you get as minions, Hero Power, and those Lesser Trinkets.
Generally, in this stage, we feel like it’s best to rush the tavern upgrades from tier 3 to tier 5 and get to tier 5 as soon as possible because it’s very awkward to play at tier 3 and 4. Also, regarding Lesser Trinkets, you don’t need to think about Tribes and picking specific tribe-related lesser trinkets, although they can be good. Rather, just go for either a huge tempo boost or for resource gain throughout the whole game.
For example: Souvenir Stand is good because u pay nothing and have a huge boost at Greater Trinket phase. Worn Treasure Map will get you 10 Gold in the key period of the game. Bartend-o-Tron’s Oilcan will practically allow you to play at Tier 6. The Innkeeper’s Stein is “Your Tavern Tier 5 is like 6 now”. Tribe related example: Mama Bear Sticker, if you already have a lot of summons in early game, this is a good boost, but you will kinda commit to playing beasts and spend 3 Gold, which isn’t great, since you don’t really know if you are going to get Beasts that actually win you the game (Goldrinn + Sewer King + Titus).
Mid and Lategame and Greater Trinkets in Season 13
Now, regarding mid and late game with greater trinkets, that is what we focus on with the builds and specific tribes. Greater trinkets are much more tribe-related, and you will, in the majority of cases, pick some winning condition, and at this point, the pivot that we mentioned in the guide and commitment to a specific build usually happens one or two turns before the greater trinket. Do remember that the trinkets that you get are tribe-related based on your board. So, for example, if you have five Nagas, then you will get two Naga trinkets and one random.
So it is best to establish your path before the greater trinket. Again, sometimes this is maybe not the case, and perhaps you’re waiting for a greater trinket to practically save you from a bad game, but in an ideal scenario, you will have your board set up in some sort of form before the greater trinket pick. In the tribe builds below, we talk about some powerful tribe-related trinkets that will steer your build in a certain way, but since there are a lot of trinkets and variables, of course, it is impossible to predict what you will get.
Generally speaking, do be aware of the cost of a specific trinket and your resource situation, because if you have 10 gold and no extra resource generation, picking a trinket for 6 gold, however it may be powerful and hoping you will get a certain minion in combination with that trinket, will give you low chances of winning the game because at that point you’re practically relying on few refreshes and you’re done. So keep in mind the resources and how much health and leverage you have left.
Tavern Spells General Overview
Tavern Spells are essentially one-time-use abilities that you can buy from Bob’s Tavern for various gold costs. With every refresh, a new Tavern Spell will appear. Only one spell will appear with each refresh unless there is a minion or hero that modifies the number of them. For the sake of explaining, we will sparate spells in 4 groups:
- Stat-boosting Tavern Spells: These Spells give you various stats. Most of them are cheap and low-level, but there are some high ones as well. Usually, these Tavern Spells are used as gold dumps or in specific scenarios in which you need to buff up one of your minions. Examples of Stat-boosting spells are: Pointy Arrow, Them Apples, and Natural Blessing.
- Economy Tavern Spells: Spells that give you extra Gold or free Refreshes are economy ones. They are very useful and can turn the tides in your favor, especially if you acquire them early on. Examples of Economy Spells are: Careful Investment, Tavern Coin.
- Utility Tavern Spells: Spells that give or remove Taunt, provide Divine Shield, and increase the number of Deathrattles, Battlecries, or End of Turn effects that you get are what we call Utility Tavern Spells. They can come in handy for specific build types, which we will discuss later on in the article.
- Discovery Tavern Spells: Several spells allow you to Discover or get a free minion. We will just call them Discovery Tavern Spells as most of them do allow you to Discover a minion of a specific type. Examples of these spells are: Contracted Corpse, Planar Telescope, Hired Headhunter.
Back to Back Build (post-nerf)
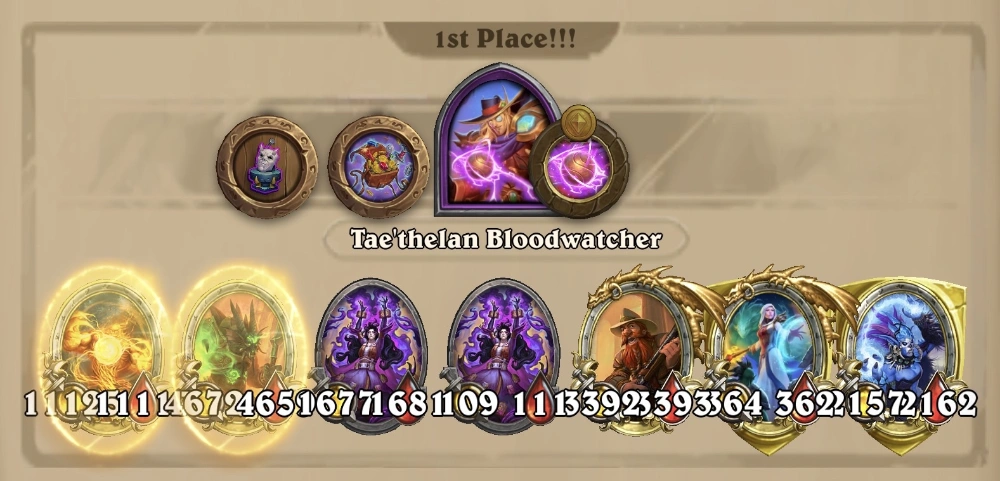
Key Minions: Brann Bronzebeard + Drakkari Enchanter + Balinda Stonehearth + Cataclysmic Harbringer + 1 Back to Back spell
Supporting Minions: Felfire Conjurer (good with Drakkari), Draconic Warden (Chromadrake spell stat), Tranquil Meditative, other spell-stat gaining minions
Screenshots are post-nerf, so the build still works.
Concept & Mechanics: Back to Back build relies on the spell Back to Back, and the main idea is to take advantage of the spell’s scaling, coupled with minions that provide you with this spell more and more + spell stats. Now, let’s start with explaining how the scaling works and what the newest changes, or should we say nerfs, are to this spell. So, basically, the way it worked before was that if you cast one spell, the next time you cast the spell, it would be cast twice, and after that, 3 times, etc. Now, you don’t cast the spell multiple times, you only buff it up its stats for the next time you cast it. This all scales with spell stats, but in a different way.
Before the patch, Back to Back worked on a multiplicative model. The key detail is that every cast scaled with your current Tavern spell stats at the moment it went off. Let’s say you had zero spell stats buffed, and you play this spell 4 times. Now, 5th time before the nerf, you would play this spell five times on a minion, and if in this turn you suddenly get, for example, +10/+10 spell stats power, then you would be casting +14/14 five times, meaning +70/+70 from one spell. So, all your retroactive spell casts would scale with your current Tavern stats.
Now, the spell doesn’t add more casts, it just buffs up the stat of your next Back to Back spell. The buff locks in based on the spell power you had at the time of casting, regardless of how much more power you get in the future.
Example (spell stat power also example):
PRE-PATCH NERF:
1st cast (0 spell stat power): +4/+4 1 time=+4
2nd cast (0 spell stat power): +4/+4 2 times=+8
3rd cast (+3/+3 spell stat power): +7/+7 3 times=+21
4th cast (+6/+6 spell stat power): +10/+10 4 times=+40
5th cast (+10/+10 spell stat power): +14/+14 5 times=+70
~total of +143/+143 stats with this example
POST-PATCH NERF:
1st cast (0 spell stat power): +4/+4, additional +4/+4 next time=+4
2nd cast (0 spell stat power): +8/+8, additional +4/+4 next time=+8
3rd cast (+3/+3 spell stat power): +12/+12, additional +7/+7 next time=+12
4th cast (+6/+6 spell stat power): +19/+19, additional +10/+10 next time=+19
5th cast (+10/+10 spell stat power): +29/+29, additional +14/+14 next time=+29
~total of +72/+72 stats with this example
.
The second one is how the spell now works. In short, it is extremely important to get early spell stats. You can’t just cast them with no buffs and then worry about spell stats later, the scaling “won’t follow you”. You need to get the spell stat as soon as possible. Even then, the total amount is simply much lower. Still, a pretty viable build that scales.
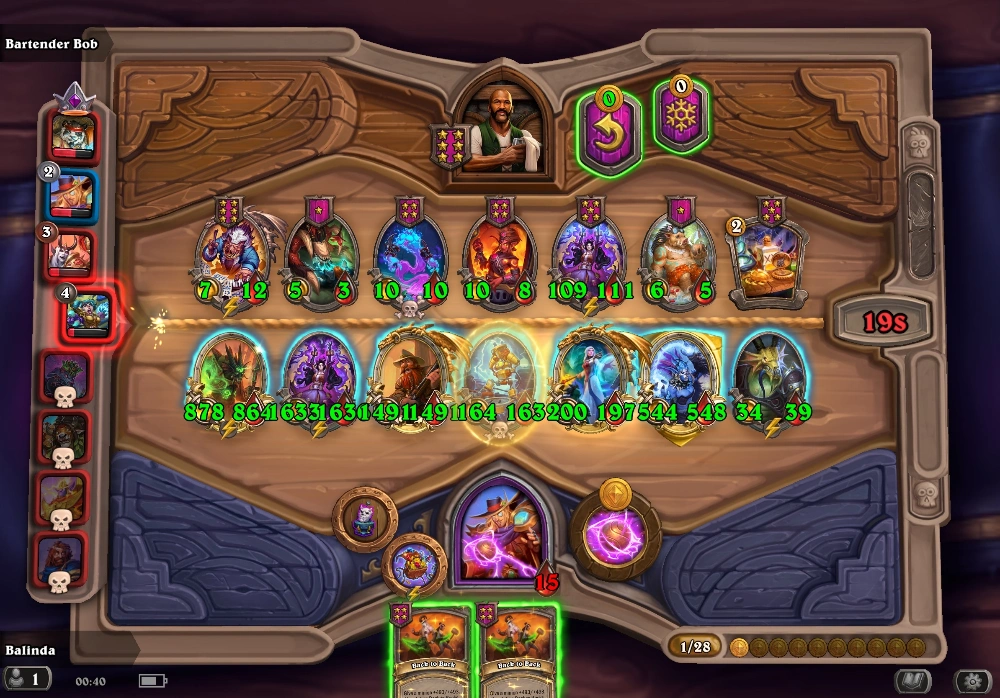
Midgame & Commitment: First, you’re going to need to focus on spell stats and resources. So Brann Bronzebeard here is practically a must because of the cycling and resources, especially if there are Dragons in the game, because from Draconic Warden, you can get gold as well as those extremely important spell stats from Chromadrakes. Of course, Felfire Conjurer is super good here because he works with Drakkari Enchanter. And you will need Drakkari because one of the best ways to get more Back to Back spells is with Cataclysmic Harbinger. So in theory, if you have, for example, two Felfire Conjurers, a Drakkari, and two Cataclysmic Harbingers, you will get +4/+4 Tavern spell stats and four Back To Back spells. Just remember to cast the spell as the last spell of your turn in order for Cataclysmic Harbinger to give it back to you. Of course, there are other spell stat-gaining minions like Shoalfin Mystic, Tranquil Meditative, etc., as well as a lot of trinkets. It’s important here to note that you really should have some resources and brand in order to start this build because it is a bit slow to get up and running, and you can’t really get tempo very quickly. So you kind of need to be ahead in the game.
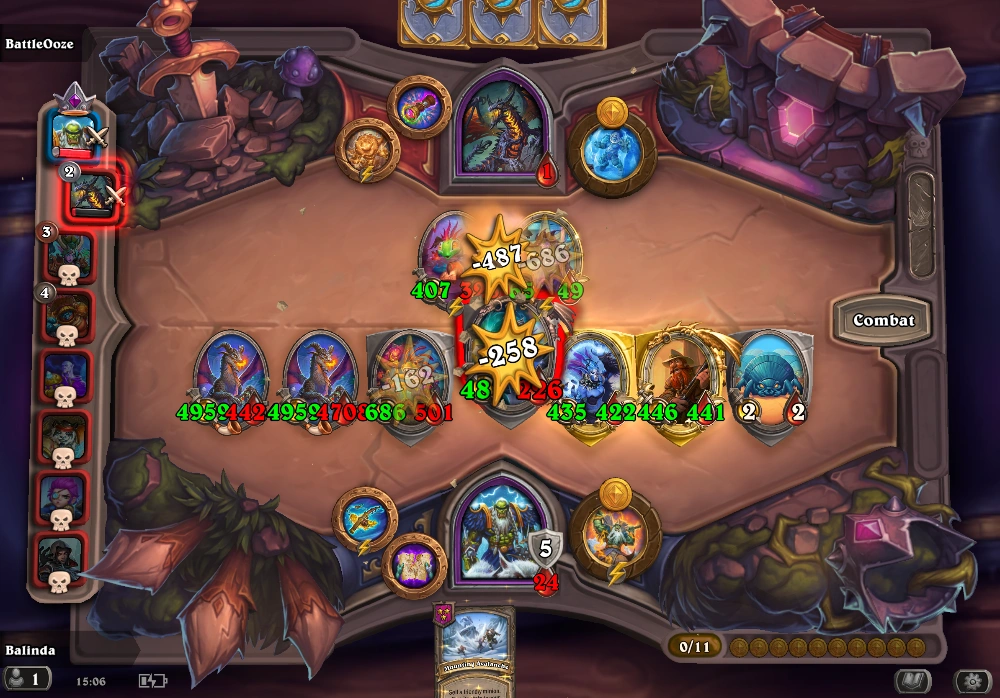
And finally, Balinda Stonehearth is the glue that binds it all together, because you are practically doubling or tripling the amount of casts. The ideal scenario is, of course, if you have a golden Brann, golden Balinda, I mean, the stats can go pretty wild, but in order to get there, actually, you kind of need extra resources and Brann and to have Dragons in the game, plus Elementals, maybe, for the extra refreshes, etc. Because you really need a lot of stuff, you practically need like 2-3 tier 5 and tier 6 golden minions + health to survive the initial rut.
Lategame Win Condition: The endgame is pretty self-explanatory. As we already said, you get spell stats from various minions and from cycling with Brann, also with end-of-turn effects from Felfire Conjurers. Once you have this, you need to find the Back to Back spell, cast it, and at the end of the turn, the Cataclysmic Harbringers will give you Back to Backs multiple times. And after that, you cast those Back to Backs, and Balinda will double or triple the amount of casts, and you will practically go exponential, especially if you keep gaining spell stats.
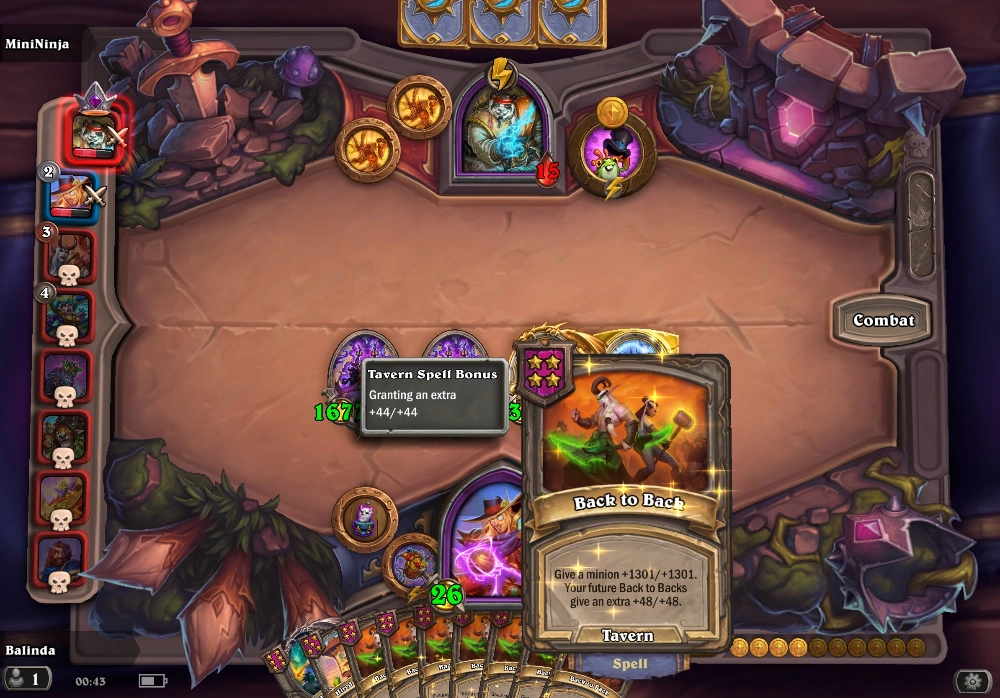
Notable Greater Trinkets: This build doesn’t really need trinkets to boost it up even more, yes something like Heart of the Forest can seem very synergistic, and it is, but the biggest problem is your tempo and resources. The above build will win you the game if you gain the initial momentum, so you usually will want to go for some resource-based trinkets, or something that gives you a lot of tempo.
Pirate Build: Bounty Hunters
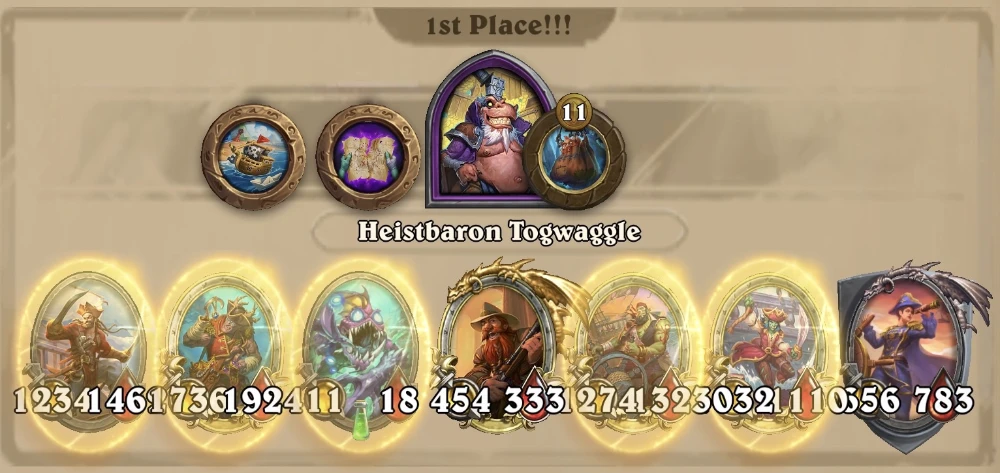
Key Minions: Sky Admiral Rogers + Proud Privateer + Brann Bronzebeard
Supporting Minions: Shipwreck Rascal, Blade Collector, Dastardly Drust, Glowscale (Divine Shield cycle), Battlecry value, e.g., Draconic Warden & Refreshing Anomaly
Bonus prerequisite (in order of importance): Nagas, Elementals, Dragons, or Murlocs are in the game.
35.2.2. Patch Commentary: There aren’t too many changes. Some minor buffs and nerfs, but the strategy is the same, and they are pretty good.
Concept & Mechanics: The main idea with pirates in season 13 is that you get to infinite money and resources as soon as possible. This is a very powerful and top-tier build, but it requires some finesse. Basically, you rely on a lot of things to get to your win condition. First, you have to have the key minions, which are Sky Admiral Rogers, Proud Privateer, and Brann Bronzebeard, plus some trinkets that are either resource-friendly or you get stats from them or bonus Bounties. Brann will work with a lot of Battlecry minions, Proud Privateer will up your bounty value by double or triple, and Sky Admiral Rogers will give you Bounties as you spend gold, and you will be spending gold by playing Battlecry minions and cycling them. Bounties will give you a lot of stats, Gold and Pirates. This is why you can take advantage of having Dastardly Drust. Each time you get a Pirate from the Bounty, he gives stats to everyone (no matter the type).
There are a lot of hidden tricks here, and advantage points that you can take on. For example, Naga has a minion (Glowscale) that gives you Divine Shield spellcraft, and because you have infinite gold, you can refresh and find that Naga and basically get two or three Divine Shields each turn on your, for example, your Blade Collector and some high-stat minions. Another thing is that you can buff Spell Stats in various ways, and Bounties are also spell stat-based, so you can have a lot of synergies with other tribes, like, for example, buying and selling a Shoalfin Mystic or Black Chromadrake/Draconic Warden when you are in your “infinite craze” or just have Brann.
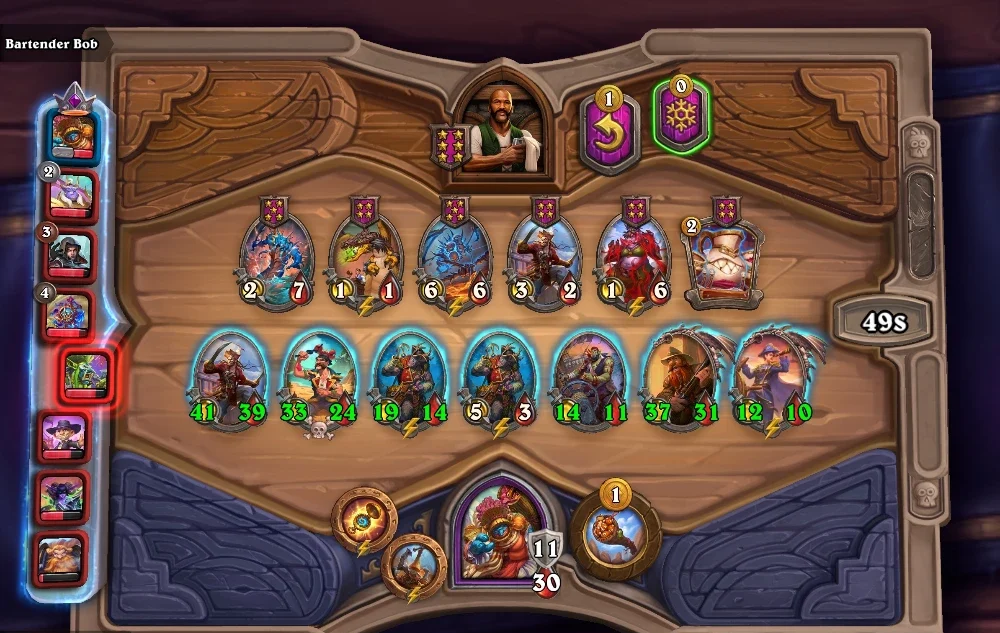
Midgame & Commitment: Now, having explained the concept a bit, there are certain things that you have to watch out for in the mid-game and before actually committing to this build. Mainly, the biggest trap that you can fall into is thinking that you are playing this build before you start actually playing it, if that makes sense. So, for example, if you have a Lost City Looter, Gunpowder Courier, and Dual Wield Corsair, those are ok minions, and they’re a good bonus for tempo and bounty generation, but they are not an indicator that you can go for this build because a lot of these lower-level pirates are just subpar in the mid to late game. You will lose tempo quickly and fall flat on your face.
So Gunpowder Courier and Dual Wield Corsair are not really doing you much if you don’t have infinite money, and even then, they are probably subpar choices compared to Dastardly Drust or similar. The first sign that you can commit to this build is if you have a Proud Privateer + Brann Bronzebeard or something like Shipwrecked Rascal. Combining those minions with Brann, plus having a good greater trinket that either gives you resources or is synergistic with this type of build, is a good sign that you can pivot.
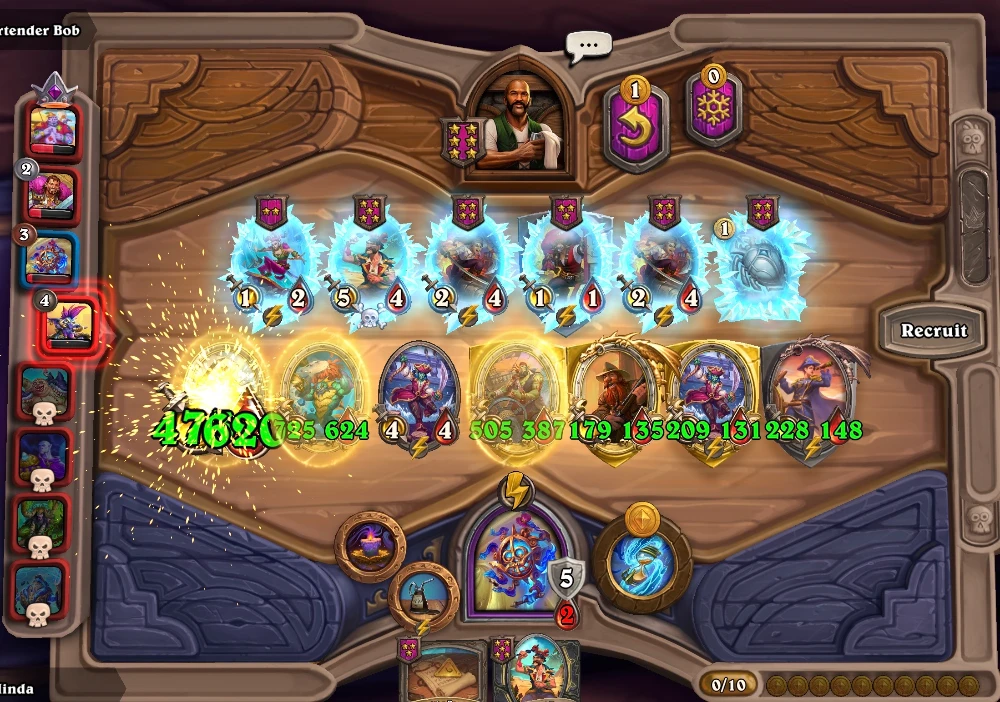
Sky Admiral Rogers is also a key minion, and basically, once you have this kind of setup, then you can fully commit. Brann will give you enough momentum from Battlecries, especially if Elementals/Dragons are in the game, because of the free refreshes from Refreshing Anomaly and drakes from Draconic Warden. Sky Admiral Rogers will take advantage of that cycling and give you Bounties because you are spending and gaining back gold, and then finally, Proud Privateer will double or triple the bounty effects from there. Brazen Buccaneer is also pretty good with Bounties, especially if you get a early Blade Collector. So all in all, don’t commit too early for this build, aka amass random pirates in early-mid game, and try to find the key minions we mentioned.
Lategame Win Condition: Now, there is a fine line between having extra resources and having a fully fledged infinite build, and usually you will have infinite if you, for example, have 15 gold at the start of each turn from trinkets or other means, for example, plus having a golden Brann and Sky Admiral Rogers, or by having 2 Sky Admiral Rogers and a golden Proud Privateer + regular Brann. It really depends on each game, but you get the gist. This is the combination you’re aiming for in your transition to the winning condition.
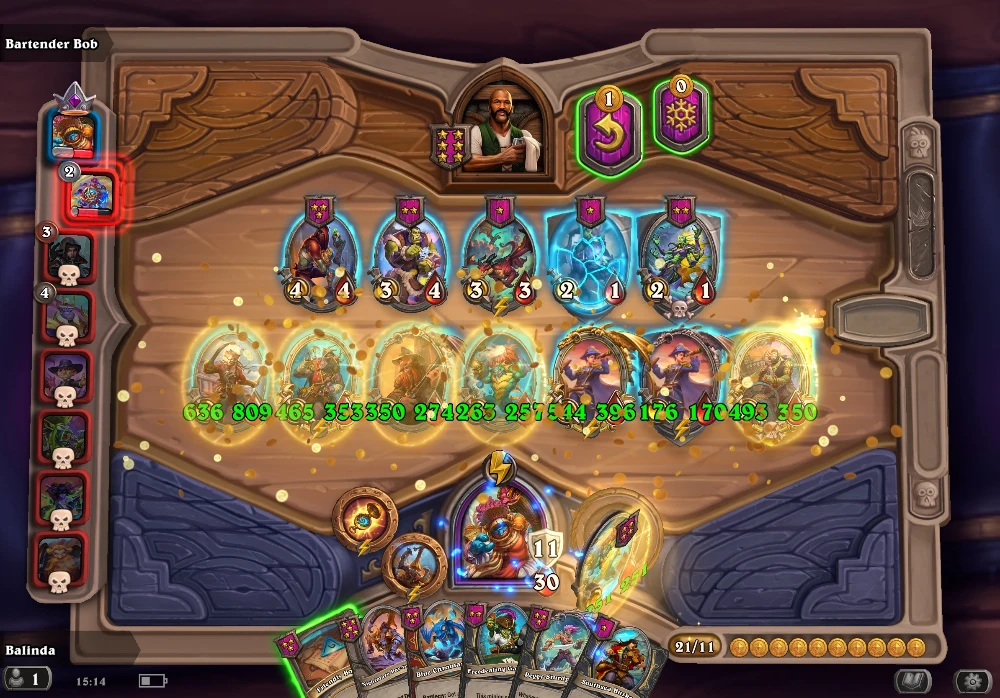
Once you reach this level, you will practically stop caring about money and just start playing really fast and trying to get as much as possible out of each turn. Of course, you’re going to get a lot of stats from the Bounties alone, but you will also need to optimize your board, and that is by having smart Taunts, a Cleave, and Divine Shields. So a Blade Collector is a very nice bonus. As we already mentioned, Nagas are extremely synergistic with Pirates, and just because you can cycle that Glowscale and give Divine Shields to a lot of your units, and finally, stuff from other tribes that we mentioned earlier that give stat bonuses on spells will also help your Bounties get more, since they are considered Tavern Spells.
Keep in mind that it also depends on the situation, so if you don’t have Nagas, then getting Divine Shields is going to be a lot harder, but if you’re, for example, going against Undead, then you can instantly go for 2 Blade Collectors and not care about Divine Shields that much. But this is the beauty of the infinite build, you kind of get to mold your gameplay depending on what you’re up against. If you are up against powerful stat-based minions without Divine Shields (eg. Demons), you can end the turn by deploying some scam minions like Leeroy or Poison.
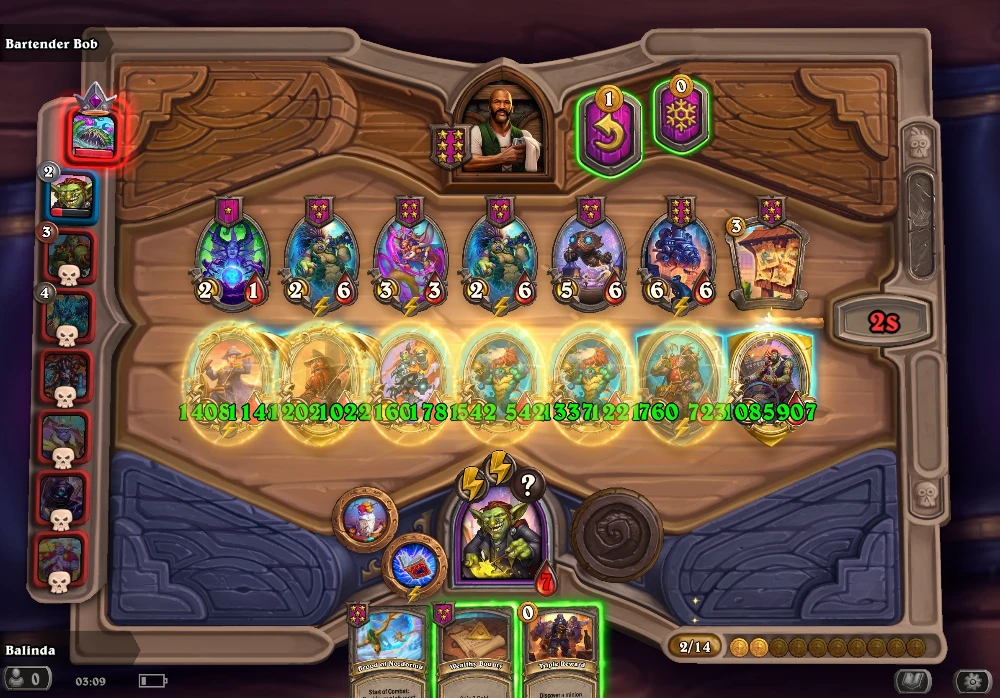
Notable Greater Trinkets: Privateer Portrait is a very straightforward way of going for the bounty path and will give you a lot of Bounties throughout the game, Proud Privateer, but also some instant tempo. It is probably the best trinket, and it’s literally made for this build. Trusty Crowbar is a nice tribe trinket, but it kind of needs you to have some resources because it doesn’t really give you any. It mostly works with the bounty that gives you extra pirates. So, for example, when you cast that bounty, and you cast it x3 times because of your golden proud privateer, then your leftmost minion will get +30/+30 from that alone. As you already guessed, probably the best minion to put there is Blade Collector, so basically, you have a giant cleave minion with this.
The final notable one is Miniature Ship, which also kind of plays into the Bounties because Bounties are counted as Tavern spells, so each time you cast any bounty, all your pirates get +2/+3. It’s good if you already have resources, but remember, the main thing that you have to establish in this pirate build is going infinite with your resources, not getting a few extra stats, so keep that in mind.
Strategies for countering Pirate builds: Basically, Pirates in best-case scenario will have high stats and one Cleave minion. Because of Cleave, put Taunt on your weakest minion and move it to the far right side. When it comes to stat problem, most builds will successfully just outgun Pirates, but in case you still have problems, you can go with any Poison or scam minion that you can find since Pirates don’t have any Divine Shield options.
Spells to use for Pirate builds: When it comes to Spells, you can utilize Bounties but don’t relly on them. Most of the Bounties just give a small stat boosts, and that won’t be enough – focus on Economy and Discover spells in order to quickly gain Eudora and move to Tavern Tier 6.
Demon Build: Delicious Fodder
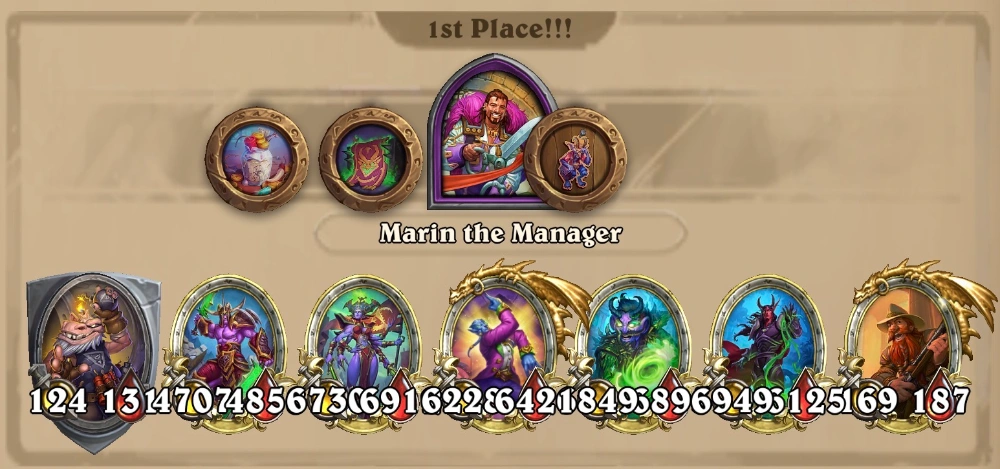
Key Minions: Ashen Corruptor + Brann Bronzebeard + Resource-gaining Demons
Supporting Minions: Imposing Persecutionist, Prince Machezaar, Bazaar Dealer, Twisted Wrathguard, Void Pop Trainer,…practically everything tier 3 and above, depending on what mechanic you are going for (Fodder, Tavern Spell, Spell Stats)
35.2.2. Patch Commentary: Just like pirates, demons remain pretty much the same. There have been some changes around the Shadowdancer, but nothing meaningful really.
Concept & Mechanics: In the newest season 13, Demons got a new keyword – Fodder. It’s a bit confusing, but once you get the gist of it, there is not too much complexity. Basically, in your next refresh, one of your Demons will get to instantly eat a specific low-tier minion called Demon Fodder in the Tavern dedicated to be eaten by it (your Demon). So, your tactic pretty much remains the same. You have to buff up the stats in the tavern. You’ll have your Ashen Corruptor, Brann Bronzebeard + Imposing Persecutionist, Machezaar, Prince of Dance, etc. But now you also have these new minions that work around the Fodder mechanic. For example, Twisted Wrathguard gives you extra Fodder, or Void Pup Trainer, which says that it gives minions in tavern from tier 3 or below +4/+4 (Demon Fodder minion is tier 1), so it also gives the Fodder minions those extra stats. Basically, it’s pretty much the same idea as before, but with that extra twist of Fodder units – you get the Demons that give you resources + Brann, then whatever you get later, you will still focus on eating + Tavern stats + resources.
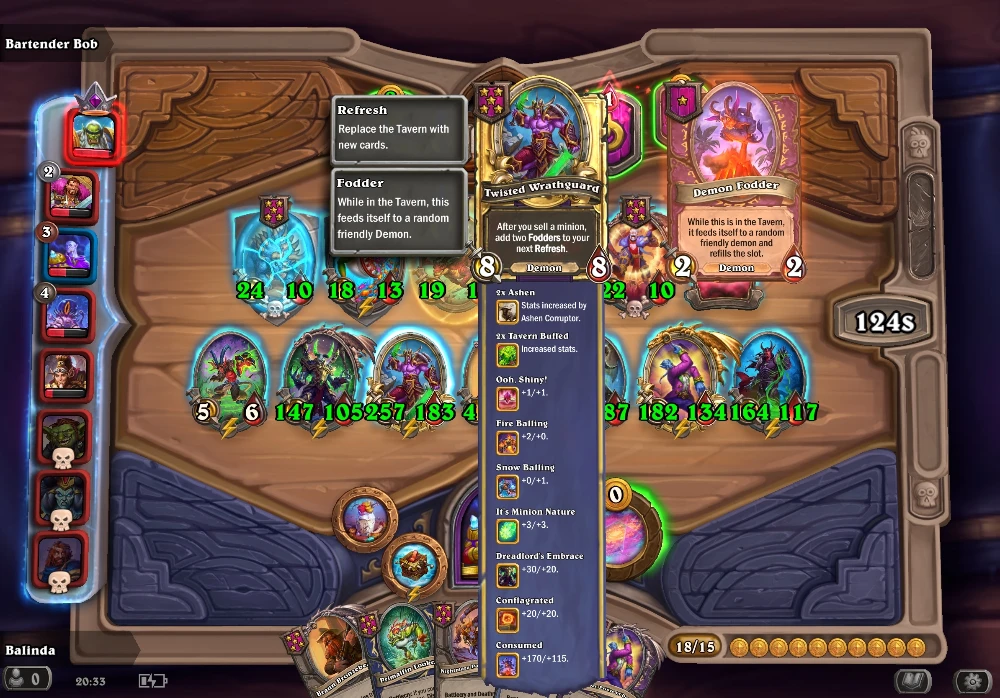
Midgame & Commitment: There are a lot of pivot moments for demons, but basically having a Soul Rewinder or even better, Ashen Corruptor + demon that gives you some extra resources like Malchezar or Bazaar Dealer + a Brann, is a very good indicator. After that, you can, for example, buff up the tier 2 or below minions in your tavern with Void Pup Trainer. You can also have a Twisted Wrathguard on your board and cycle with the help of Brann and those extra resources, eat, and repeat. You also have the Shadowdancer, so he and spell tavern stats from Felfire Conjurer + Titus would actually work, but it’s a bit situational in this case, and you don’t really have the same momentum as with Brann.
Demons have a lot of units that work well with each other. Some Demons work by you buying and casting Tavern spells like Batty Terrorguard, so he and Bazaar Dealer, are a nice combination, whereas, for example, others like Woodland Defiler and Twisted Wraithguard focus on Fodder, and you can buff the Fodder with Void Pup Trainer or just by buffing Tavern stats. So you kind of have this 1/4 of spell Tavern casting focus, 1/4 Spell stat focus, and 1/2 focusing on Fodder minions, which you can mix up depending on what you get.
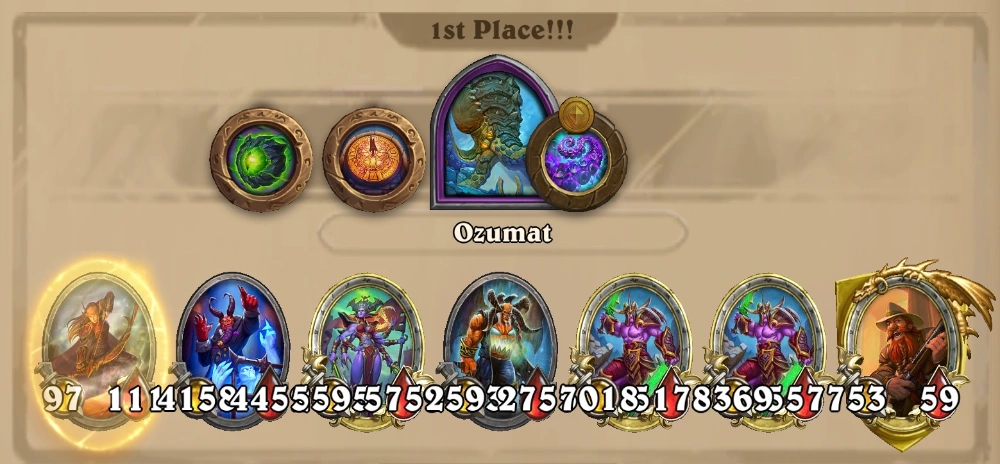
Lategame Win Condition: The winning condition is, of course, trying to get something from the Trinkets for extra resources, plus ideally a golden Brann, and then just eating and buffing the Tavern as much as you can. You will want to focus on one specific mechanic or maybe two. So, for example, if you get or have 2 Bazaar Dealers and a Batty Terrorguard, then you will be playing around tavern spells. But if you happen to get Twisted Wraith Guard or Void Pop Trainer with, for example, Woodland Defiler and Consummate Conqueror, then you’re going to have a lot of these “Fodder eats”. You simply can’t have space for every Demon that is useful, and you will have to choose which type of mechanic you’re going for, depending on what you get in the moment. If you have a golden Brann, Fodder is the best way to get extra stats because it works with cycle and Battlecries.
Basically, focusing first on resource-heavy demons plus a brand or even a golden Brann and some greater trinkets or lesser trinkets that buff up your resources even more is kind of a prerequisite. And again, depending on what you get in the later stages, you pivot to that type. But all in all, it’s pretty much the same. You focus on buffing and eating at the tavern. Sadly, demons don’t really have Keywords in this season, so you’re not going to have Divine Shields, Reborns, etc. Just be acutely aware of that. You can get scammed even with a good game. You have some ways of compensating (Hero Powers, Trinkets, Glowscale naga,…), but it is a “barebones board” a lot of the time.
Notable Greater Trinkets: Defiler Portrait is a good way to play around Fodder. It will hinder your tempo a bit, since it costs 3 Gold, but if you have a good board setup already, this is a very nice bonus, especially if you need those extra stats right now. The Eye of Sargeras is kind of a boost trinket for you to go infinite with demons. If you already have a Brann and a Bazaar Dealer + a few other resource-generating Demons, then Eye of Sargeras will propel you to go infinite and not think about money anymore. Nether Pendant is pretty straightforward, you have to establish a way to take a lot of damage on your turn, Malchazaar, Bazaar Dealer, etc., and you will get in return stats. It is a bit costly, though.
Strategies for countering Demon build: Once it reaches the endgame, Venom minions like Bile Spitter will be pretty effective, since Demons can’t really get Divine Shields easily in this season.
Spells to use for Demon builds: Generally, Corrupted Cupcakes is a Demon-specific and only if you are playing the “Eats build”.
Beast Build: Goldrinn & The Rat King
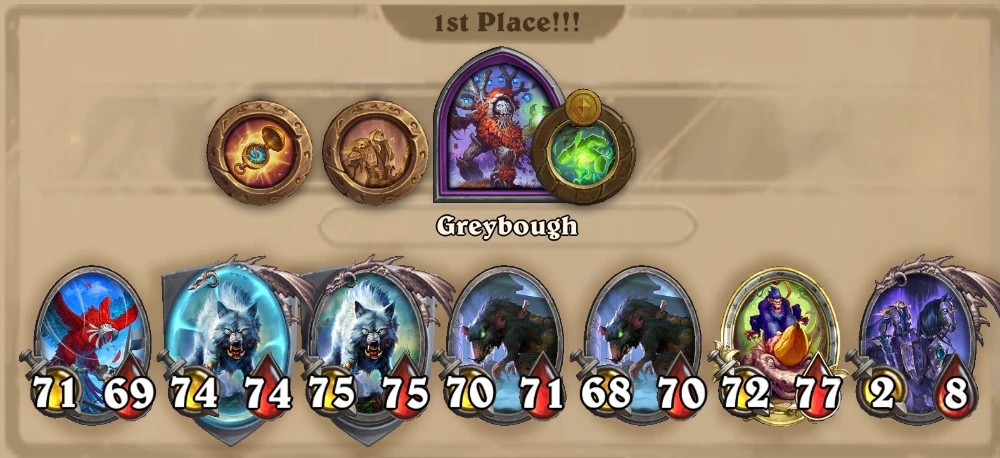
Key Minions: Goldrinn, the Great Wolf + Sewer Lord + Titus Rivendare
Supporting Minions: Monstrous Macaw, Lurking Leviathan, Bannana Slamma, Sprightly Scarab
35.2.2. Patch Commentary: No more “Stagadon build” because P-0UL-TR-0N is out of the game. The Goldrinn one remains the same.
Concept & Mechanics: So, for this specific build, it is very similar to previous seasons with the summon mechanic, and it is pretty straightforward. Goldrinn the Great Wolf, Sewer Lord, and Titus Rivendare are your bread and butter, and you basically rely on your Goldrinn’s Deathrattle to buff up your beasts in combat, and then Sewer Lord will summon a lot of stuff with those stats. You also then have options like Banana Slamma to buff them up even further, or the new Lurking Leviathan, which is an interesting one, especially if your enemies don’t have Divine Shields. You can make your beasts very annoying with those high attacks from the Leviathan.
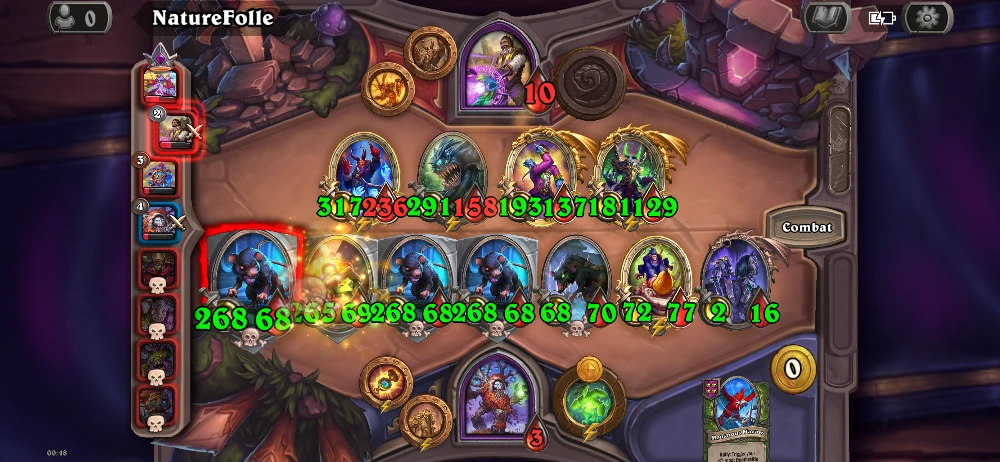
Midgame & Commitment: Generally speaking, in the mid-game, you will practically have to find Goldrinn as soon as possible, because without him, everything falls apart. Hunting Tiger Shark + Monstrous Macaw + Rylak Metalhead is a good way to generate Beasts. But still, at this stage, you’re probably at tier 4 or 5, and you’re still going to need a triple or a greater trinket or some other way to acquire Goldrinn. Once you acquire Goldrinn, everything starts to fall into pieces because he works well with Sewer Lord and Titus, etc. We will have an alternative build with Iridescent Skyblazer and a “self damage” mechanic, but here we will focus on Goldrinn.
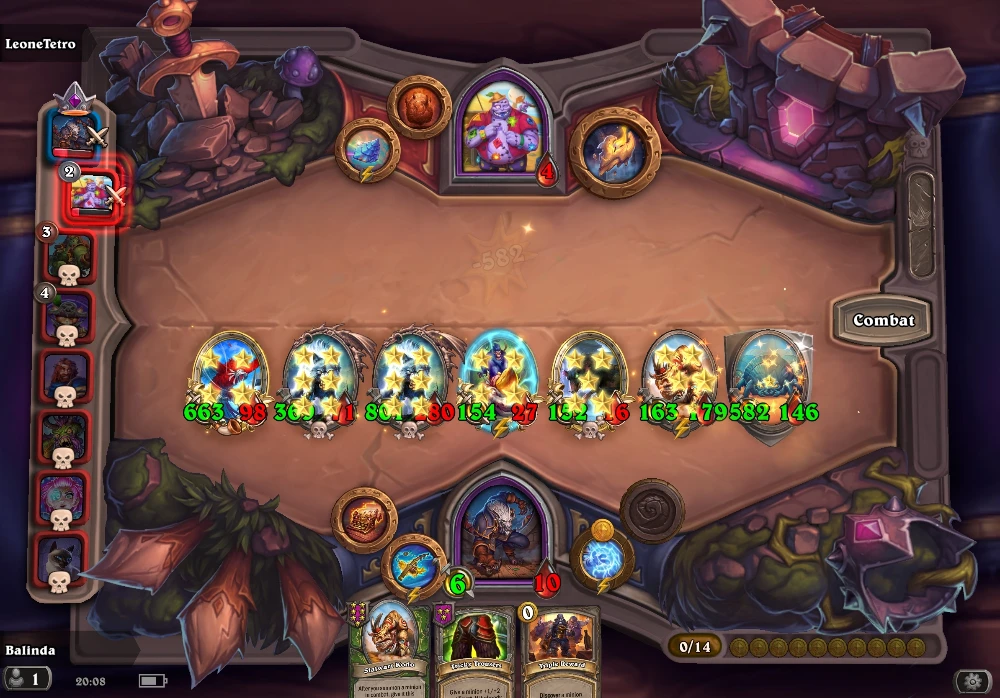
Lategame Win Condition: Now, when it comes to the winning condition, Beasts are pretty straightforward. You just need to lay down your minions in a specific order and cycle a few sprinkly scarabs for those windfuries and reborns. You’ll have Macaw, then Goldrinn, then Sewer Lords, and after that either Lurking Leviathan or Banana Slamma for those extra stats upon summons, and then finally you’ll have your Titus. Ideally, you’ll also have one extra space in order to cycle stuff, like Springlthy Scarab to cast Reborns and Windfuries Macaw and Reborn on Goldrinn. That’s practically that, there is nothing too complicated in this build.
Notable Greater Trinkets: Herald Sticker obviously works the best with this build. It’s pretty straightforward, you get all your Deathrattles triggered instantly at the start of combat, which is a giant boost if you have Goldrinn. Wildfeather Duster is good if you already are summoning beasts, but want those extra resources. It’s kind of slow, especially for a Greater Trinket, but again, if you have a lot of summons, it’s not that bad. Finally, Fang Anklet is kind of a small Goldrin, and it ramps up the more you summon beasts. It is a bit iffy for 4 gold, especially if you’re in dire need of more Beasts, but if you already have the summons but lack extra stats, then it is a nice pick.
Quilboar Build: Shaman Windfury Keywordmania
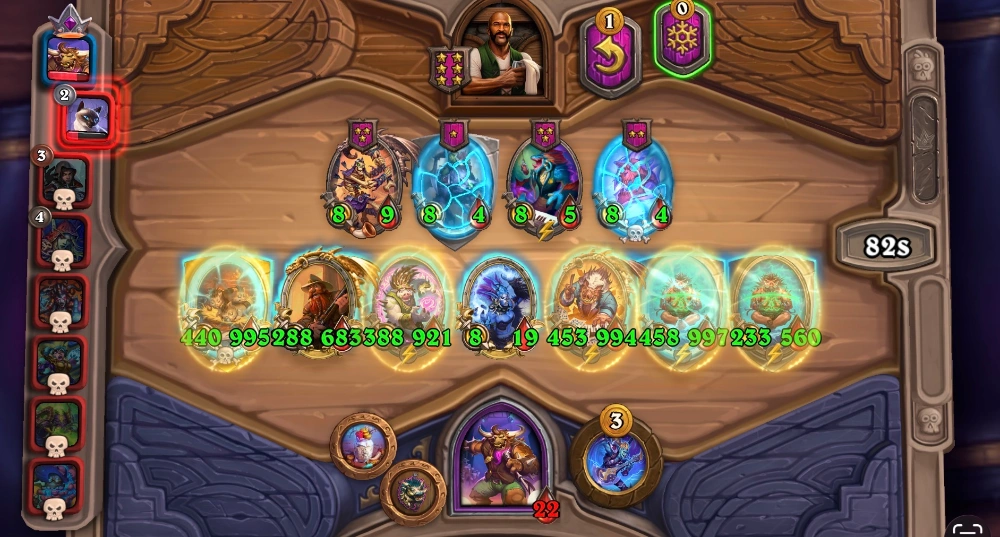
Key Minions: Earthsong Shaman + Drakkari OR Vinespeaker + Three Lil’ Quilboar + Titus
Supporting Minions: Hired Ritualist (Gold gain), Brann, Hog Watcher (Divine Shield Gem), Redtusk Thornraiser (Reborn Gem), Bristleback Bully (Taunt Gem), Blood Gem stat-gaining Quils, etc.
35.2.2. Patch Commentary: The biggest change to Quills is Darkgaze Elder, it gives u 2 Blood Gems on all every 8 Gold, instead of 1 every 6. This basically means that a Brann-based Quillboar build with cycling is more viable. Other than that, Quillboars had some minor stat buffs, but they remained pretty much the same. A bit hard to get up, but very powerful and good scaling.
Concept & Mechanics: Quilboars in this season have a lot going for them, but they are kind of hard to get up and running. Basically, the most important Quilboar actually is Hired Ritualist because you desperately need extra resources to play the game. Once you get resources from Trinkets or from Hired Ritualist, then you can actually start making the build. You have your classic Quilboars that gain Blood Gem stats and stuff from previous seasons, like Three Lil’ Quills or Bristlebach, but the newest addition now is that you can actually get Blood Gems that have keywords, specifically Divine Shield Blood Gems, Reborn Blood Gems, and Taunt, which are gained from Hog Watcher, Redtusk Thornraiser, and Bristleback Bully. This gives Quilboars a new dimension, especially because you also now have Earthsong Shaman, which can take advantage of these keywords and basically play a gigantic amount of Blood Gems on all your minions at the end of the turn.
Midgame & Commitment: In the mid-game and commitment phase, this is where it’s very awkward because you don’t really, you can’t really play without extra resources, just by having a bit of buffed Blood Gems or just by having random Quilboars on the board. You actually need some form of resource, whether from your lesser or greater trinkets or by having two Hierd Ritualists or perhaps a Brann. This will give you enough momentum to chase what you want afterwards, and having this plus getting an Earthsong Shaman or Three Lil’ Quilboar is a good moment to pivot and commit to this build. Again, you will kind of have to assess the situation because a lot of it depends on your health, your trinkets, and your tempo. As with any build, but especially with quillboars, because with this, you can either be in the top two places or fall flat on your face in the mid-game.
You also have these combinations like casting Taunt Blood Gem on every Quilboar, then utilizing Bristlemane Scrapsmith to get the Blood Gems in your hand, and then Hot-Air Surveyor with Geomagus Roogug to take the full advantage of them, but you kind of can’t have all the builds and quils, and the Earthsong Shaman with keywords is a more reliable one.
Lategame Win Condition: Now, in the later stages of the game, once you acquire resources, there are a few ways to gain winning conditions. Basically, you have two paths to take. The first path is with the standard Three Lil’ Quilboar & Titus, plus some stat gain on the Blood Gems, and Vinespeaker for a lot of extra attack stat. This can go well depending on what trinkets you get, and it is still a very reliable build.
The other and the newest build is with keywords, and essentially, you will need to ramp up your resources, and then, with Earthsong Shaman, give every type of keyword there is to him. The Blood Gems that give Divine Shield, Taunt, and Reborn, you can cast them on him. He will usually have 4 keywords in total: Windfury, Reborn, Divine Shield, Taunt, and he will cast Blood Gems on everybody at the end of the turn for every bonus keyword + 1 time by default. Throw in Drakkari Enchanter in there, and he will cast 10 times in total (4 KW + 1 Default x2), not to mention if you golden one of those two. This is essentially your bread and butter for this type of build. Don’t forget, he also has the Windfury keyword, so just by having him alone, he already casts Bloog Gems on everybody 2 times. It is also powerful since after that, you can also cast Reborns on other Quilboars, cast Divine Shields on other Quilboars, and have a very robust board. But again, you will need resources to get there.
Notable Greater Trinkets: Quilligraphy Set will get you a lot of stats on your Blood Gems, but it’s a bit delayed because you kind of need to have Reborns on your Quilboards if you want to take a full advantage of this. It’s very good, but it costs 4 gold, and it doesn’t give you anything instantly. So if you’re comfortable with losing a bit of tempo, it’s pretty good. On the other hand, Great Boars Sticker does the opposite. For 0 Gold, it gives you +2/+2 on Blood Gems. This might seem bad, but if you already have a big setup that we already mentioned of giving everybody blood gems multiple times, then going from, for example, 2/2 to 4/4 Blood Gems is a huge amount, and it doesn’t cost anything. Sometimes you have these games where you have a lot of end of turn Blood Gem casts on everybody, but you lack stats.
Furthermore, we have Blood Amulet, which works with the deathrattle build with three little quills. It is pretty nice, but essentially, you already have to have the Deathrattle board set up, so it is a nice trinket. Finally, Surveyor Portrait is the third build that we were talking about, and that is, if you have “hand Blood Gems” and have Geomagus, then this is a nice choice, obviously.
Strategies for countering Quillboar build: Honestly, the best “counter” to Quillboars is wiping them out in the midgame. They have these 1-2 turns where they are very weak until they get their buffs and board in order. This is where they lose if they happen to encounter someone with an already “established” build. This is kinda true for every build, but Quillboars especially need this leeway.
Spells to use with Quillboar build: Quilboar comps in Season 13 of Hearthstone Battlegrounds don’t rely much on Spells. Getting Gem Confiscation is a good utility spell for changing up the board, especially if you want to put gems on a Cleave minion.
Dragon Build: Draconic Chromadrake
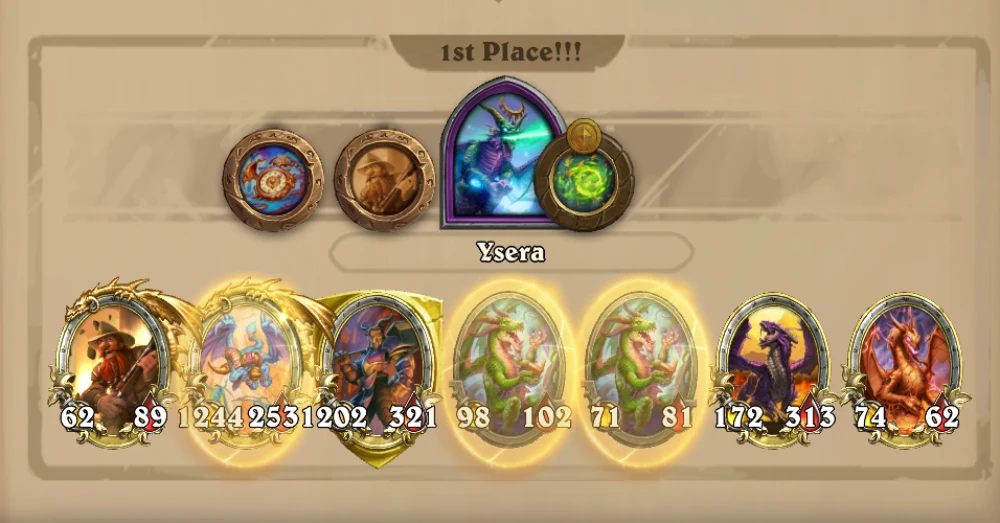
Key Minions: Brann Bronzebeard + Draconic Warden
Supporting Minions: Kalecgos, Fireforged Evoker, Tarecgosa, Persistent Poet, Battlecry minions
35.2.2. Patch Commentary: Drakes received a bit of a buff, and Kalecgos is now tier 5, which is okay. Still, they are kind of weird now. The most notable buff is the Ring Bearer, which is a super good minion now, but tier 6.
Concept & Mechanics: In season 13 of Hearthstone Battlegrounds, Dragon comps are very versatile and revolve around several mechanics: Battlecry, End-of-turn, Deathrattle, and even Start-of-turn. When you take Trinkets into account, you can see that the possibilities for a build are vast, but after the initial testing, we will focus on Battlecry one as it is the easiest one to make (well, if you can get your hands on Brann Bronzebeard anyway). There are other options as well – Twilight Broodmother and Incubation Researcher are other ways of getting Chromadrakes. However, keep in mind that Chromadrakes are Battlecry minions (all six of them), and this might clog your board unless you have 1-2 very powerful minions already. Chromadrakes will give you two things: stat boost, both for your Dragons and spells, and gold. That’s why it’s impretive to have Brann for this as it will resolve your gold issues as well as provide tempo and late-game win condition. However, that’s not the only option – you can also go with the end-of-turn spell boost build with Ignition Specialist and Felfire Conjurer, along with Drakkari Enchanter (an old-type of battlegrounds comp). Whatever you go with, the basic premise is the same – ramp up the spells in order to Fire Forged Evoker effect and achieve victory through stat and Divine shield supremacy.
Midgame & Commitment: Maintain the tempo by using Tarecgosa and other strong low-level dragon minions. Do not commit by buying Chromadrakes early on, as they are not so strong. Focus on tempo and economy. You can use Roaring Recruiter and Amber Guardian if you have Tarecgosa and/or Persistent Poet on the field. As soon as you get Brann, start looking for Draconic Warden. Once you get one, things should go more smoothly (depending on the Trinket that you have). Your spells should become very strong very fast, and since Dragons have Divine Shield capabilities, that will create enough momentum for you to survive long enough until you can overrun your opponent by sheer stats. Kalecgos and Fireforged Evoker are a nice addition to the tempo if you can get your hands on them, but do not overcommit to level 6, as this type of build will require some time for its effects to start showing.
Lategame Win Condition: In order to win the game with this Hearthstone Battlegrounds dragon comp in season 13, you need to make two things possible: stat spell boost and spell generation. Stat spell boost should be easy enough once you get Bran, as we said earlier. However, things get a bit tricky with spell generation, as there are no dragons (except Ignition Specialist) who can give you that. Here, you need to combine this Dragon build with something else – combine this build with another tribe. Nagas, Pirates, and Murlocs have spell-generating minions, so you should look for those depending on the game in which you are. For example, getting Rimescale Princess is an option if Nagas are in the game. Magicfin Mycolost is another way to go if Murlocs are in the game (especially good because of all the economy boost that you can get with it). Bounty pirate minions are also an option – but the key is to have the golden Brann so that you can refresh and get the spells that you need.
Notable Greater Trinkets: When it comes to Greater Battlegrounds Trinkets in season 13 for Dragons, by far, the best one to go for is Bronzebeard Portrait simply because the Battlecry build is the best. The other options are something like Chromatic Tear which is especially good if you already have a Brann.
Strategies for countering Dragon builds: The first thing you need to do is to take down the Divine Shields that the Dragons have. If you manage to do so, any unit with Poison is a good option to go for as Dragons don’t have any Reborn capabilities. Using a scam is also a good idea in this way. Keep in mind that Dragons will have Windfury capabilities, probably more than one minion, so try to use Taunt on your minions that are not the key ones for the build.
Spells to use for Dragon builds: Tavern Spells that boost your stats and economy spells. Those are two types of spells to go for when playing Dragon comps. You don’t need any other kind of Spells as your whole build will work perfectly if you manage to buff up your spells to a decent level.
Mech Build: Moonsteel Chickens and Sky Golems
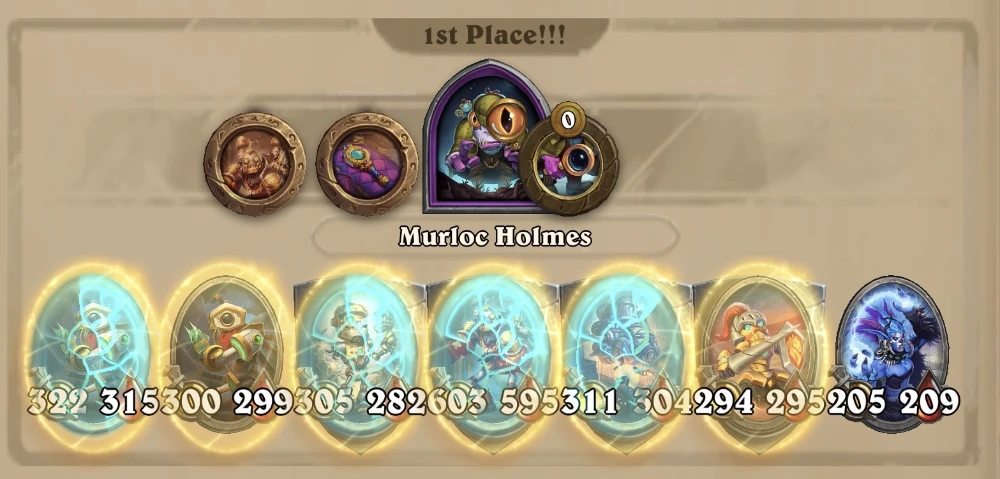
Key Minions: Scrap Scraper + Titus (Magnetization Generation), Junk Juster (Stats), Moonsteel Juggernaut + Drakkari (Generation and Stats)
Supporting Minions: Magnetizations, P-0UL-TR-0N & Deflect-o-Bot (Buff them), Falling Sky Golem
35.2.2. Patch Commentary: Mechs received arguably the most significant buff. While Junk Jouster had a -1/-1 nerf, the Moonsteel Juggernaut is much, much stronger now. It now gives 2 4/4 Satellites instead of 1 6/6. 1 Drakkar and 1 Moonsteel, you have 4 Sattelites, meaning golden Satellite + 1 regular, so a tier 6 discovers each turn. Very good for a 2-minion combo. Still, these end-of-turn builds are a bit “stiff” now when your opponent is playing Elementals with golden Brann, for example.
Concept & Mechanics: In season 13, mechs basically rely on magnetizations and minions that take advantage of those magnetizations, like Junk Jouster. You have some new ones, like Falling Sky Golem, which are interesting, but generally speaking, you will still rely on Accord-o-trons for the gold gain and also take advantage of those lesser and greater trinkets to up the momentum, because a lot of key mechs are tier 6, like Moonsteel Juggernaut. Scrap Scraper with Titus Rivendare is also a classic combo. Basically, it’s a combination of getting the resources and the magnetizations and then finally taking advantage of that and potentially even going infinite if you have enough gold. It’s a pretty powerful build because you have Divine Shields, you have Reborns, you can also later on get in at the Deflect-o-bot and play around him, or get the P-0UL-TR-0N and take advantage of his ability. All in all, they are a bit hard to get up and running, but are good once you have the tempo and momentum.
Midgame & Commitment: Before committing to this build, you will either have to have Moonsteel Juggernaut with Drakkari Enchanter or 1 or 2 Scrape Scraper with Titus, for example. The reason for this is mainly because if you get P-0UL-TR-0N or Falling Sky Golem without magnetizations, you don’t really have any momentum in the game. The momentum you get is mainly from Accord-o-tron with the Gold gain, plus, of course, your lesser and greater trinkets. And finally, once you have resources from that and you’re generating magnetizations, then you will gain a lot of stats from Moonsteel Juggernaut end-of-turn satellites that they keep improving over and over, and also by casting magnetizations while Junk Jouster is on the board. Junk Jouster is very powerful because you get +6/+6 now on all your minions after you magnetize ANYTHING. So, in this season, this is very powerful and basically a must.
Of course, you also have Falling Sky Golems, which can give you a lot of tempo because he’s basically a very strong minion, but he doesn’t really do anything other than just stand there and be strong. He relies on your Deathrattles, which means he is good if you already have Scrap Scraper. Again, he is very good for tempo, but in order to play this build, you will need resources + magnetizations first.
Lategame Win Condition: In the later stages of the game, it comes down to optimizing your board. If you have Moonsteel Juggernauts and a lot of these extremely powerful Satellites with a lot of stats, it is good to take advantage of the stats by having a Deflect-O-Botsand casting those satellites on them because they will renew the divine shields over and over again. The same thing goes for P-0UL-TR-0N, and because he also works well with those stats that you give him. Of course, Junk Jouster is there for mass stat gain and is the key minion for taking advantage of mass magnetization generation. Falling Sky Golems are very good, but at these later stages, they are just becoming more of a supportive role, and you have to bring your Deflect-O-Bots and P-0UL-TR-0N to the front and buff them up as much as possible with the satellites.
Falling Sky Golem is nice and all, especially if you triggered a lot of Deathattles with Scrape Scrapers. Depending on that, you can leave him in, but don’t rely on this minion in later stages since you already have Divine Shields from Annoy-o-modules. On the other hand, do note that Falling Sky Golem works well with Prosthetic Hand because his ability says “wherever this is”, which means if he is Reborn, he will still have the same stats from those Deathrattles that you triggered throughout the game (once he’s reborn in the combat) + a Divine Shield. So this is kind of a good mid to late game tempo, but really in the final stages, again, you will have to defer to the other mentioned mechs.
Notable Greater Trinkets: Beatboxer Portrait is pretty straightforward and will get you a ton of tempo and resources, especially if you can get a few Accordatrons on your other max. Accord-o-Tron Portrait is also very nice because you practically can go infinite with this, and it is a huge resource boost, especially because it costs nothing. Divine Signet is also kind of good with Charging Czarina build, and not this one, but it’s worth mentioning if you happen to get a couple of Charging Czarina’s on your board.
Strategies for Countering Mech Build: Mechs are pretty straightforward to counter, and the biggest counter for them is, for sure, Tunnel Blaster. It will blow up all the Divine Shields that are the backbone of Mechs. Furthermore, utilizing Leeroy The Reckless against P-0UL-TR-0N or a powerful Divine Shield mech is a pretty good counter.
Spells to use for Mech Build: There aren’t a lot of tavern spells with max that can provide you with some extreme value, but one notable and most important one is Lost Staff of Hamuul, which is a very good way of getting magentizations/key minions.
Murloc build: Magicfin Lookout
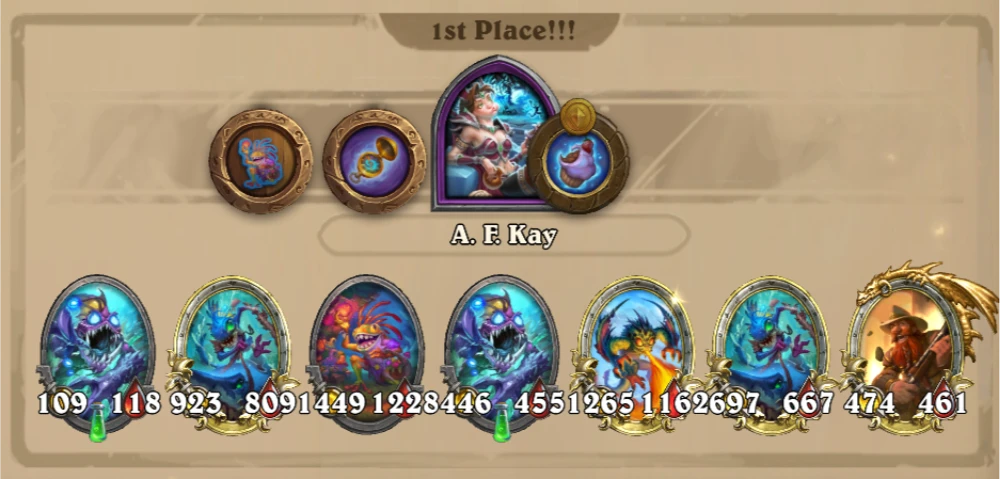
Key minions: Brann Bronzebeard, Magicfin Mycologist, Mrrglin Burglar
Supporting Minions: Primitive Painter, Bile Spitter, Choral Burglar, Bream Counter, Battlecry Murlocs
35.2.2. Patch Commentary: Some changes, but strategy is the same. Get Brann and then do the classic Murloc thing.
Concept & Mechanics: New season, old Murlocs. That’s pretty much how we can sum it up for season 13 of Hearthstone Battlegrounds when it comes to Murloc comps. In all honesty, there were some changes, but the basic principle remains the same – you need Brann, and after you’ve golden it, pretty much everything will work. Papa Mrrglton and Mama Mrrglton are additions in this season, and they heavily rely on Brann and Battlecry abilities. Your all-star minion is still Primalfin Lookout as well as Magicfin Mycologist, as their synergies work perfectly with Brann. Hand minions are still pretty useful, although Bassgil is only obtainable through Trinkets now – Mrglin Burglar and Choral Burglar work fine with Bream Counter if you have Brann on the field, and you can shuffle the minions fast enough.
Midgame & Commitment: In the early game, Murlocs are kind of awkward, to be honest, and they should generally be avoided. For example, Flighty Scout is nice, but only if you have Very Hungry Winterfiner and Expert Aviator on the field. The ones you need to look out for are King Bugurgle and Deepwater Chieftain, which give you a bit of a tempo. Other than that, these other Murlocs are pretty generic in terms of strength.
In the mid-game, there are a few things to look out for. In this guide, we’ll focus all possible synergies, but mainly Battlecry Murlocs because they are the bread and butter in this season. The “Hand Murlocs” are very good support and they give you an edge. In the mid-game, you will need to get Brann Bronzebeard and combine it with Mrglin Burglar. This will give you enough stat boost in order to get to the next stage of the game. At this stage, you really need resources so try to go for a trinket that gives you that.
Lategame Win Condition: Magicfin Mycologist. He is essentially the bread and butter of your army. This guy will carry you the whole game, especially if you have Brann and Mrglin Burglar. Once you buy Magicfin Mycologist, the next spell you buy once per turn generates a Tier 1 1/1 Murloc that have the Battlecry to play that spell. If you have Brann on the field, then that means that spell will play two times. This also goes well with the combination of Floatsome Flinger, since that Murloc that has the Battlecry of your spell is Tier 1.
So, for example, you can buy Strike Oil, and if you have Brann, your Murloc that you get from Magicfin Mycologist will cast Strike Oil two times, as well as you having the actual spell in hand. This will propel you to victory, and the one spell especially that you need to look for is Cloning Conch. The same logic applies here. If you buy it and you have Brann, you get a Murlocs, and when you play that Murloc, you essentially get two times two Murlocs as well as that spell. So you get six Murlocs out of that spell. It’s pretty good once you get this combination.
In the later stages of the game, there are a lot of options to consider if you’re playing the spell Murlocs. You will have to look for at least one, preferably two Magicfin Mycologist and the Murloc-generating spell. Once you get this, the floor is yours, and you can probably go infinite, especially if you have Brann. There are a few tips on optimizing the build, but Primitive Painter, goes with this build extremely well because you will get a lot of junk and shuffles that you need to sell, and that will give your Murlocs a lot of stats. Once your Murlocs have stats, you will see that your board is a bit crowded, and once it gets to that stage, you can buy something like Channel the Devourer in order to devour the less useful Murlocs and get a few Murlocs with a lot of stats.
Of course, you should also utilize hand murlocs like Bream Counter, since you will be getting a lot of murlocs this way. And you can of course get Bilespitters in order to have that nasty late-game scam mechanic in place. Since there are a lot of spells, and it’s pretty RNG on what spells you get, this Murloc build is extremely flexible and chaotic, but the general guideline is to get the setup first, then Cloning Couch for a lot of Murlocs, then shuffle and gain stats with Primitive Painter, then Channel the Devourer some less useful Murlocs to clear the board.
You can also, for example, if you have a lot of stat gain from getting Shoalfin Mystic, you can buy spells like Deepwater Clan in order to gain stats, because if you’re really infinite, you have to optimize the stat gaining and to play as fast as possible. All in all, a very good build once you get it up and running, but you have to “get there” first.
Notable Greater Trinkets: When it comes to Trinkets in season 13 of Hearthstone Battlegrounds for Murlocs, probably the best way to go with the lesser ones is to proceed to Tavern Tier level 5 as soon as possible. Depending on your game setup, you should decide what kind of trinket will give you this – almost all of your key minions are on that level (and Tier 6), and you don’t want to get stuck on tier 3-4 for too long. For Greater Trinkets, Bronzebeard Portrait is the best one (same as for Dragon builds) because it gives you the key minion that you desperately need. Plus, you can have poison on Bronzebeard, which is neat.
Strategies for Countering Murloc Build: Countering murlocs is extremely difficult because there is a lot of stuff going on on the murloc board. The one thing that you really need is a lot of Divine Shields because you’re going to be playing against venomous murlocs that can also be pretty big stat-wise. So stack up Divine Shields as much as you can and hope for the best.
Spells to use with Murloc Build: As we mentioned, Cloning Conch is super good. This was an important spell for Murlocs. Getting Lost Staff of Hamuul is also an excellent choice since, just like with Pirates, when you are playing Murlocs, there are a lot of Murlocs that you can find that are useful, and you will have enough money for cycle because of Brann.
Elemental Build: Arcane Azerite Balinda
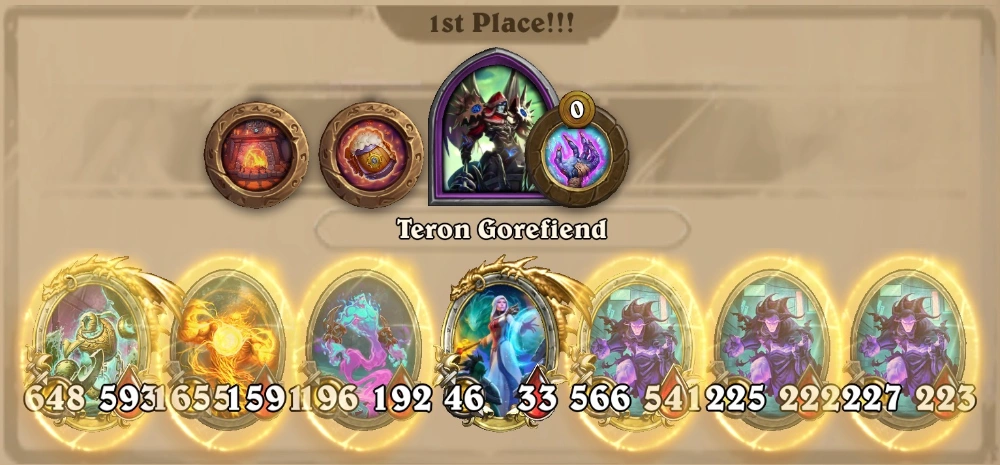
Key Minions: Brann Bronzebeard + Balinda Stonehearth + Layline Surfacer + Air Revanant or Living Azerite
Supporting Minions: Ichoron the Protector (preferably golden), Battlecry Elementals, Ultraviolet Ascendant as an alternative
35.2.2. Patch Commentary: They received minor nerfs to all their “give random minion in Tavern” effects, still, they are very good. Brann + good Battlecry minions.
Concept & Mechanics: Elements have had an interesting change in the newest season 13, and there are a few new key elements and mechanics to watch out for. Essentially, you’re going to have your standard Brann, which is the bread and butter of Elements, but now you kind of have two choices. The first one is having an Ultraviolet Ascendant and just cycling the elements, which is a very nice build, especially with the new Firelands Fugitive, since it also works with those cycling elements. The other build is with Tavern stat gain. Basically, you will buff up one minion in the tavern with a lot of stats. Then a good way to take advantage of those stats is, of course, by buying it, but also yet, by utilizing the new spell, Arcane Absorption from Leyline Surfacer, which gives half the stats of that super powerful minion on one your board. This is especially good if you already have Brann and if you have Balinda Stonehearth, because the Arcane Absorption is then cast twice. Of course, you have your En-Djinn Blazer and Air Revenant for gaining those extra stats, as well as the new form of Living Azerite.
Midgame & Commitment: So, in the midgame and commitment phase, you will have to look out for key minions. And first of all, you will need Brann, as well as something that gives you extra stats in the tavern, like Air Revenant or Living Azerite, or even a few En-Djinn Blazers. Once you have that up and running, you will have to look for Balinda Stonehearth and Leyline Surfer. Essentially, getting a few of these key minions is your signal to fully commit to this build. You can also get Ultraviolet Ascendant with Brann, which also works really well with cycling, and you will also get a pretty nice tempo very fast. The other notable minion is Flaming Enforcer because you can have games when you can snatch this early on, and it ramps up a lot.
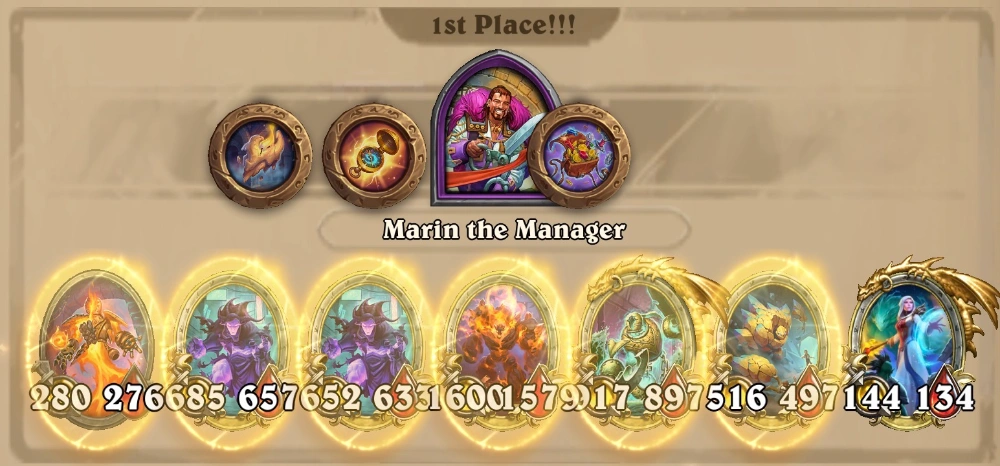
Lategame Win Condition: Now, as we mentioned before in the concept, you will have to buff up the stat of that one minion in the tavern a lot. The trio for this is Air Revenant, Living Azerite, and En-Djinn Blazer. Once you have those stats up, up and running, you will use Leyline Surfacer in order to buff up the elementals on your board, and with Balinda, that Arcane Absorption spell will have double the effect. Of course, this is relatively easy to get if you already have extra resources and a brand, and get a Refreshing Anomaly or Tavern Tempest. If you happen to have Ultraviolet Ascendant and the other type of build, then you can also play around brand and get Firelands Fugitive, which has a new spell configuration and works around taking advantage of you cycling those elementals each turn. Finally, it’s important to note Ichor on the Protector, because golden in this elemental will guarantee you divine shields with the Technical Element permanently.
Notable Greater Trinkets: Upstart Embers is the most notable trinket because it plays with the super-powerful minion in the tavern extremely well. Of course, the old Nomi Sticker is nice, but be careful because it doesn’t really play exceptionally well with the super-powerful stat build, because the stat tavern build is random. So if you refresh the tavern and the powerful minion is not an element, then it will not take the Nomi Sticker‘s buff, so it’s kind of iffy. It’s good, of course, if you’re cycling elements, but it’s not synergistic in this case.
Strategies for Countering Elemental Build: Currently, there aren’t really straightforward ways to counter elementals because if your opponent has elemental minions, they will probably have a lot of divine shields and a lot of stats, so you can’t rely on scams like Venomous minions. You will just need to knock him out earlier or outscale him with your own board. One thing you can do is if your board doesn’t have Divine Shields, you can blow up theirs with Kaboom and then equalize the playing field a little bit.
Spells to use with Elemental Build: There is a new spell in Season 13, and that is Arcane Absorption, which is essential if you are playing Elementals, since you are going to have that one super buffed minion in the Taven. This spell takes advantage of that and buffs your Elemental on the board. The one spell that you can really use is the Temperature Shift, which is precisely for this build, as it gives you a Fire Baller and a Snow Baller. Other than that, Channel the Devourer can be pretty helpful in a lot of situations involving cycling.
Undead Build: Catacomb Crasher
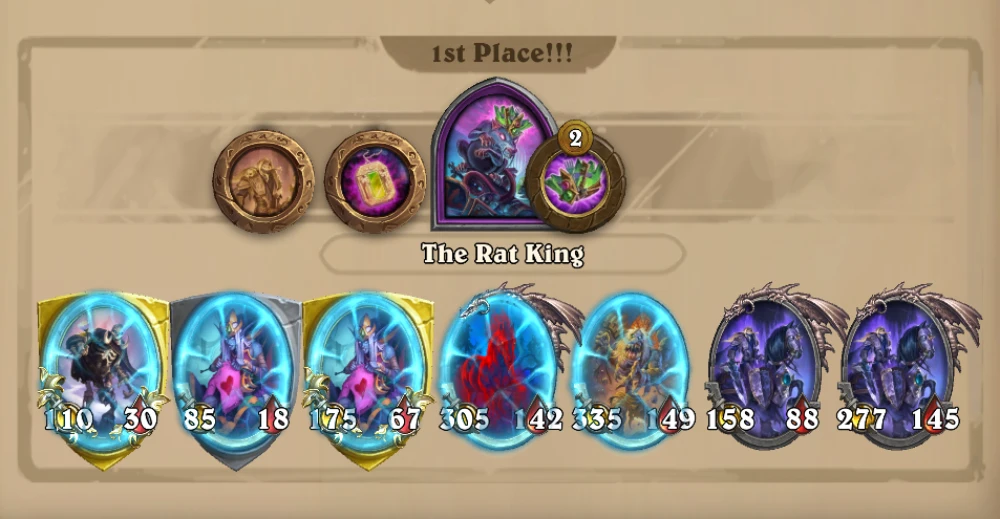
Key Minions: Cadever Caretaker, Catacomb Crasher, Titus Rivendare
Supporting Minions: Wintergrasp Ghoul, Sinnrunner Blanchy
35.2.2. Patch Commentary: Catacomb Crasher got a buff. Also, the Tavern Spell Undead variation with Forsaken Weaver is now somewhat viable since it got buffed from +1 to +2.
Concept & Mechanics: Undeads have changed in season 13 of Hearthstone Battlegrounds, but not a lot; Cadever build is actually more enhanced now and easier to make. The basic premise of this build is as follows: high attack/reborn minions will provide tempo and sustain until you get three main minions: Cadever Caretaker, Catacomb Crasher, and Titus. Wintergrasp Ghoul is an addition in season 13 of HS BG, and it works fine with this build because it relies on Deathrattle mechanics and provides a very decent tempo. Everything else is the same in the previous seasons of Hearthstone Battlegrounds – Cadever Caretaker dies first, you get a buff from Catacomb Crasher doubled (or tripled if golden) from Titus Rivendare, and reborn minions take care of the enemy Divine Shield or Poison capabilities. Note that there is an optional Undead build focusing solely on Eternal Knights, which we will write about in a separate paragraph.
Midgame & Commitment: Undead minions are not strong enough early on to provide enough sustain for you not to lose HP. Don’t just buy random undead minions, as you don’t need most of them – what you really need is Cadever Caretaker and Plaguerunner early on in order to boost reborn-high attack mechanics. Prosthetic Hand is just too expensive to get as a stock minion, Mummifier is a better way to go. The moment in which you decide to pivot and commit to this undead build is when you get Catacomb Crasher, providing that you already have one Cadever Caretaker on the field. Depending on your Battlegrounds Trinkets, you need to get enough sustain for the Crasher’s effect to take place. Suffice to say, obtaining Titus is a must because almost all Undead minions in Hearthstone Battlegrounds season 13 have Deathrattle as their main keyword.
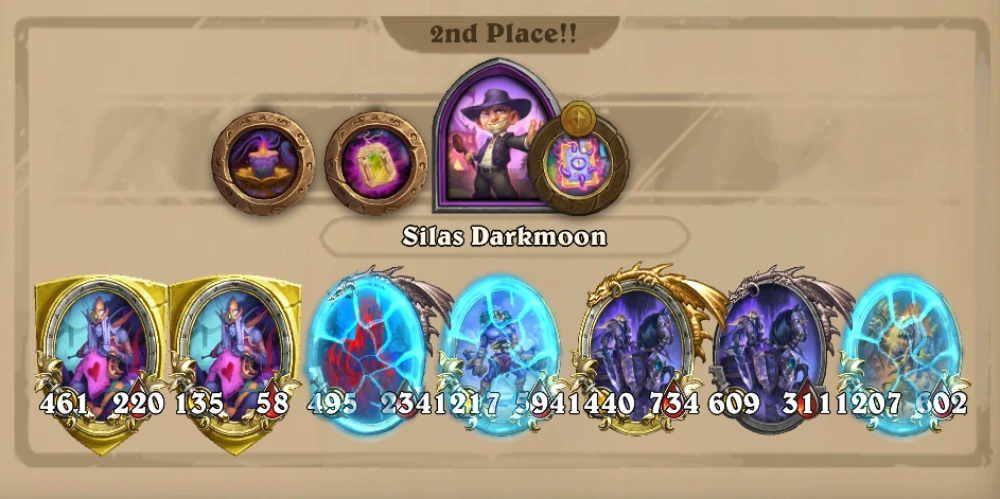
Lategame Win Condition: The party starts when you have your trio on the field – Crasher, Cadever, and Titus. After that, if it’s not too late, putting Sinrunner Blanchy is a good option because it will get reborn with full stats, and this build is essentially a stat-based one. As we mentioned earlier, getting Wintergrasp Ghoul is also an option since it will provide reborn (through destroying Mummifier) and stat boost (through destroying various Deathrattle: summon minions). It is also the only gold-generating minion, as you can keep the minions in hand and sell them in the next turn.
Notable Greater Trinkets: When it comes to greater Trinkets, the best one to get is Rivendare Portrait. Not only that, it will give you Titus, who is your key minion, but it will also make him probably the strongest minion on the board. There are no other builds that can buff Titus this much.
Strategies for Countering Undead Build: Generally speaking, the standard counters like having a Cleave or a similar mechanic, and Sin’dorei Straight Shot are nice.
Spells to use with Undead Build: Remember that if you happen to get spells that give stats, you’ll, of course, get the benefit from the friendly geist that gives you attack stat on all your spells, so that’s a really nice bonus. If you get extra free spells like a Shiny Ring, that is a nice power boost, but you shouldn’t really spend money on it. Rather, you should look for key minions to optimize your board.
Naga Build: Darkcrest Groundbreaker
Key Minions: Groundbreaker + Darkcrest Strategist (Groundbreaker carry) OR Tranquil Meditative + Maelstorm Emergent + Ruthless Queensguard (Spell Stat Focus) AND Brann
Supporting Minions: Spellcraft-generating Nagas, Draconic Warden
35.2.2. Patch Commentary: The biggest change is the Ring Bearer and Deep Blue. The Ring Barer goes naturally with the “In combat Naga Build”.
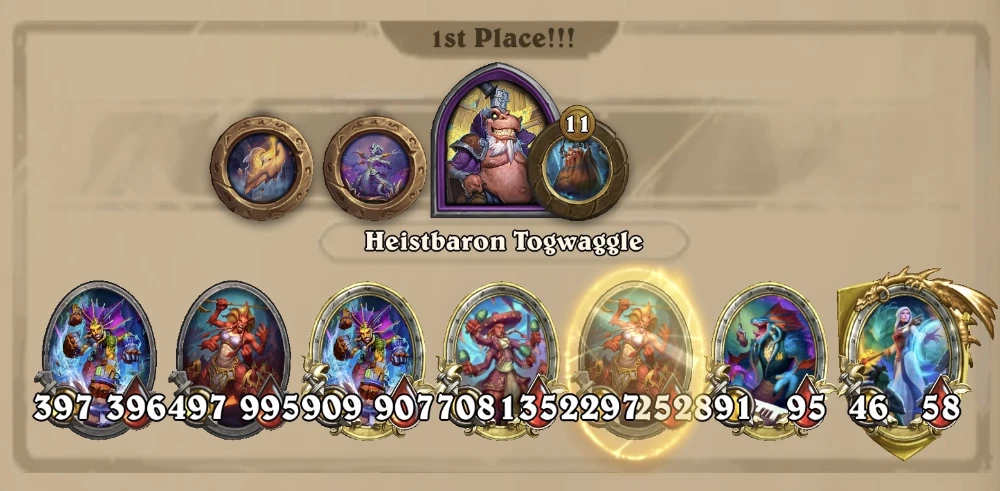
Concept & Mechanics: When it comes to Naga builds in season 13 of Hearthstone Battlegrounds, there are a few things to have in mind. The build is tricky as it requires several things to work: stat boosting, spell generating, and minion generating Spellcrafts. Another thing is that, just like Dragons, Nagas are much stronger if Dragons are in the game. So, how does this work – Tranquil Meditative is your main spell boosting minion.
You can also use Brann Bronzebeard and Draconic Warden (For the Chromadrakes) combo for this. With Dragons and Brann, this will scale pretty fast. The more spells you cast, the stronger Grounbreaker becomes after you play a minion. That’s another issue – you need to get all those Naga minions somehow, and you can’t do that just by refreshing. One way is to use Brann. The other one is use Darkcrest Strategist (preferably two) in order to boost your money income as well as Groundbreaker buffs.
Midgame & Commitment: Naga minions early on are just too weak, and you don’t need any of them. The only useful minions for tempo early on are Zesty Shaker, Abyssal Bruiser and Rimescale Princess. Rimescale Princess is your source of stat-generating spells, but more importantly, it acts as 2 spells for the Groundbreaker ability. Abysal Bruiser, on the other hand, is a great minion overall, not just for Naga builds. It scales very rapidly, and it is bound to have something like 20/20 plus Divine Shield while all other minions are much lower, even the ones without keywords.
Having said that, Darkcrest Strategist is probably the most important minion here, as it will give you more Naga minions and ramp up your temp. Things start to scale rapidly once you get Brann (if Dragons are in the game). Getting Balinda Stonehearth is also neat here if you can squeeze her in on the board. Balinda works with all Spellcrafts that you cast on a target, so it also works with Deep Blue and will double the cast on each one. So even if you don’t get other key Nagas, your Deep Blue will ramp up a lot. This is not the main idea of the build, but it is not to be ignored. The Spellcrafts that you generate should provide enough sustain to keep you in the game until your ultimate minion arrives – Groundbreaker.
You can also have another build with Maelstrom Emergent and Ruthless Queensguard, which relies on you practically casting spells in combat. On top of that, Ring Bearer also does this, so it works with Tranquil Meditative. You get the spell stats, and then Ruthless Queensguard will cast Queen’s Command in combat (Rally and Deathrattle).
Lategame Win Condition: If you have Groundbreakers, then your aim should be to play around Darkcrest and Brann for the rest of the game, as well as Spellcrafts. A lot of spells and a lot of Groundbreakers and other Naga minions. Preferably, if you can have two Grounbreakers as well as two Darkcrest Strategists on the field at the same time while generating Spellcrafts with golden Rimescale Princess, that’s great. Keep in mind that here you need to be fast – you will have A LOT of minions and spells to cast in every turn if you set this right. Brann is important here since you will need to cycle Nagas for the Groundbreaker, as well as have extra resources.
Noteable Greater Trinkets: Nagas need a lot of resources – Spellcrafts, Tavern Spells, various minions. Early on, try to set up your economy because the last thing you want to happen is to get the Groundbreaker and simply not have enough gold to buy all the minions and spells that you need. For Greater trinket, at least for Naga builds in Hearthstone Battlegrounds Season 13, you need something like Guiding Candle or Nazjatar Postcard. Things like Transcribing Typewriter or Colorful Compass also work however not as good as Groundbreaker Portrait.
Strategies for Countering Naga builds: This build is a stat build – so any build that counters stats is to be used against it. This means that you can either go with Poison (there are almost no Divine Shields in this build) or use classic scam with Leeroy. Furthermore, using a build that focuses on Divine Shields is also an option, as Naga comps don’t have any cleave or mass damage minions to counter it. The main issue with countering this build is the fact that most of the time, stats will be divided almost equally among all Naga minions. This means that you can’t just snipe one or two units, so you need to take this into account when countering the build.
Spells to use for Naga builds: As we mentioned before, this is a stat build, and all Spells that give mass stat boosts are to be used in it. Getting a few economy ones is also a good idea, especially early on. Later on, you can stuff like Spitescale Special in order to further boost your spells, and of course, Queen’s Command, which you can naturally get from your Naga.
Final Thoughts on the Hearthstone Battlegrounds Strategy for Season 13
Hopefully, this article helped you or at least gave you some new ideas and builds when it comes to Hearthstone Battlegrounds strategy for Season 13. With the reintroduction of Trinkets in Season 13, the Hearthstone Battlegrounds meta has shifted significantly. The game feels faster now, and there are a lot of paths to victory. All in all, it is a fresh and very welcome update, so be sure to stay tuned for future updates, because we will for sure update this guide as the meta progresses and new patches come out.